40 pages, in navigation order. The API Reference is generated from the live specification and is not included — read the online API Reference.
Opens your browser's print dialog — choose Save as PDF as the destination.
Welcome to AskRAI
Documentation for the Responsible AI platform — architecture, admin console, integrations, and guardrails
AskRAI is a Responsible AI platform that brings intelligent automation to your organization — without stretching budgets or adding complexity. With configurable safety and compliance controls, an always-on audit trail, and transparent logic, AskRAI helps teams Resolve issues, Inform decisions, Engage users, and Support operations.
Your team curates the knowledge base from existing enterprise sources — documents, FAQs, and internal policies — through the admin console. Nothing is crawled or ingested on its own: every item is there because someone put it there.
When a user asks a question, AskRAI answers from your curated knowledge base rather than from the model's own training data. Every response is recorded with the question that produced it, the confidence it scored, and the result of every check that ran. Grounding an answer in content you approved is the main defence against an invented one.
Configurable safety and compliance controls, an always-on audit trail, and transparent logic keep every response accountable and traceable.
Data Curation and Knowledge Base
Admin
Admins curate enterprise knowledge from existing sources, ensuring the AI only uses approved, reviewed content.
Active AI Guardrail (AAIG)
Safety
Configurable guardrails screen the question, the generated answer, and the arguments an agent sends to a tool — blocking, warning, or redacting according to the rule you wrote.
Seamless Integration
Integration
Deploy AskRAI as a Microsoft Teams bot for instant, organization-wide access — plus a governed API, MCP server, and CLI for applications and AI agents.
Concepts
Understand how AskRAI delivers responsible AI — from knowledge management and guardrails to confidence scoring and governance
AskRAI is a Responsible AI platform that delivers intelligent automation with built-in safety, compliance, and accountability. Every response is grounded in curated knowledge, evaluated by the guardrails you have attached, scored for confidence, and recorded in a full audit trail.
When a user asks a question, the platform runs a multi-step pipeline designed to keep the response grounded, governed, and traceable.
The user sends a question through Microsoft Teams — the one human channel available today — or a machine calls through a programmable interface (API, CLI, or MCP) authenticated with a credential.
Active AI Guardrails evaluate the question against your safety, compliance, and quality rules. A guardrail set to Block stops the request here and no answer is produced; one set to Warn or Redact records or rewrites and lets the turn continue. The same rules can instead be set to read the generated answer, or the arguments an agent sends to a tool.
AskRAI searches the curated knowledge base for relevant content and composes a grounded answer.
The platform assigns a confidence score reflecting how well the knowledge base supports the answer.
The response is delivered. Afterwards, your escalation rules are evaluated against the confidence band and can open a support ticket for human follow-up.
Every step is recorded in a complete audit trail for governance and continuous improvement.
A guardrail on the Input stage runs before retrieval, so it can stop an answer from being generated at all; one on the Output stage runs after generation and can still withhold or rewrite the answer before anyone reads it. Escalation runs after the answer has been delivered, so it can raise a ticket for a human — but it cannot withhold the response.
Knowledge management defines what the assistant knows. Guardrails define what it must not do. Confidence scoring defines how certain it must be. Access control defines who gets access to what. And governance gives you the tools to monitor, measure, and improve over time.
Each concept builds on the others — groups bundle knowledge packs with guardrails, and the audit trail captures how all of these interact during every conversation.
The RIESE Model
Five pillars that define what your AI assistant does — Resolve, Inform, Engage, Support, and Escalate
The RIESE model defines five distinct ways your AI assistant interacts with users. Each pillar represents a different intent — from answering a straightforward question to escalating a complex issue to a human agent. Understanding these pillars helps you organize your knowledge base and configure your assistant to handle each scenario appropriately.
The assistant directly solves the user's problem with a definitive answer. This is the ideal outcome — the user gets what they need without any human involvement.
Example: "How do I reset my password?" → The assistant provides step-by-step reset instructions from the knowledge base.
Inform
The assistant provides factual information or context that helps the user make a decision. The response educates rather than solves.
Example: "What are the office hours for the permits department?" → The assistant returns the hours, location, and contact details.
Engage
The assistant enters a multi-turn conversation to clarify the user's needs, gather required details, or guide them through a process.
Example: "I need to apply for a building permit" → The assistant asks about the project type, location, and scope to determine which forms and requirements apply.
Support
The assistant provides ongoing assistance for complex workflows that span multiple steps or require follow-up. This goes beyond a single answer to provide guided support.
Example: "Walk me through preparing my grant application" → The assistant helps the user gather documents, fill in sections, and check eligibility requirements across multiple messages.
Escalate
The assistant recognizes that it cannot confidently answer — its confidence falls into a band you have configured to escalate — and hands the request off to a human by opening a support ticket.
Example: "I want to file a formal complaint about my neighbor's construction" → The assistant creates a support ticket so a human agent can follow up.
Escalation is not a failure — it is a designed outcome. A well-configured assistant knows its limits and hands off gracefully when human judgment is needed.
How content enters AskRAI, gets organized into knowledge packs, and powers AI responses through Text Search and AI Search
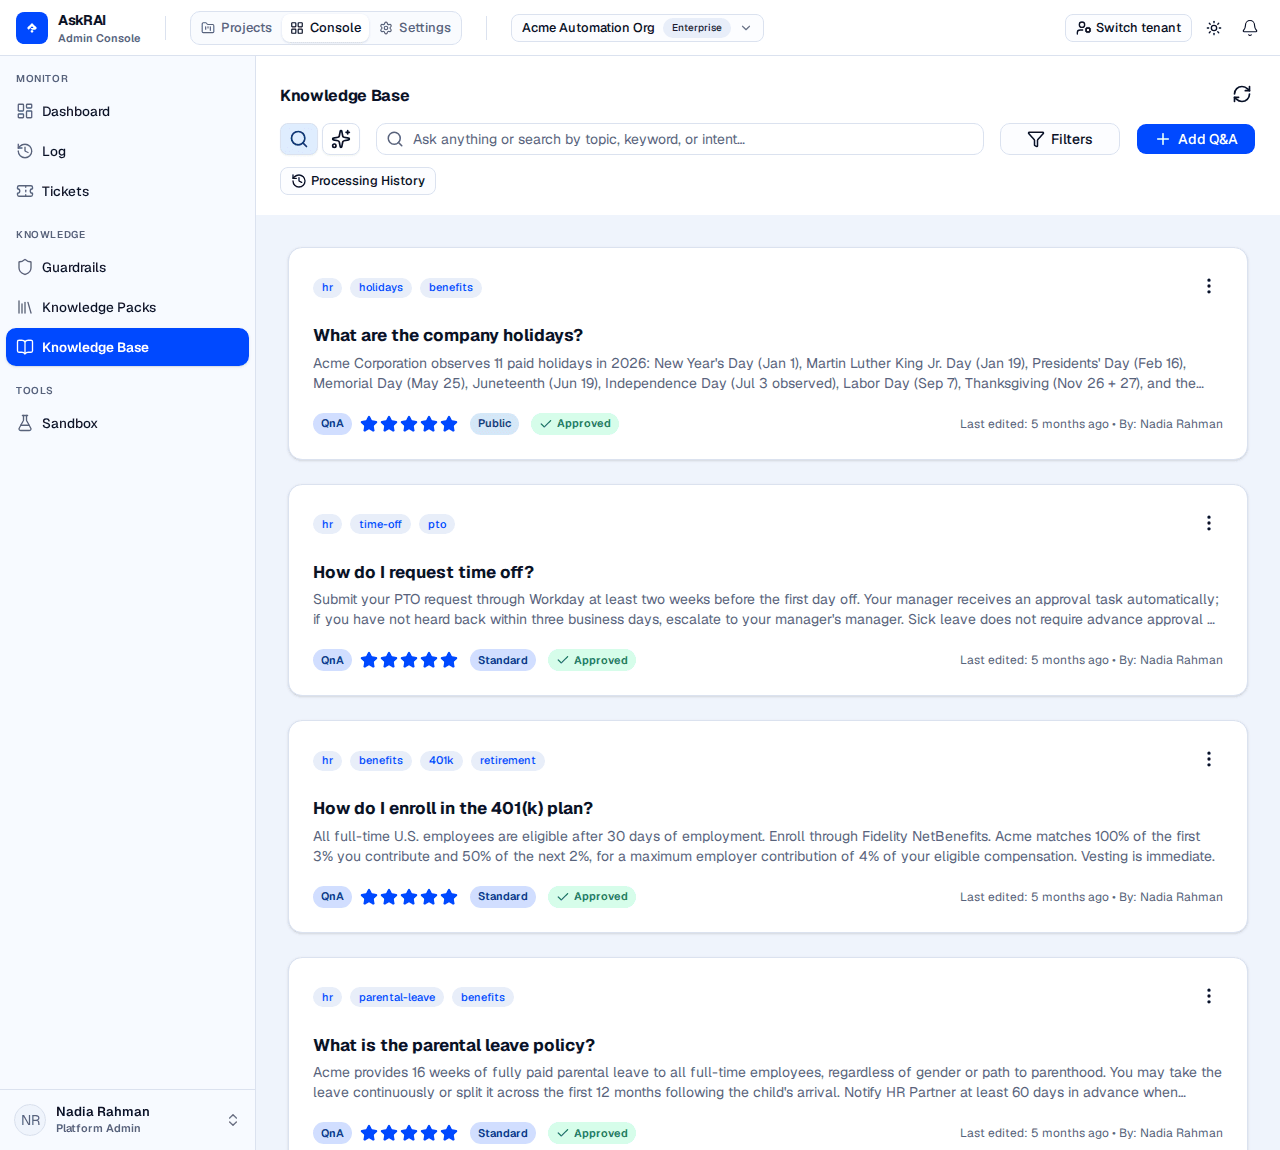
The knowledge base is the single source of truth for your AI assistant. Every response is grounded in content your team put there, rather than in the model's own training data, and nothing outside it is retrieved. To see exactly which items a question retrieved, replay it in the Sandbox — the retrieval set is not kept in the audit record.
AskRAI supports two types of knowledge content, each suited to different use cases:
Type
What it is
Best for
Q&A pairs
A question and its answer — written by a curator, imported from a CSV or XLSX table, or generated from a document you upload
Direct answers to common questions (Resolve, Inform)
Document chunks
Segments extracted from uploaded PDFs
Reference material, policies, and detailed procedures (Inform, Support)
Both types live in the same knowledge base. The difference is in how they enter the system — and in how they are read: admin AI Search merges both, while at query time the assistant searches each separately and keeps whichever leg scored higher, summarizing that one alone.
When you upload a document to a knowledge pack, AskRAI processes it through an automated pipeline.
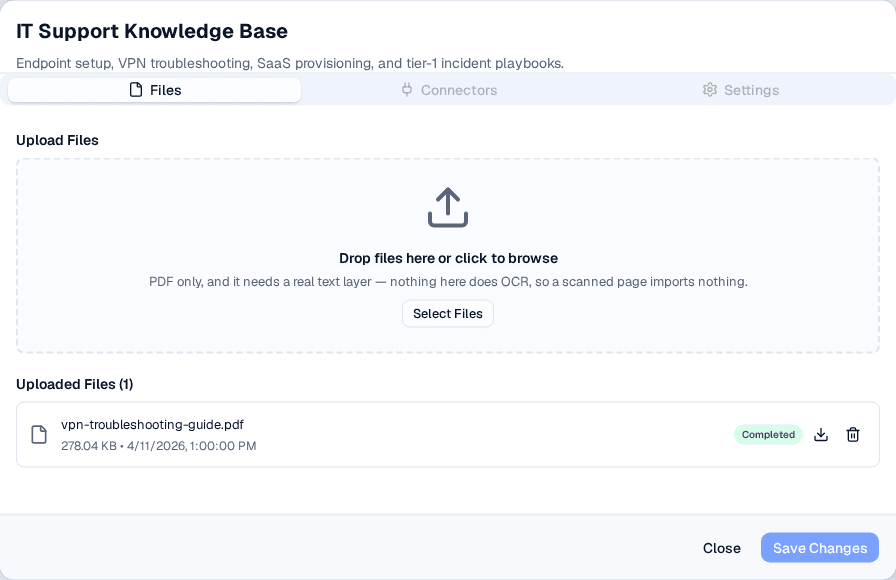
Upload — drag and drop files into a document-type knowledge pack. A document-type pack accepts PDF only; a Q&A-type pack also accepts CSV and XLSX tables of ready-made pairs. There is no OCR, so a PDF has to carry a real text layer — a scan or a photograph fails.
Extract — the system reads the file's text layer, keeping track of which page each passage came from.
Chunk — long documents are split into overlapping windows that each capture a coherent unit of information.
Embed and store — each chunk is turned into a vector and written to the knowledge base, which makes it searchable the moment it lands.
For Q&A pairs, you write the question and answer directly — no parsing pipeline needed.
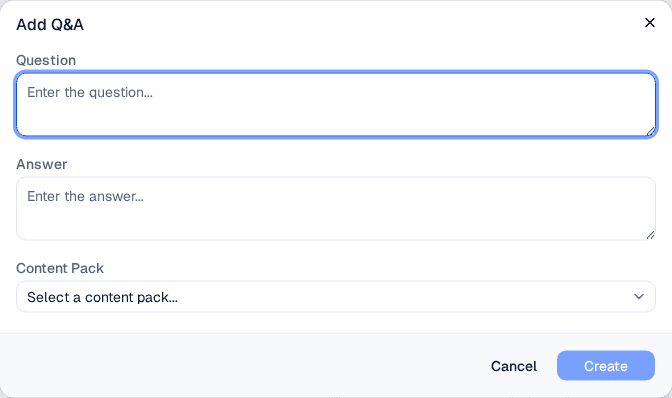
A new Q&A is not live when you save it. It is created as a Draft, and only Approved items are retrievable — the assistant cannot see a draft. To publish a Q&A you must approve it, and that takes effect immediately: there is no indexing run to wait for. If a curator adds an answer and users still get "I don't know", an unapproved draft is the first thing to check.
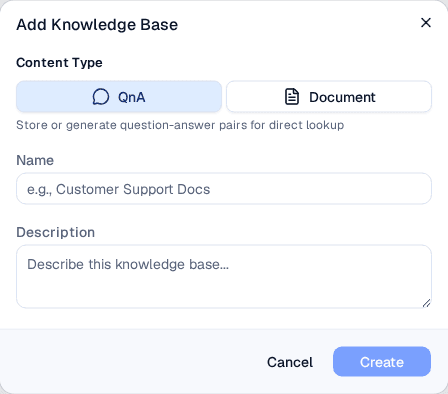
Knowledge packs are containers that group related content together. Each pack has a content type (Q&A or Document) chosen at creation, and content within a pack shares the same lifecycle and access controls.
Packs serve two purposes:
Organization — group content by topic, department, or use case (e.g., "HR Policies", "Building Permits", "IT Self-Service")
Access control — groups reference knowledge packs to control which users can access which content
A user's AI assistant only searches knowledge packs that their group memberships grant access to. Content in packs outside their groups is invisible to their queries.
Every knowledge item follows a status workflow that controls whether it appears in search results:
Status
Visible to users?
Description
Draft
No
The starting status for a hand-written Q&A — awaiting review
Approved
Yes
Reviewed and live — appears in search results
Needs Attention
No
Flagged for review — temporarily hidden
Discarded
No
Soft-deleted — excluded from all searches
Only Approved content is retrievable, so an item in any other status answers nothing.
What you upload decides whether anyone reviews it. Chunks produced for a Document pack are created Approved and are live as soon as processing finishes — uploading a document to one publishes its content with no review step. Everything bound for a Q&A pack lands as Draft instead and answers nothing until approved: a pair you write by hand, a CSV or XLSX table you import, and the pairs generated from a PDF uploaded to a Q&A pack. So importing five hundred pairs and then asking about them returns nothing until you approve them — use Bulk Approve All QnAs on the pack once you have read them.
AskRAI offers two ways to search the knowledge base:
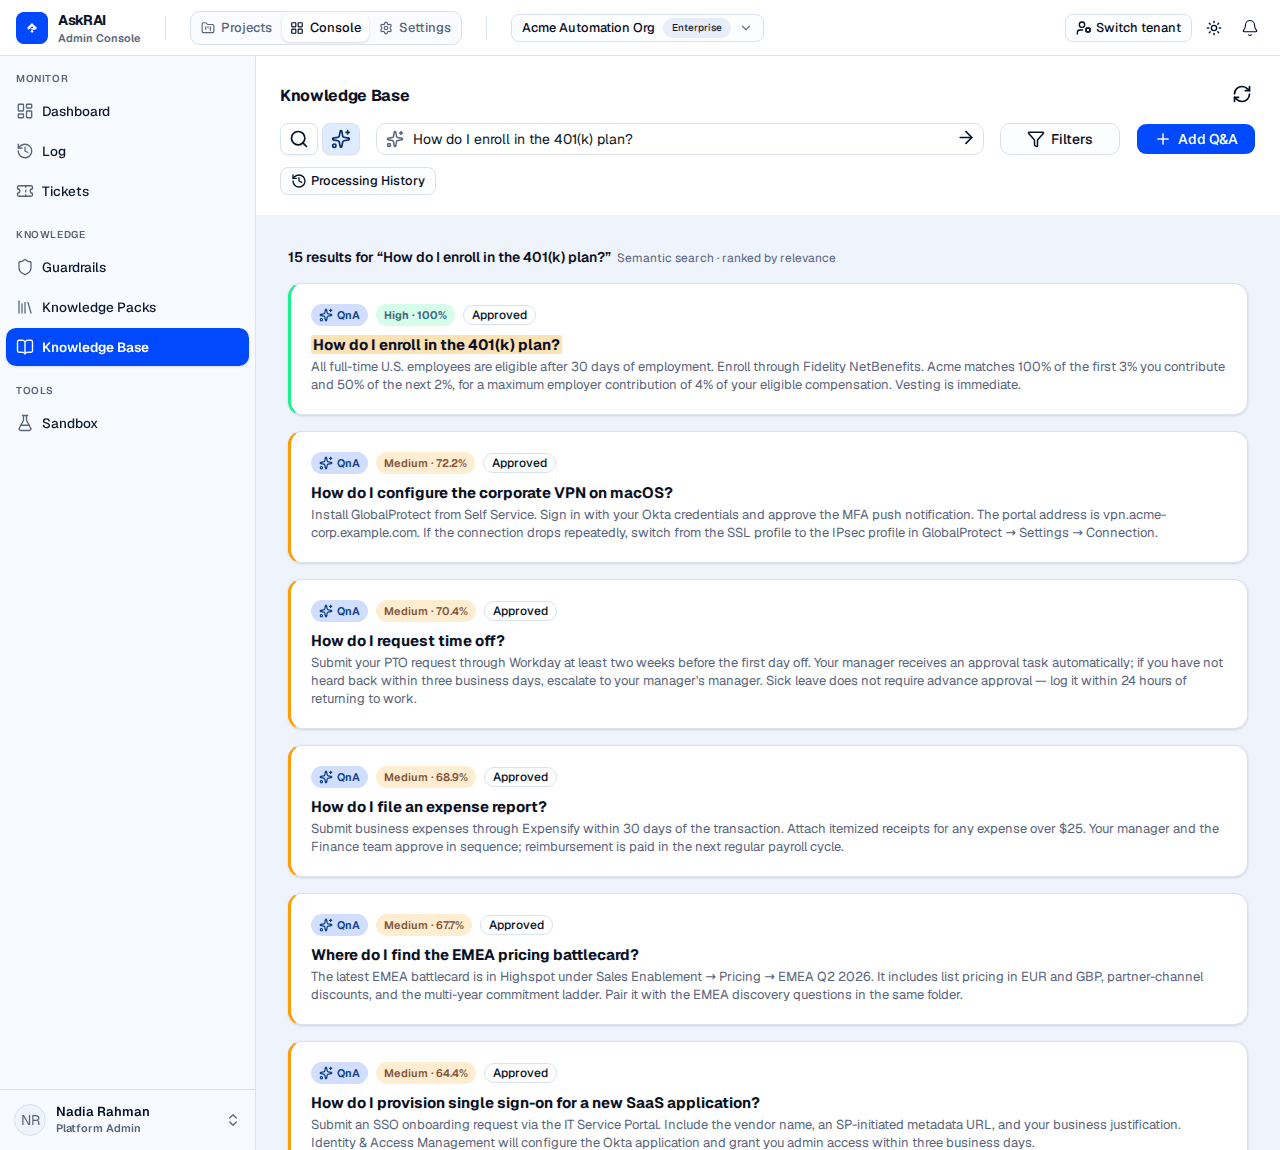
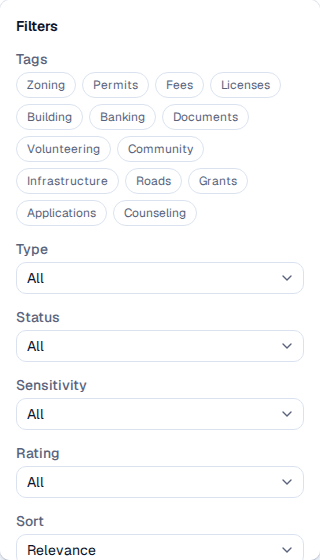
Text Search — substring matching against questions, answers, titles, section headings, document content and tags. Fast and predictable, and the only mode that reliably finds an exact identifier or phrase.
AI Search (semantic) — meaning-based search that finds relevant content even when the wording differs from the query. Uses vector embeddings to match by concept rather than keywords.
These two modes are a curator tool on the Knowledge Base page — they are how you look content up. They are not a runtime setting. At query time the assistant always searches by meaning, the way AI Search does; there is no per-tenant switch that selects a retrieval mode, and nothing to configure.
Knowledge Base — create and manage Q&A pairs and document chunks
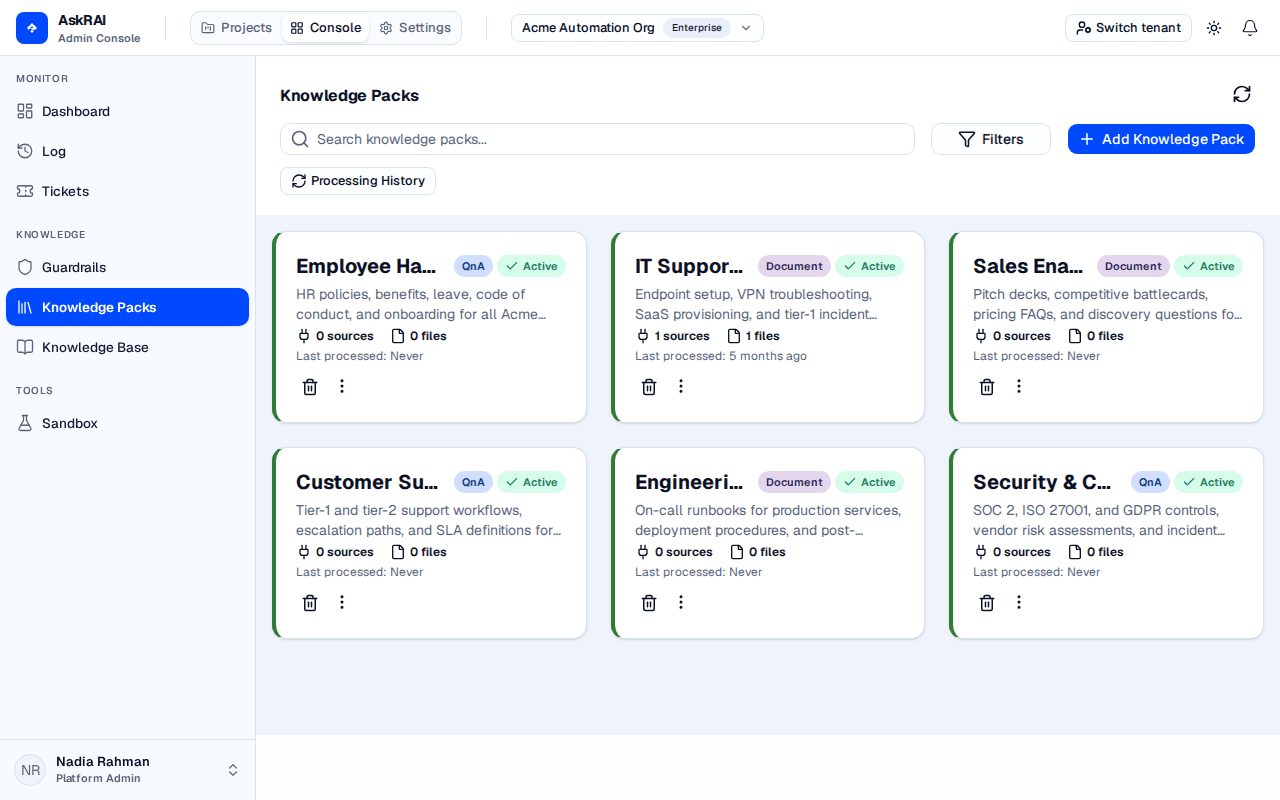
Knowledge Packs — organize content into collections and upload files
Guardrails — understand how safety rules protect knowledge-based responses
Access Control — learn how groups control access to knowledge packs
Guardrails
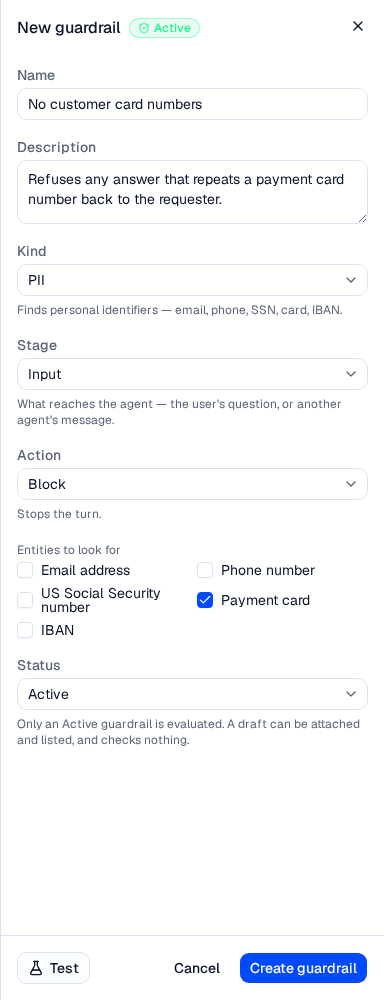
A guardrail is three decisions — what it checks, which payload it reads, and what it does about a violation
A guardrail is one check AskRAI runs over one payload of a turn. Every guardrail is three decisions made independently of each other: a kind that decides how the check is performed, a stage that decides which payload it reads, and an action that decides what happens when it fires.
Those three are what the rest of this page is about. One more setting does change behaviour: priority is the order guardrails are evaluated in, and it decides which blocker is reported as the reason. The category is a label for the people reading the console.
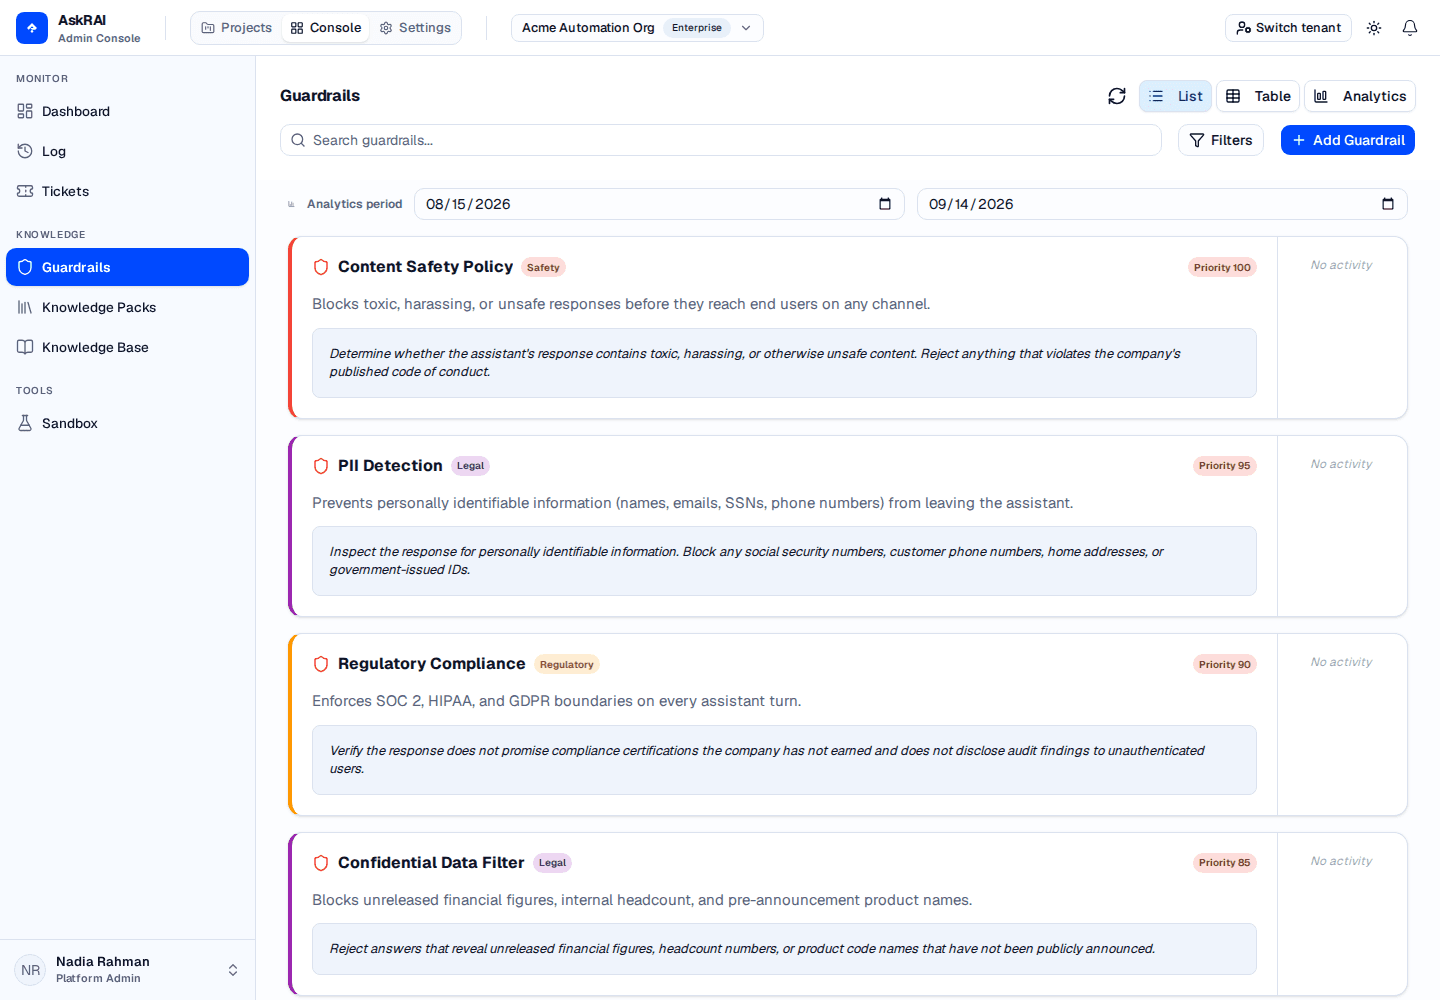
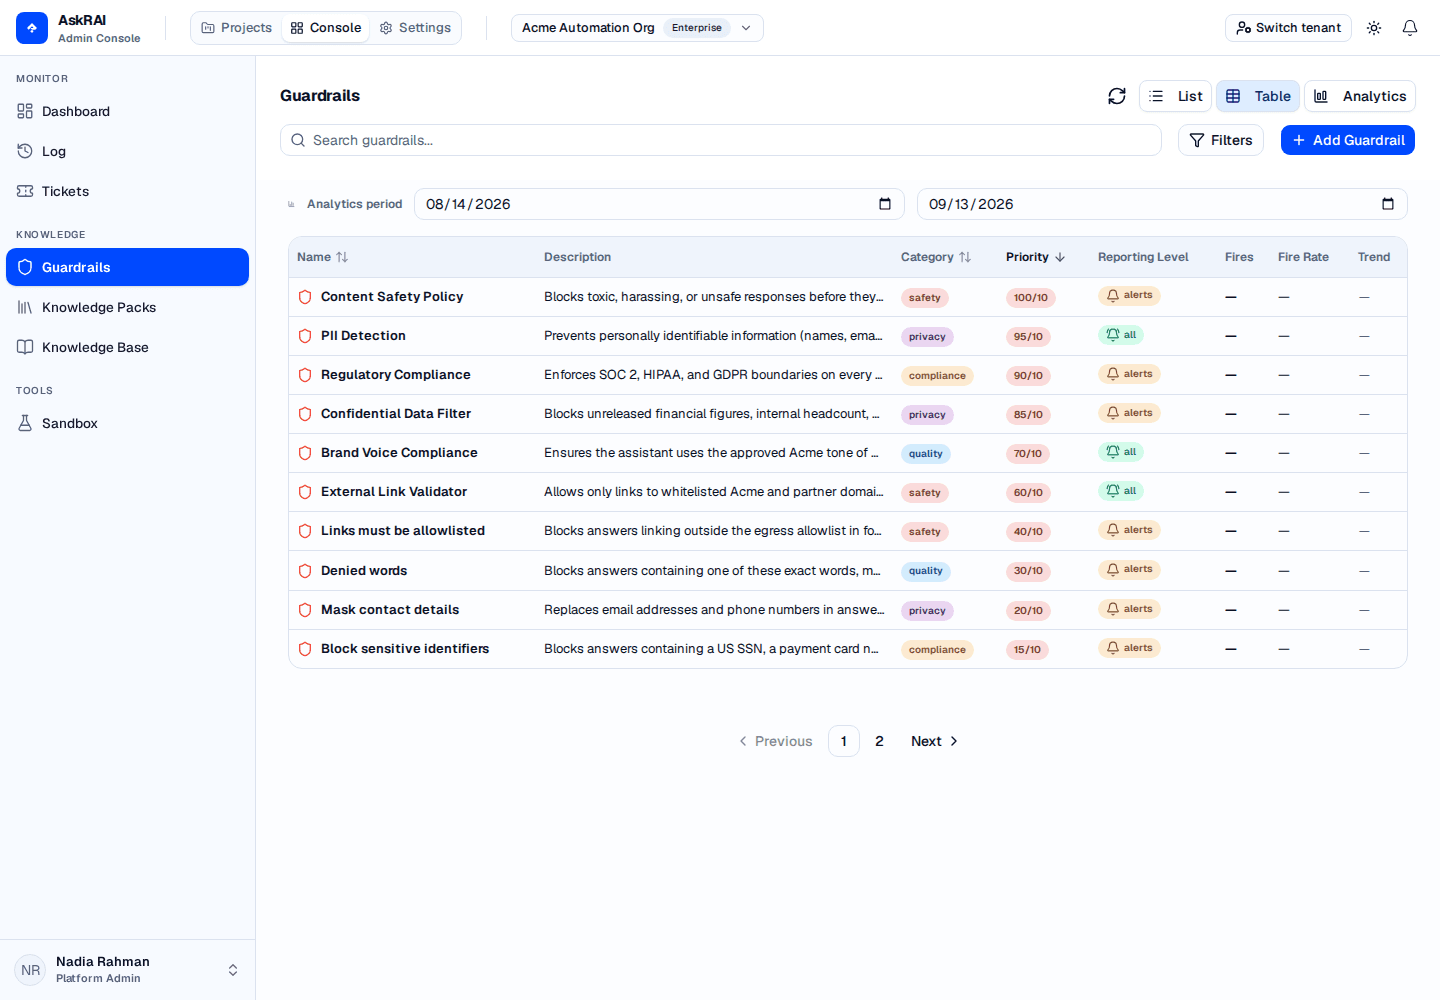
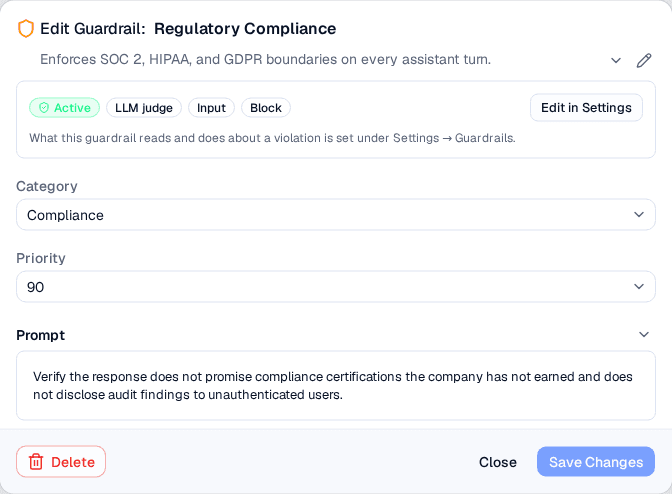
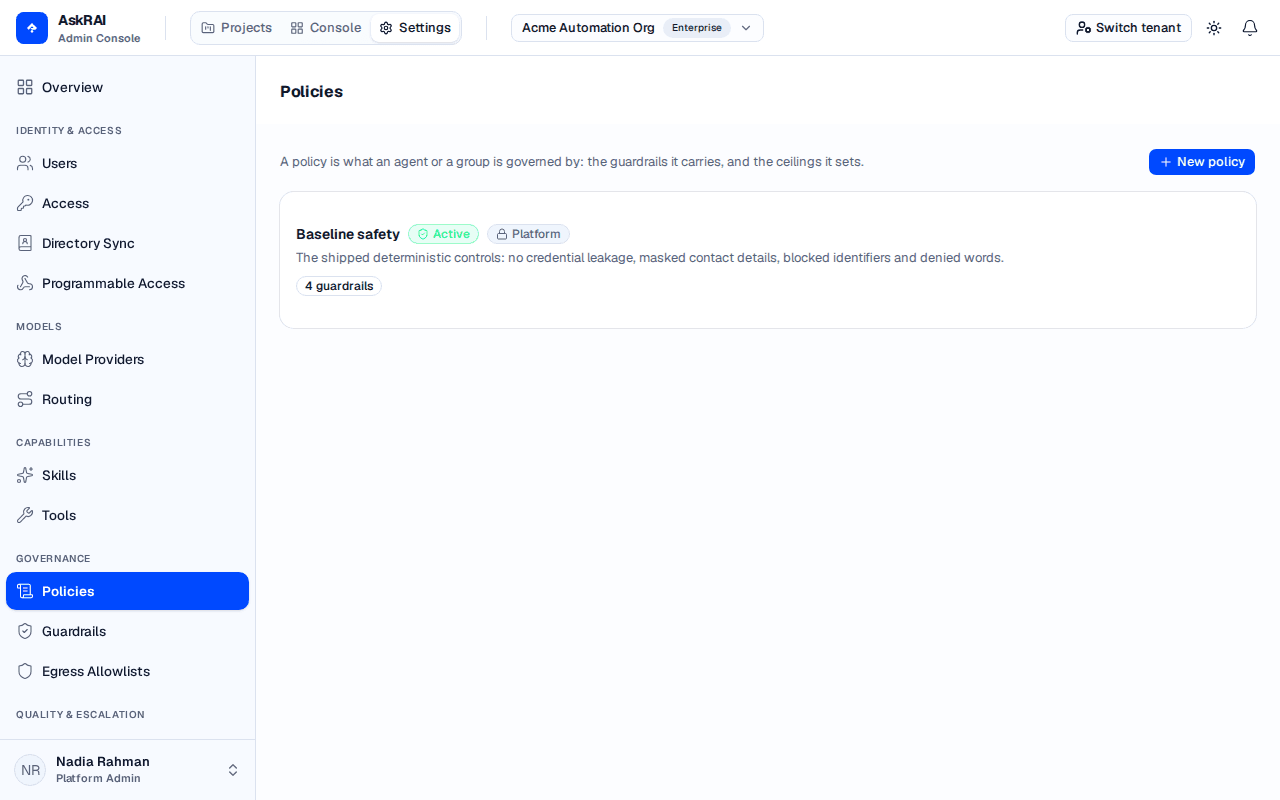
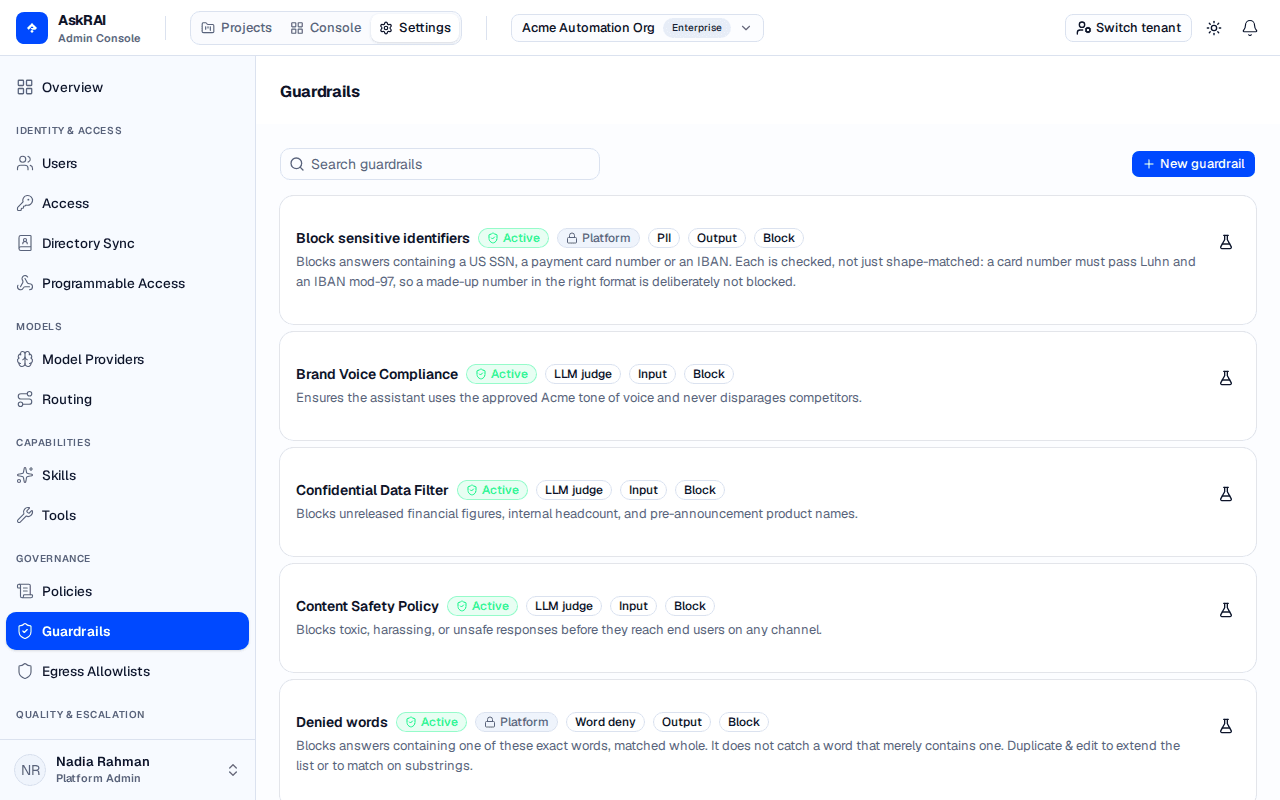
A guardrail's kind, stage, action and status are set on the Settings → Guardrails page, which is reserved for the Platform Admin role. The Content Management → Guardrails page is where you watch the same guardrails perform.
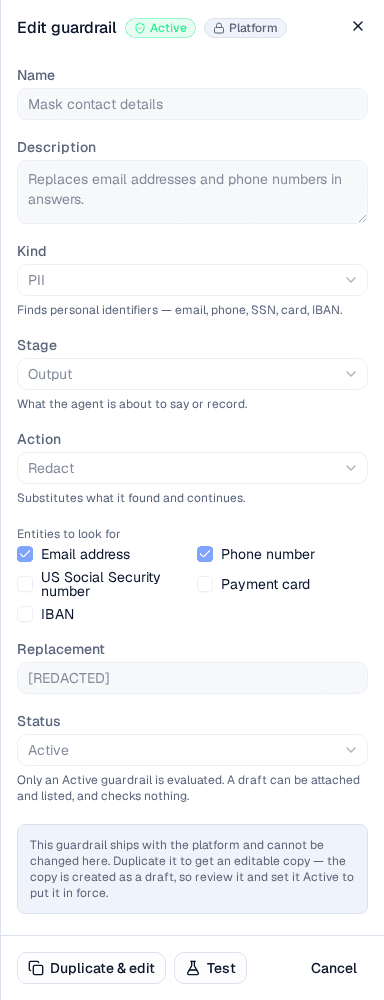
Six kinds ship today. Five of them are evaluated in code: they cost no model call, add no provider latency, and give the same answer every time.
Kind
What it looks for
Can redact
PII
Personal identifiers — email, phone, US SSN, payment card, IBAN. Each has a precise detector, including a Luhn check for cards and mod-97 for IBANs.
Yes
Regex deny
Anything matching patterns you write. Up to 25 patterns, each up to 200 characters.
Yes
Word deny
Specific terms. Up to 500 words, matched as whole words by default or anywhere inside a word if you choose.
Yes
Secret scan
API keys, tokens and private keys, using the shipped pattern set. Takes no configuration.
Yes
Link domain
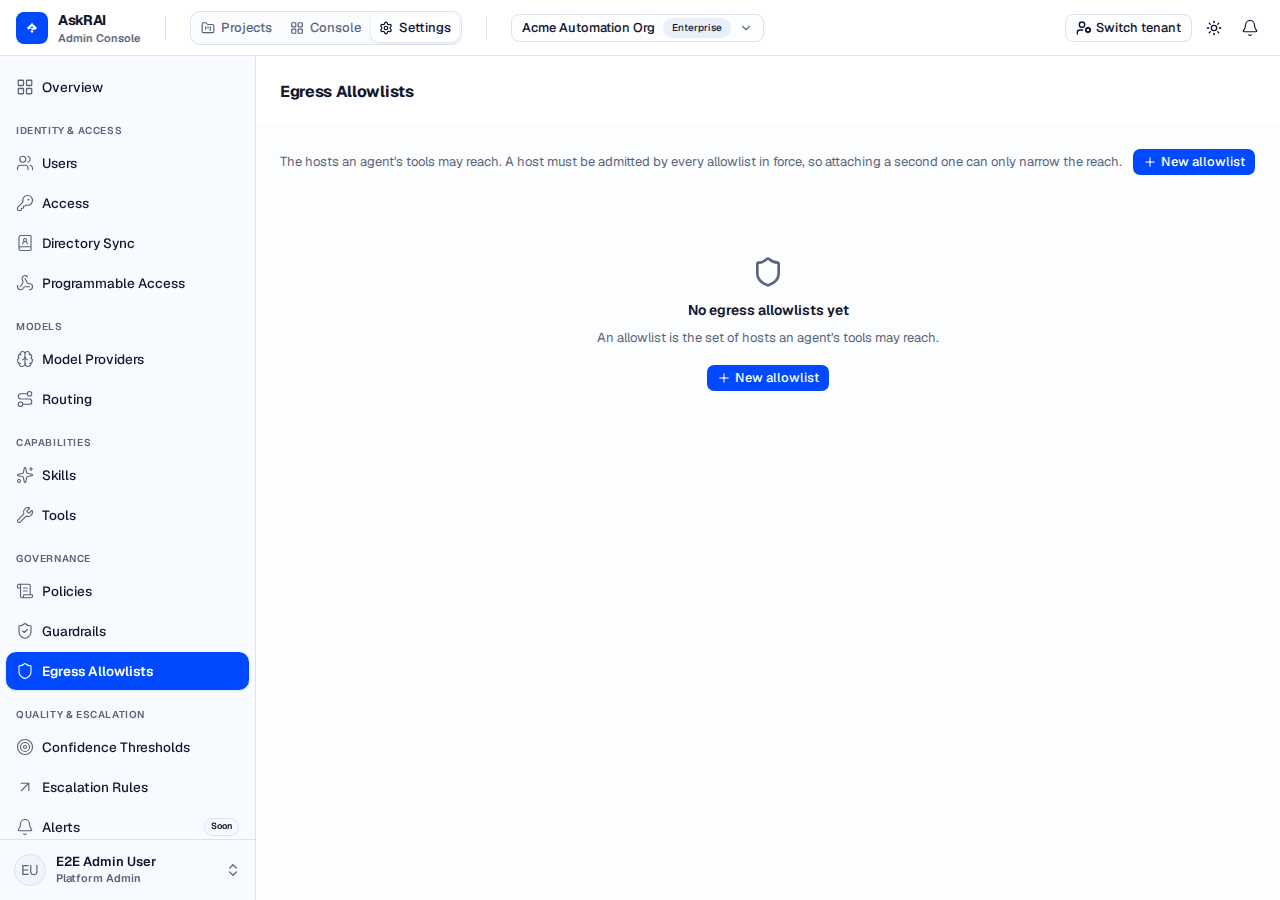
Links pointing at a host your egress allowlist does not admit. Takes no configuration — it reads the allowlist in force.
No
LLM judge
A natural-language rule you write, put to a model. This is what every guardrail was before the other five existed.
No
The last column matters because Redact is an action a kind has to be able to perform. A judge returns a verdict rather than the position of what it objected to, and a link-domain check has nothing to substitute, so neither can redact. The console refuses that combination when you save it rather than at runtime.
A Link domain guardrail with no egress allowlist in force cannot be evaluated, and AskRAI stops the turn rather than passing it. With nothing to compare a host against, "allowed" would be a verdict the check never reached — so this is the one control whose unknown answer is deliberately not silence. If you attach one, attach an allowlist too.
The user's question, or the kickoff instruction of an agent beat.
Before retrieval, so a blocked request costs no search and no summarisation tokens.
Output
The answer the assistant generated, or what an agent is about to say or record.
After the answer exists and before anyone reads it.
Tool call
The arguments an agent is about to send to a tool, serialised as JSON.
After every free check and before anything billable — a judge here costs the tenant a model call.
A rule phrased as a constraint on the response is enforceable: set its stage to Output. Set that same rule on Input and it fires on nothing and reports compliance on every turn.
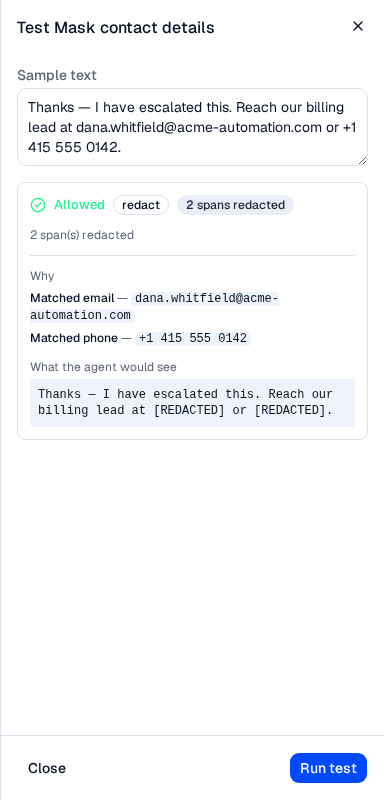
Redact means something different at each stage. On Input it rewrites the question, and what continues into retrieval — and what the audit record stores as the question — is the rewritten text. On Output it rewrites what is delivered. On Tool call it refuses the call entirely: a redacted argument is a different call to the far side, and sending one the model never wrote would be worse than not sending it at all.
An output guardrail turns off token-by-token streaming. A check that can refuse or rewrite an answer cannot run after the caller has already read it, so for a tenant with an Output guardrail in force the answer is held until it has been governed, then delivered in one piece. Tenants with none stream exactly as before.
There is no majority rule and no scoring: one blocking guardrail is enough. A Warn does not stop the turn — its effect is the record it leaves, which is why it is worth reviewing the audit trail for warnings rather than waiting for something to break.
The deterministic kinds are evaluated first, one after another in priority order. The LLM judges run afterwards, concurrently — at most three at a time. If something has already blocked, only the judges that would Block are skipped; a Warn judge still runs. (A judge cannot be set to Redact — see the table above.)
Three consequences follow from that order:
A regex settles what a judge would be billed to decide. This one is free: the deterministic kinds always run before any judge, whatever priority you give them, so a cheap check that blocks keeps the turn off a model. Priority does not control it.
Priority orders the deterministic checks among themselves, lowest number first, and when several would block, the first is the one reported as the reason. Note that the console's bands run the other way — it labels 8–10 High and 1–4 Low — so a guardrail in the Low band is evaluated before one in the High band, and is the one an administrator is told about. Set the number you want evaluated first to the lowest value, not the highest.
A redaction earlier in the order changes what every later guardrail reads. A PII guardrail that redacts at priority 1 means the judge at priority 9 sees the redacted text, not the original.
Once a deterministic check has blocked the turn, blocking judges are skipped — their verdict cannot change the outcome and the tenant should not be billed for it. Judges set to Warn still run, because they were attached to observe exactly these turns and a skipped one would report "never fired" on the population it exists to watch.
AskRAI stops the turn instead of allowing it. A control that quietly stops checking while still reporting compliance is the failure this whole plane exists to prevent, so it is the one outcome the evaluator will not produce. A turn fails closed when:
an LLM judge names a model that no longer resolves, or the tenant has no model configured for the guardrail stage;
a pattern runs long enough to be abandoned;
a Block or Redact guardrail is handed a payload longer than 100,000 characters — neither "I refused all of this" nor "I handled every span in this" can be said honestly about a prefix. A Warn guardrail scans the first 100,000 characters and says so in its record;
a guardrail was written by a newer build than the one evaluating it. Only the subjects that attached it fail; everyone else in the tenant is unaffected.
A guardrail governs a subject, never the tenant at large.
For a person asking a question, the subject is their groups — the union of every guardrail listed by every group they resolve into.
For a team agent, the subject is the agent itself.
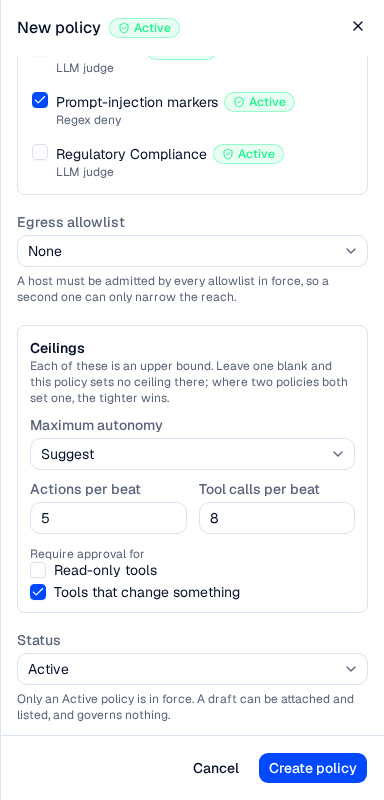
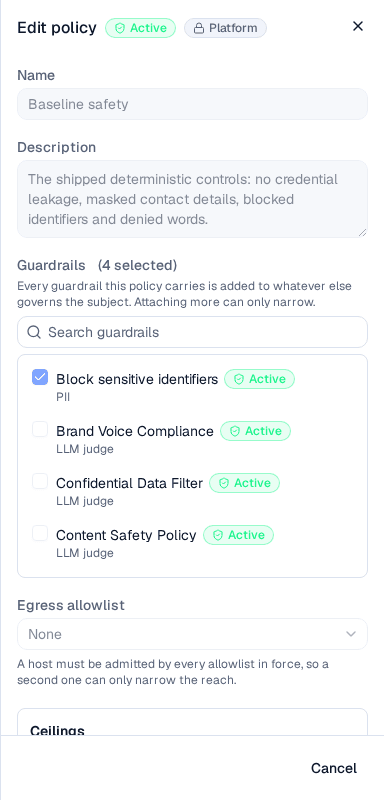
Either can also carry policies, and a policy brings its own guardrails. All of those sources compose into one effective set, under a single rule: every merge is a narrowing. Guardrails union together, ceilings take the lower value, and a host must be admitted by every allowlist in force. Attaching a second policy can tighten what a subject may do and can never loosen it — so there is no "bypass" group, and no way to exempt one population by adding something to it.
Only guardrails whose status is Active take part. A draft governs nothing, however carefully it is written.
Saving a guardrail applies to the next turn, not the current one, and is in force everywhere within five minutes at the outside.
Every evaluation — pass or fail — is written to the audit trail and counted in the analytics. There is no setting that reduces this. A redaction records how many spans it replaced and never the values, which would put the content back into the record the redaction exists to keep it out of.
Administrators can mark a guardrail trigger as a false positive in the conversation logs. Those marks drive the per-guardrail false-positive rate on the guardrail analytics, which is how you find a rule that fires too eagerly without weakening it blind.
Sandbox — test guardrail behaviour before it reaches production
Confidence & Escalation
How AskRAI scores response confidence and uses escalation rules to decide when conversations need human attention
Every AI response receives a confidence score — a percentage reflecting how well the knowledge base supports the answer. The score sorts the answer into a band, and your escalation rules decide what follows from that band. Scoring happens as the answer is produced; escalation happens after it has been delivered, which is what decides the difference between the two.
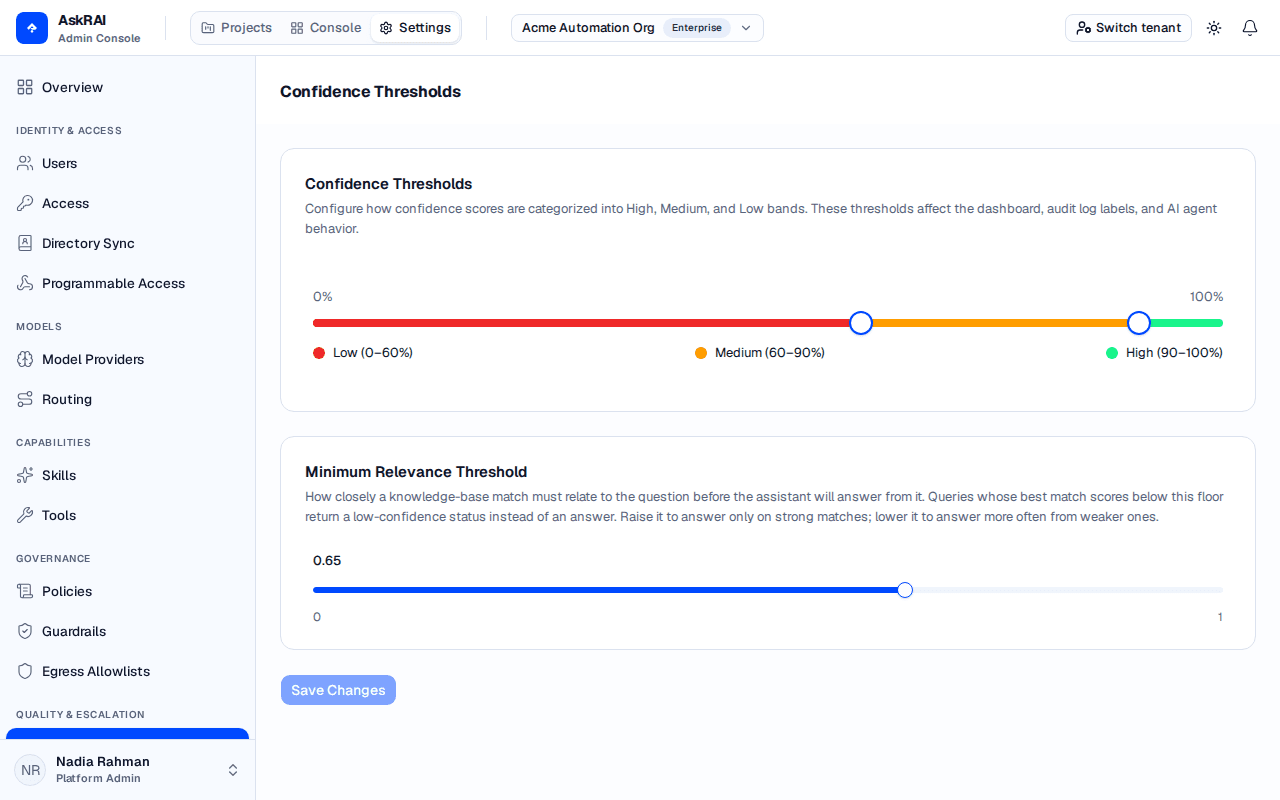
Confidence scores fall into three configurable bands. You set the thresholds in Settings — the defaults are shown here.
Band
Default range
Typical behavior
High
90% and above
The assistant is confident in its answer. Response is delivered normally.
Medium
60% – 89%
The assistant has a reasonable answer but some uncertainty. The response is delivered.
Low
Below 60%
The assistant cannot adequately answer. The conversation is typically escalated.
Threshold boundaries are fully configurable per tenant. When you adjust them, a reclassification preview shows how existing conversations would be recategorized — so you can see the impact before saving.
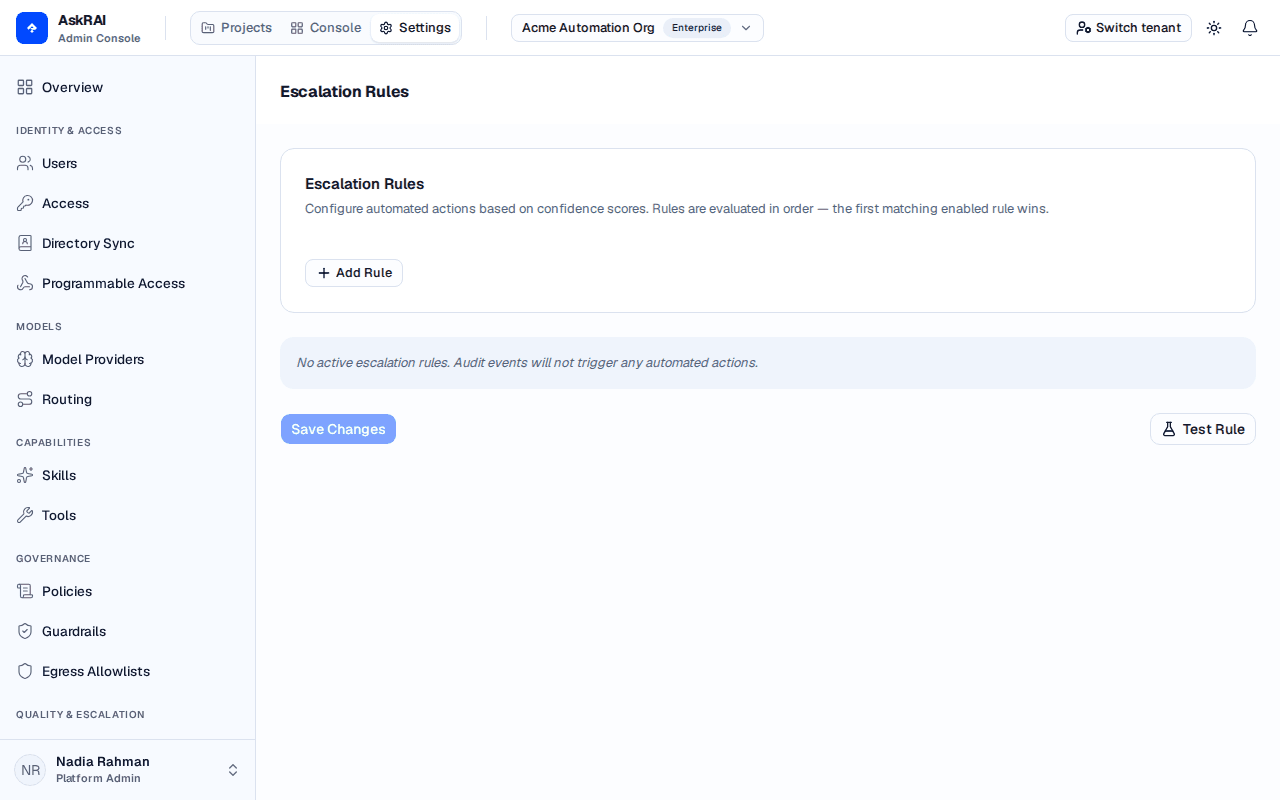
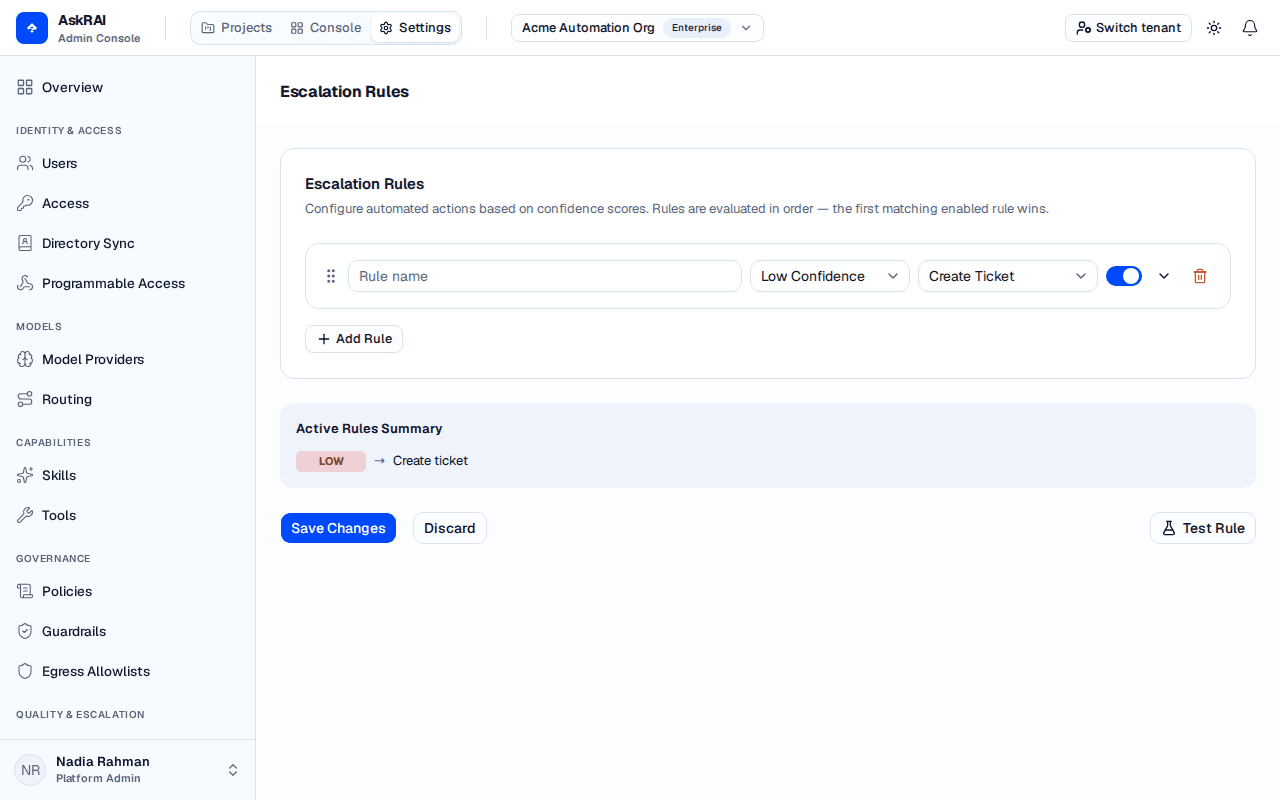
Escalation rules define what happens when a response falls into a particular confidence band. Each rule specifies a condition (confidence band) and an action to take.
Generates a support ticket in the Tickets queue for human follow-up. The ticket carries the original question, and — unless you clear Include AI context on the rule — the AI response and its confidence score.
Flag for Review
Not yet implemented. Selectable today, but no conversation is marked and no one is notified.
Suppress Response
Not yet implemented — and by design it could not block a response anyway, because escalation is evaluated only after the answer has been delivered (see below).
Auto Respond
Delivers the AI response without any escalation, regardless of confidence. Use this for bands where you trust the assistant's judgment.
Escalation happens after delivery, and Create Ticket is the only action that currently does anything. AskRAI answers the user first, and your rules are then evaluated against the record of that turn. So escalation is a follow-up mechanism, not a gate — nothing it does can un-send an answer. To prevent a response, use a guardrail, which is evaluated during the turn itself.
One other thing can stop an answer before it is written, and it is neither a guardrail nor an escalation rule: if the best knowledge-base match scores below the tenant's minimum relevance threshold, the assistant returns its low-confidence reply without composing an answer at all. See Confidence Thresholds.
When multiple escalation rules match (for example, if two rules both apply to the Medium band), the rules are evaluated in priority order. The first matching rule's action is executed.
Every confidence band should have at least one matching escalation rule. If no rule matches a given band, the platform defaults to delivering the response without escalation — which may not be the behavior you want for low-confidence answers.
The confidence score is not a simple keyword-match percentage. After the assistant drafts an answer, a lightweight assessment step scores two things:
Answer quality and groundedness — how well the drafted answer actually addresses the user's question using the retrieved knowledge base content, rather than guessing or padding.
Retrieval relevance — how close the top knowledge base results the answer was built from are to the question, measured as the similarity score retrieval returns for each of them.
Only the first of those bands the answer. Retrieval relevance is kept as a separate signal and does not move the confidence band. A high score means the assistant judged its own answer well-grounded in what it retrieved. A low score means it is uncertain — perhaps the question is outside the knowledge base's scope, or the best-matching content only partially fits.
Users, roles, groups, and multi-tenant isolation control who can access which knowledge and guardrails
AskRAI's access control model determines who can access which knowledge and what safety rules apply to their interactions. The model is built on four layers — users, roles, groups, and tenants — that combine to provide fine-grained, scalable access management without per-user configuration.
A Platform Admin can open Settings and reconfigure the tenant. A Member cannot, but still uses the console and their projects normally. This is a separate question from what content anyone can see — that is decided by groups and resource-access roles, described below, and applies to admins and members alike.
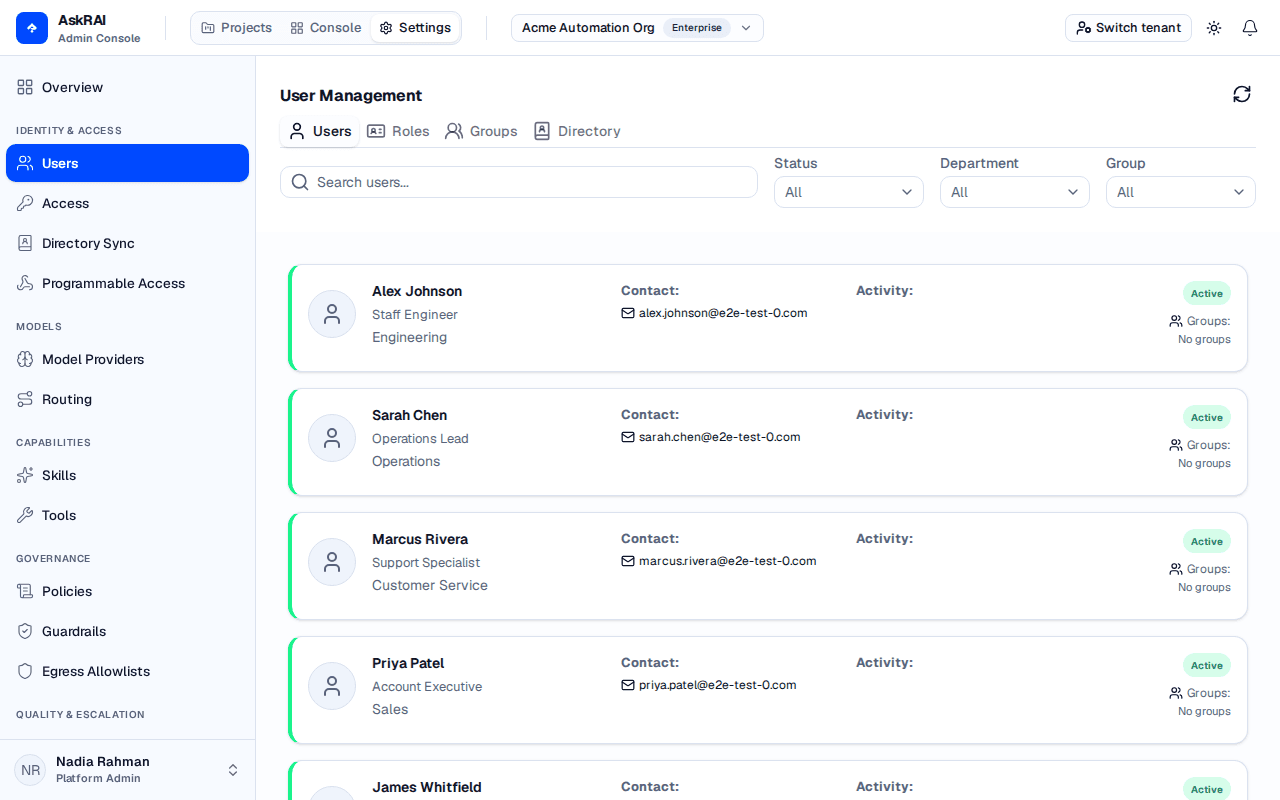
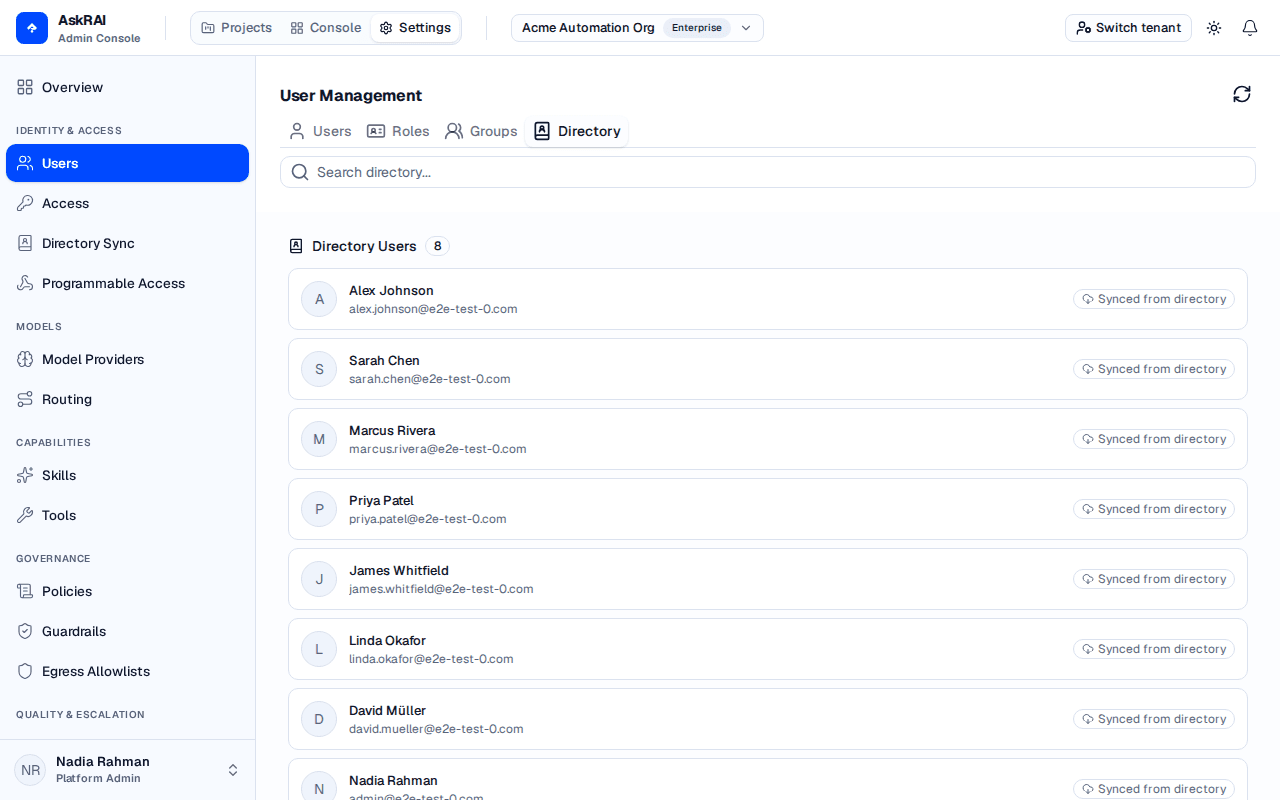
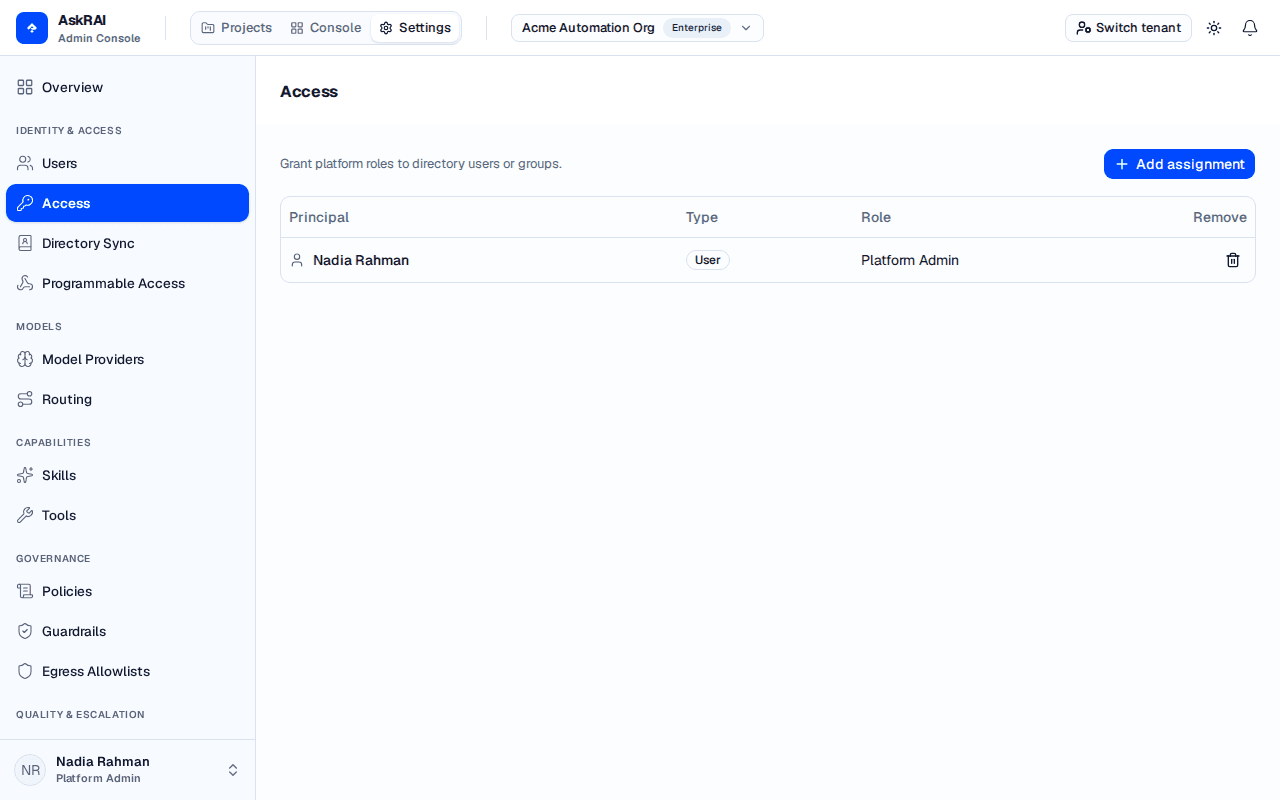
Users are real people in your organization. They are synced automatically from your identity provider — you do not create user accounts manually in AskRAI. Every synced user is a Member until an admin grants them a tenant role on the Access page — with one exception: the very first user to sign in to a brand-new tenant is automatically promoted to Platform Admin, so there is always someone who can open Settings and grant roles to everyone else. Administrators can:
View user details (name, department, job title, contact info)
Monitor activity (last login, active sessions, online status)
Block or unblock user accounts
Users gain access to knowledge and guardrails through their group memberships, never directly.
The roles in this section are resource-access roles — the ones that decide which knowledge and guardrails an interaction gets. They are unrelated to the tenant roles (Platform Admin / Member) that unlock Settings.
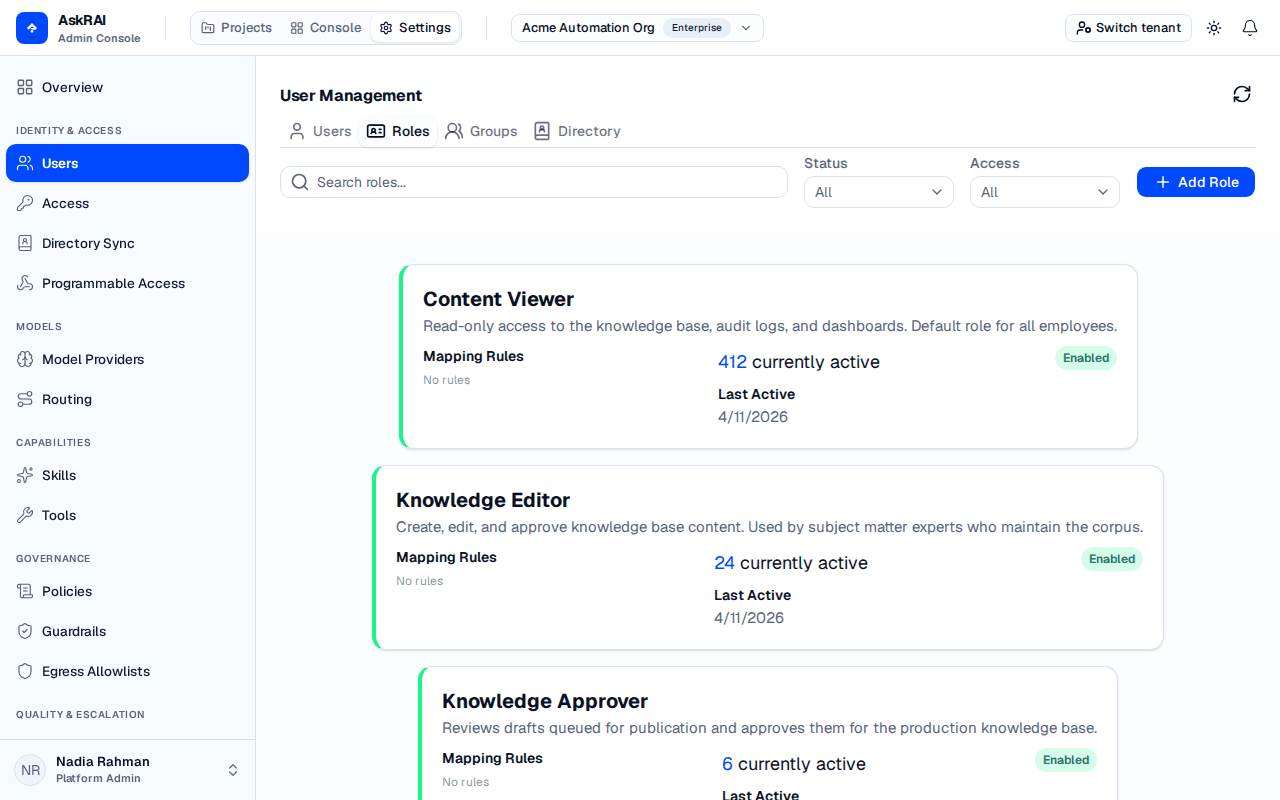
Roles represent usage patterns rather than individual people. Each role defines mapping rules — conditions that automatically classify incoming interactions based on properties like:
Rule type
Example
Channel
Teams, Web Chat, API
Auth status
Authenticated vs. Unauthenticated
Device
Desktop, mobile, tablet
Referrer
Where the request came from
Caller type
Human, Application, Agent
Credential type
Which class of credential made the call
Those six are the whole list. Location and Time rule types were offered until recently and never worked — they were compared against a field the record did not carry, so a role carrying one matched nothing. They have been removed rather than fixed; making them work would be a new feature, not a repair.
A role saved with one of them before the removal still carries it. AskRAI holds that rule aside and refuses to match the role at all, rather than matching on the rule's surviving siblings — which is the decision the role already produced. Rewrite such a role using the six types above to bring it back into use.
When a user sends a message, the system evaluates mapping rules to determine which roles apply. Every rule on a role must match for that role to apply, and a user receives the combined access of every role that does — there is no ordering between roles. Roles are assigned to groups, so matching a role grants the user that group's knowledge packs and guardrails.
Roles enable dynamic access control without per-user configuration. For example, you can create a "Public Kiosk" role that matches unauthenticated web chat requests, and a separate "Employee" role that matches authenticated Teams messages — each with different knowledge packs and safety rules.
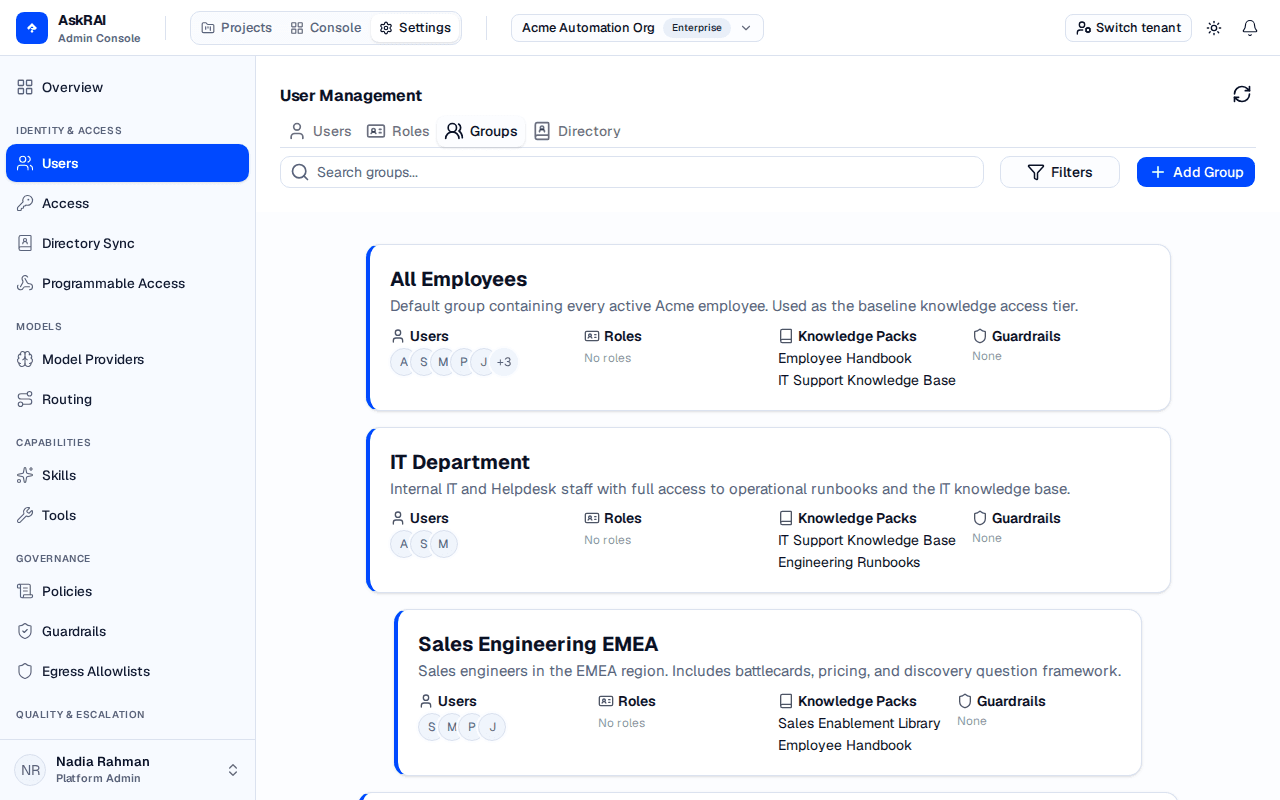
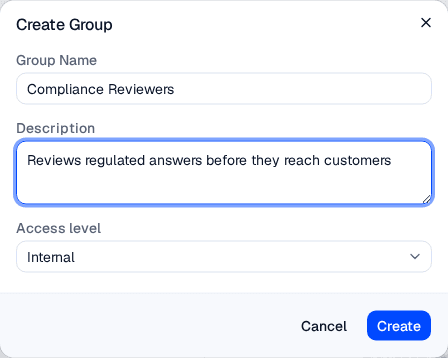
Groups are the central connection point in the access model. A group bundles together:
Members — users and roles that belong to the group
Knowledge packs — content collections the group can access
Guardrails — safety rules that apply to the group's interactions
A user's effective access is the union of all knowledge packs and guardrails from every group they belong to. If a user belongs to Group A (with packs 1 and 2) and Group B (with packs 2 and 3), they can search packs 1, 2, and 3.
Administrators add and remove users and roles individually
Automatic
Declared on the API, but not reachable: the console creates every group as Manual, and automatic assignment is not evaluated for a person asking a question. Use roles to grant group access by rule instead.
AskRAI is a multi-tenant platform. Each tenant operates in complete isolation — data, configuration, users, knowledge, and guardrails are fully separated between tenants.
From a product perspective, this means:
Each organization gets its own independent AskRAI environment
Users in one tenant can never see or search content from another tenant
Configuration changes in one tenant have no effect on others
Administrative actions (creating groups, editing guardrails, managing users) are scoped entirely to the current tenant
Tenant isolation is enforced at every layer of the platform. No tenant administrator can see or reach another tenant's data or configuration, and no configuration option shares content between tenants — every record of your data, and every query against it, is scoped to a single tenant.
Knowledge Packs — create content collections to assign to groups
Guardrails — author the safety rules a group or policy carries
Governance & Audit — learn how access control ties into audit and compliance
Governance & Audit
Audit trails, analytics dashboards, sandbox testing, and the continuous improvement loop for responsible AI
AskRAI is designed for organizations that need accountability, transparency, and continuous improvement in their AI operations. Every interaction is recorded, every guardrail evaluation is logged, and every confidence score is tracked — giving your team the data needed to monitor, measure, and improve your AI assistant over time.
Two different things are called governance. This page is about the record — what AskRAI captures about an interaction, and the review loop that record supports. The controls that decide what an interaction is allowed to do — policies, guardrail definitions, egress allowlists — live under Settings → Governance. The two meet here: every control that runs writes to the trail below.
Governance in AskRAI is not a one-time setup — it is an ongoing cycle of interaction, review, tuning, and testing.
Interact — users ask questions through connected channels. Every interaction flows through the query pipeline.
Audit — the platform records the full context of every interaction: the query, the response, the confidence score, guardrail evaluation results, and processing metadata.
Review — administrators use the dashboard and conversation logs to identify patterns: frequent low-confidence answers, guardrail false positives, knowledge gaps, and usage trends.
Tune — based on review findings, administrators adjust configuration: add knowledge content, refine guardrail prompts, adjust confidence thresholds, or modify escalation rules.
Test — changes are validated in the sandbox environment before going live, ensuring they work as expected.
Deploy — verified changes are applied to production, and the cycle continues.
Every conversation generates an audit record containing:
Data point
Description
User query
The original question the user asked
AI response
The generated answer
Confidence score
The score the answer received. The band is not stored — it is derived from your thresholds as you read the record, so moving a threshold relabels past conversations
Guardrail evaluations
Pass/fail result for each guardrail, with the reason any that fired gives. A check that passed records no reason
Ticket decision
Whether a ticket should be opened, the reason, and the resulting ticket ID
Processing metadata
Response time, model and routing information, channel, caller, and session details
This data powers the dashboard analytics, conversation review, and compliance reporting.
One thing the audit record deliberately does not keep: the retrieved search results — which knowledge items matched, and their scores. Retrieval detail is available live in the Sandbox, which is built for exactly this kind of inspection but never persists anything. The escalation rule is recorded: when a rule opens a ticket, the audit's ticket-decision reason names it ("Escalated by rule: …"), though not its id.
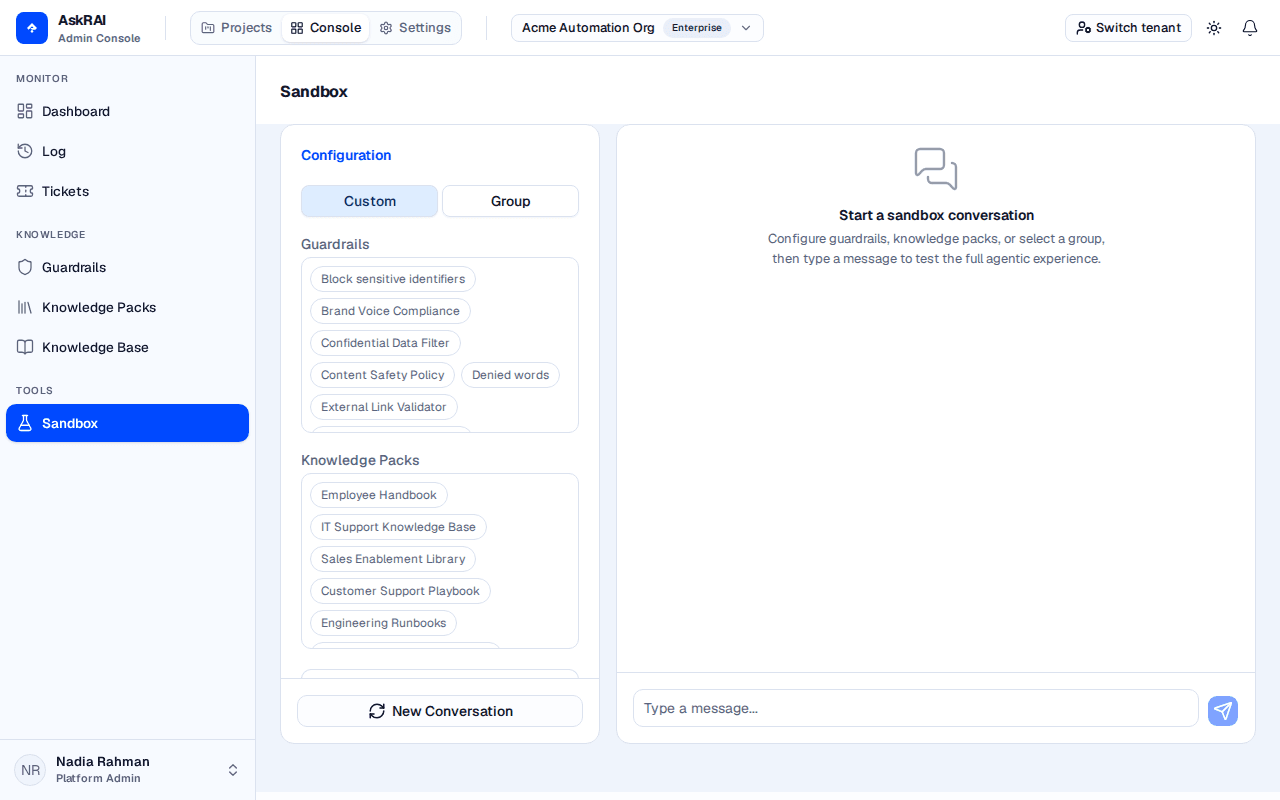
The Sandbox is a safe environment for validating configuration changes before they affect live users. You can:
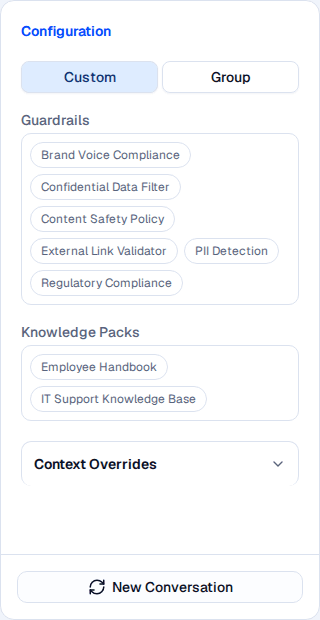
Test with custom configurations — select specific guardrails and knowledge packs to evaluate
Test as a group — simulate a group's exact configuration to verify the end-user experience
Inspect the full pipeline — view guardrail evaluation results, search debug data, audit previews, and model information for every test message
Validate escalation rules — see which rules would trigger and what actions would be taken, without creating real tickets
Sandbox conversations are not recorded as production audit records. This keeps your analytics clean while giving you full visibility into how changes will behave.
AskRAI's governance model supports compliance requirements by providing:
Traceability — every response is recorded with the question that produced it, the confidence score it received, and the result of every check that ran. Which knowledge items were retrieved is not part of that record — replay the question in the Sandbox to see the retrieval set
Accountability — audit records capture who asked, what was answered, and what safety checks were applied
Transparency — a guardrail that fires records why. A check that passed records no reason, and the deterministic kinds never produce prose at all — a fired pattern check records how many spans matched
Control — the content lifecycle (Draft → Approved → Needs Attention → Discarded) decides what is retrievable, and gives you a place to park an item you no longer trust
Settings — configure thresholds and escalation rules
Admin Console
Overview of the AskRAI admin console — run projects, monitor activity, manage content, and configure settings
The AskRAI admin console is the central hub for managing your AI assistant. From here you can run projects where people and AI agents collaborate, monitor platform activity, curate knowledge, configure guardrails, and manage users and settings.
Organize work into projects within an organization — create, browse, edit, and delete projects, and track each project's team and budget from a single workspace
Projects are the workspaces where your people and AI agents collaborate. Each project lives inside an organization and brings together a team, a budget, and an overview of how everyone connects. Open the Projects plane from the plane switcher in the top header.
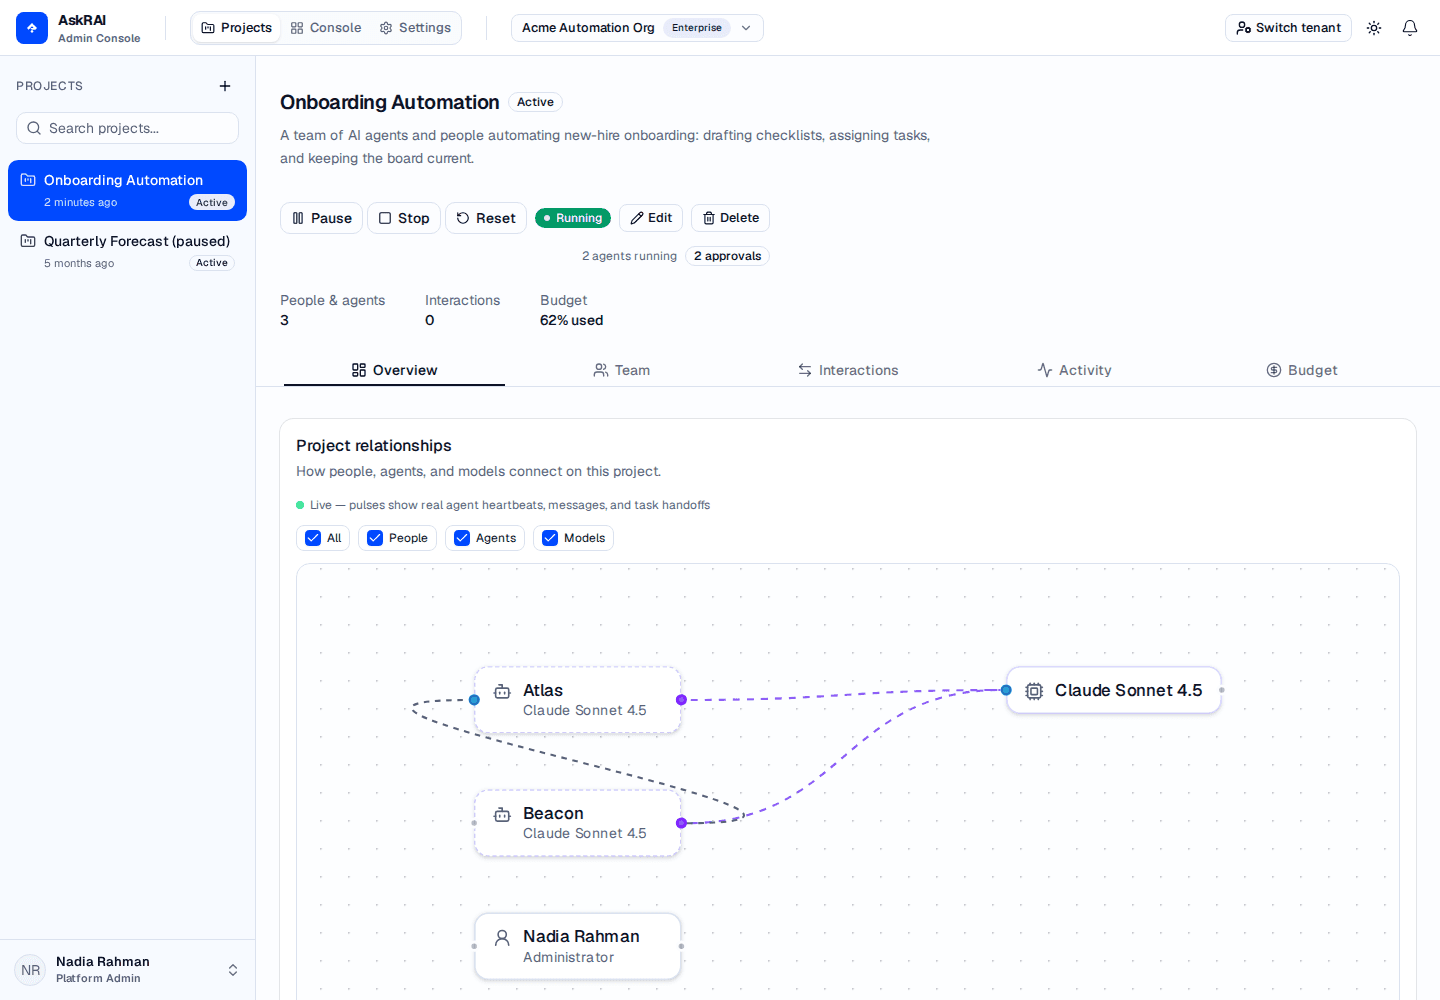
The Projects plane pairs a searchable project list with a per-project workspace — here the Customer Insights Platform project, scoped to the active Acme Corporation organization.
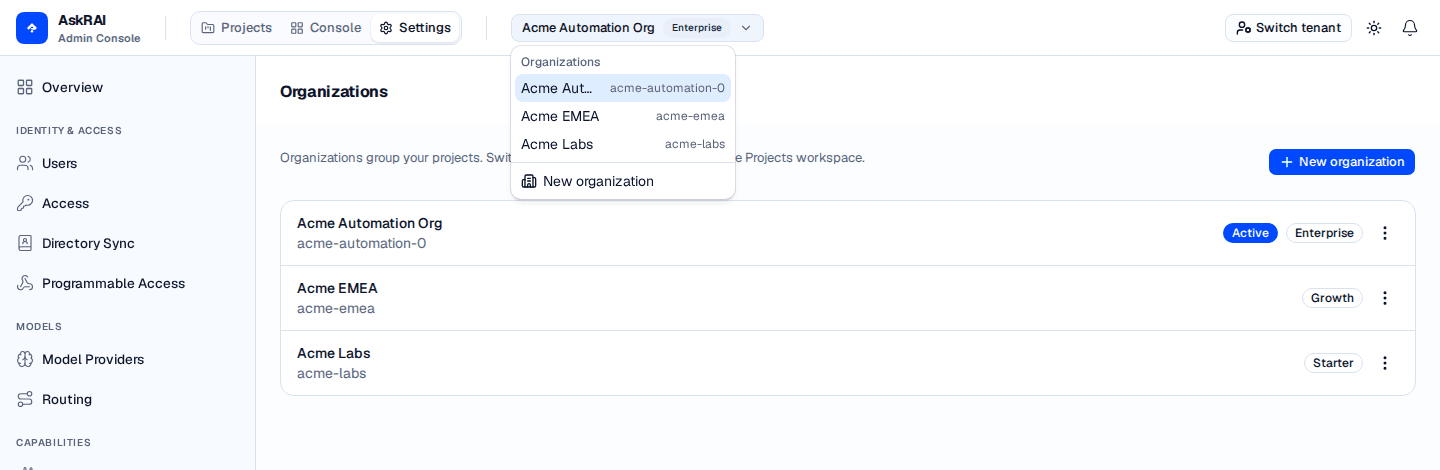
A project always belongs to one organization, and the active organization scopes which projects you see. Switching organizations in the header switcher reloads the Projects plane for the newly selected organization.
Organization → projects — you need at least one organization before you can create a project. If your tenant has no organizations yet, the Projects plane prompts you to Create an organization in Settings first.
One workspace per project — selecting a project opens its workspace, where the Overview, Team, Interactions, Activity, and Budget tabs live.
Team and budget — every project tracks the people and agents working on it (the Team tab) and an optional spending budget.
A live team — the Interactions tab runs the project's agents and people as an autonomous workspace, with messages, a task board, and Start/Stop controls.
Projects are scoped to the active organization. If the project list looks wrong, confirm which organization is active in the header org switcher — see Organizations for how the active organization works.
The Projects sidebar lists every project in the active organization. Use it to search, switch between projects, and start a new one.
Search — type in the Search projects… box to filter the list by name or description.
Two groups — the six most recently updated projects appear at the top, unlabelled; the rest are grouped under All projects.
Status at a glance — every entry shows the project name and a status badge (Active, Paused, or Archived). The top group also shows when each project was last updated.
Select a project — click any project to open its workspace on the right.
When the active organization has no projects yet, the workspace shows an empty state with a New project button to create your first one.
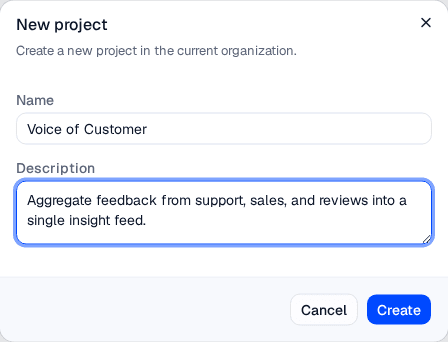
Click the + button next to the Projects heading in the sidebar (or the New project button in the empty state) to open the create dialog.
New projects are created in the current organization; you set the status and budget afterward by editing the project.
Open the create dialog. Click + in the Projects sidebar. The dialog notes that the project is created in the current organization.
Name the project. Enter a Name — this is required and identifies the project throughout the workspace.
Add a description (optional). Use the Description field for a short summary of what the project is for.
Create. Click Create. The new project is added, selected automatically, and opens to its Overview tab.
New projects start as Active, with no budget and an Idle check-in of 60 minutes. To set a status, allocate a budget or change the idle check-in, edit the project after creating it.
Selecting a project opens its workspace. The header shows the project name and status, its description, the Start / Pause / Stoprun controls, and Edit and Delete actions. A stats strip summarizes the People & agents count, Interactions, and Budget usage. Below, five tabs organize the work.
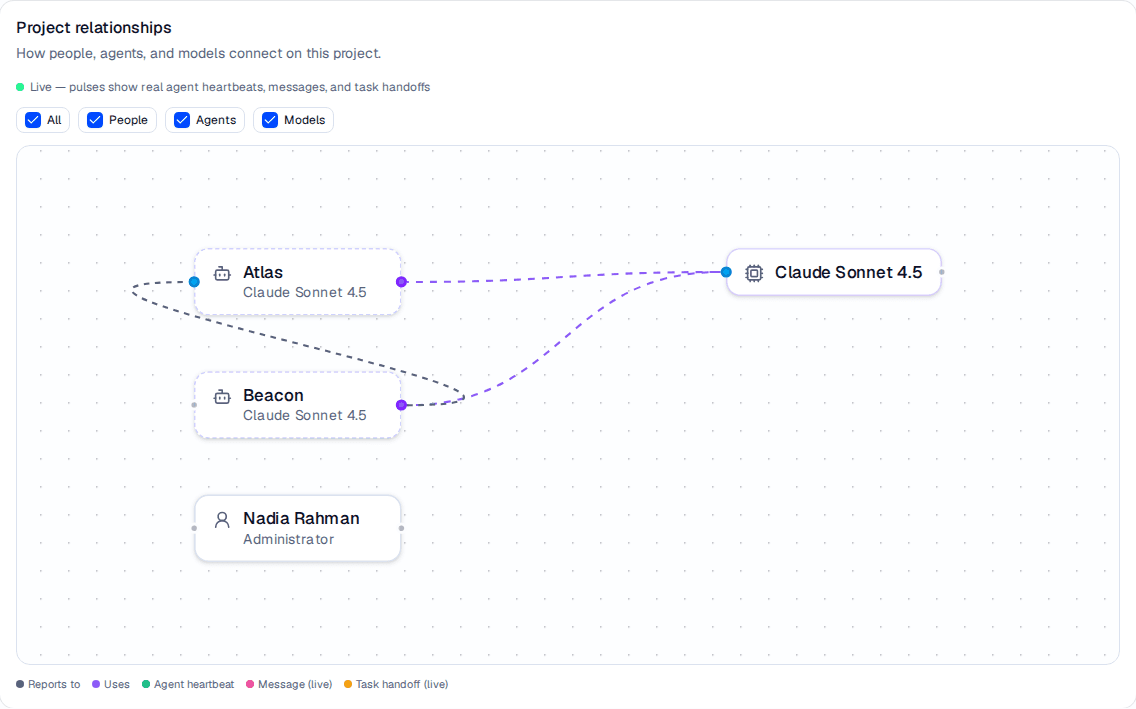
The Project relationships card on the Overview tab draws the project as a graph: who is on the team, who reports to whom, and which model each agent runs on. While the team is running, it also animates the work as it happens.
The graph places the team on the left and their models on the right. Beacon reports to Atlas, and both run on the same model — so it collapses into a single shared node. The green outline is a beat in progress.
Start the team and the graph goes live — the status line reads Live — pulses show real agent heartbeats, messages, and task handoffs. Three kinds of pulse then light up the graph as the events actually happen:
Pulse
What just happened
Agent heartbeat
The agent glows green — it is taking a beat right now
Message (live)
A line flashes from the sender to the recipient. A broadcast to everyone glows the sender instead
Task handoff (live)
A line flashes from the task's creator to its new assignee, labelled with the task's title. It is drawn from the creator even when someone else did the reassigning
Each pulse is an event the team produced. Each agent beats on its own configured cadence — five minutes by default, and as often as every 30 seconds — so a healthy graph is calm rather than busy. If you see nothing at all, check that the team is Running and that your agents have Automatic heartbeat enabled.
Focus a member. Click a person or agent to focus it. Everything it connects to stays sharp, everything else dims, and a hint reads Showing relationships for …. Click the canvas to clear it.
Filter. Untick People, Agents, or Models to hide that kind of node, or use All to toggle everything at once.
Pan and zoom. Drag to pan, scroll or pinch to zoom. Nodes cannot be dragged.
If the project has no team yet, the card reads No team yet — add people and agents on the Team tab to populate it.
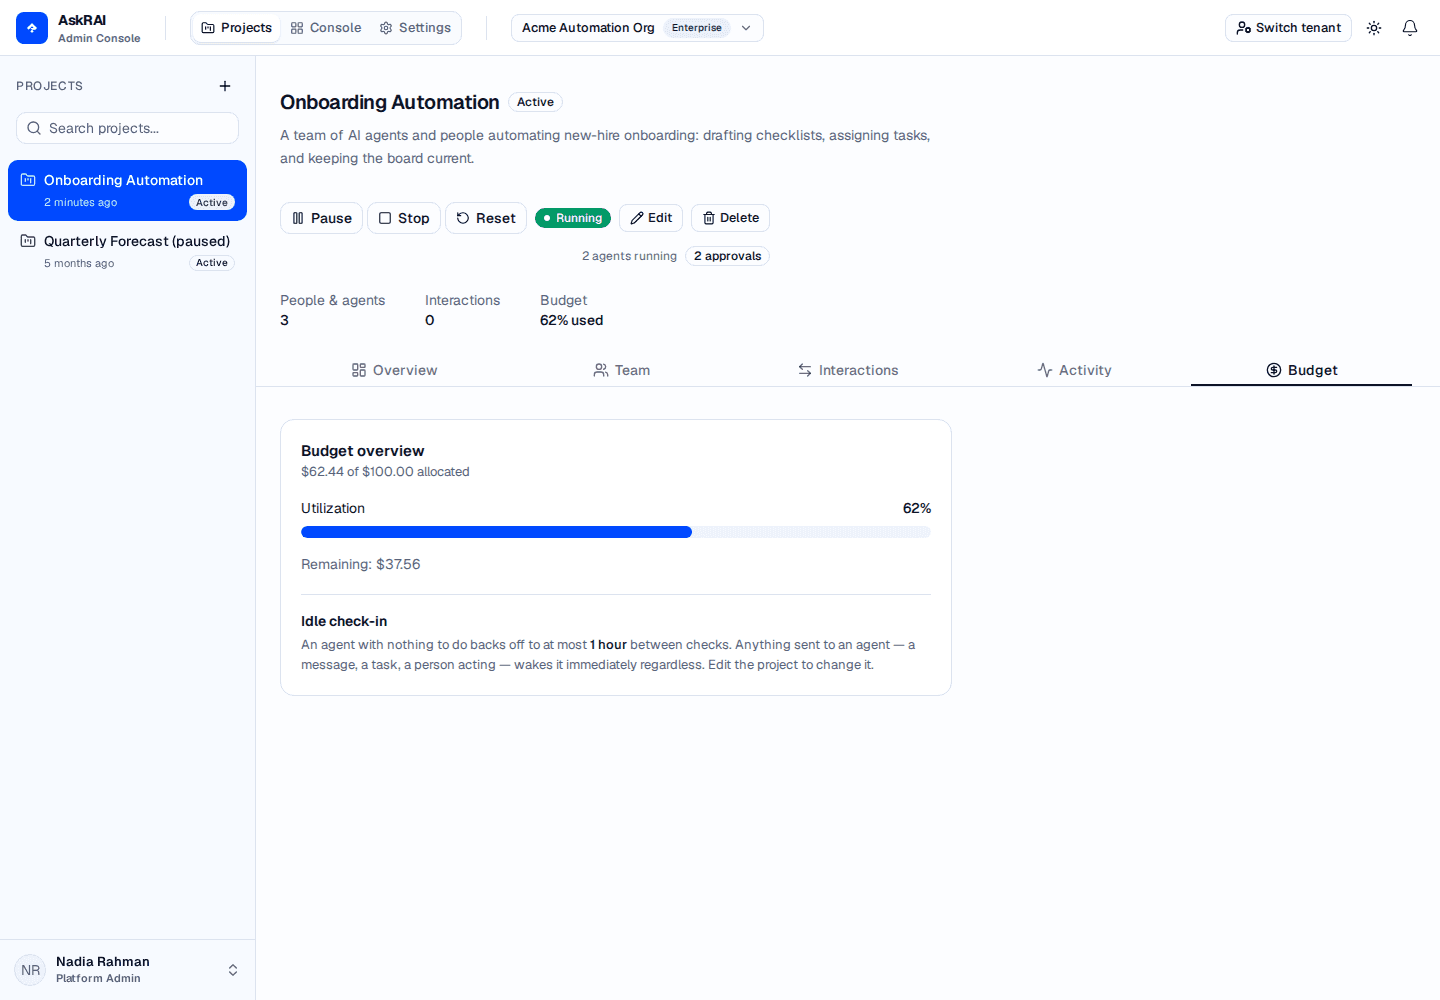
The Budget tab tracks spending against the project's budget total.
The Budget tab does not update live the way the Overview and Interactions tabs do: it shows what had been spent when the page loaded, so reload it to see a running team's latest figure.
When a budget is allocated, the Budget overview shows the amount used against the total (for example $62.43 of $100.00 allocated), a Utilization bar with the percentage consumed, and a closing line that reads Remaining: $37.57, At budget limit, or Over budget by $20.00. If no budget is set, the tab reports that spend is uncapped, tells you how much has accrued so far, and prompts you to edit the project to allocate one.
Spend is reported to the cent, and small amounts are never rounded away: a project that has spent a fraction of its budget total reads <1% used rather than 0%, one that is nearly exhausted reads >99% used rather than 100%, and an amount under half a cent reads <$0.01 rather than $0.00. The project header carries the same figure as a Budget stat.
The budget total is the only budget value you set directly. Usage accrues automatically as the project's agents beat — each beat is priced from its model's token rates, which you can set per model on Model Providers. The cap is measured against the project's lifetime spend; it does not reset at the start of a month.
When a project exhausts its budget, AskRAI hard-stops the whole team: every agent stops, the run state becomes Stopped, and the project's status is set to Paused. A Budget exhausted badge appears in the header and Start is disabled. Recovery therefore takes two steps — raise the Budget total (USD)and set the status back to Active — because raising the budget alone leaves the project paused.
Beneath the budget, the Budget tab reports the project's Idle check-in — the longest an agent with nothing to do waits between beats.
The readout states the ceiling in plain units, and says outright that a wake overrides it.
This is the other half of what a team costs. The budget total bounds the total a project may spend; Idle check-in bounds the rate a team that has finished its work keeps spending, because a beat is a model call whether or not there is anything to do. An agent whose beats change nothing doubles its own interval toward this ceiling; anything sent to it — a message, a task, a person acting — wakes it immediately regardless. See Agent Heartbeat for the full rule.
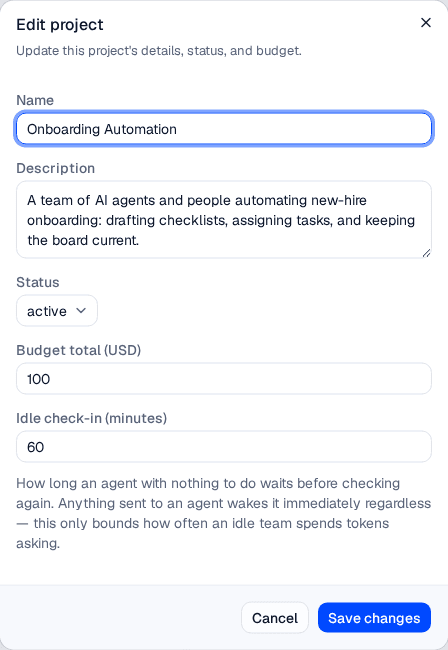
Click Edit in the project header to open the edit dialog. Editing is where you set the project's status and budget.
The edit dialog adds Status, Budget total (USD) and Idle check-in (minutes) on top of the name and description. The Status selector shows the stored value — active, paused or archived — while the open list shows the names below.
The edit dialog exposes these fields:
Field
Description
Name
The project's display name (required)
Description
A short summary of the project's purpose
Status
Active, Paused, or Archived
Budget total (USD)
The ceiling on total project spend, in US dollars. Must be greater than zero; cents are accepted. Leave it blank for no budget
Idle check-in (minutes)
The ceiling an idle agent's interval backs off to. A whole number of minutes from 1 to 525,600 (one year)
Click Save changes to apply. If you enter zero or a negative number, AskRAI reports Budget total must be a positive number — correct the value and save again. To remove a cap entirely, clear the field rather than setting it to zero.
Idle check-in is validated the same way: a value outside 1 to 525,600, or one that is not a whole number, is refused with Idle check-in must be a whole number of minutes between 1 and 525600.
Click Delete in the project header to open a confirmation dialog. Deleting a project is permanent, so AskRAI asks you to confirm.
Deleting a project permanently removes it and cannot be undone. The confirmation dialog names the project and warns that it will be permanently deleted — make sure you have selected the right project before confirming.
Build a project team of people and AI agents, organize them into a reporting hierarchy, and configure each agent's model and behavior from the project's Team tab
The Team tab is where you staff a project with the people and AI agents that do its work, and arrange them into a reporting hierarchy. People come from your directory; agents are configured here with a model and behavior. Open it from the Team tab inside any project workspace.
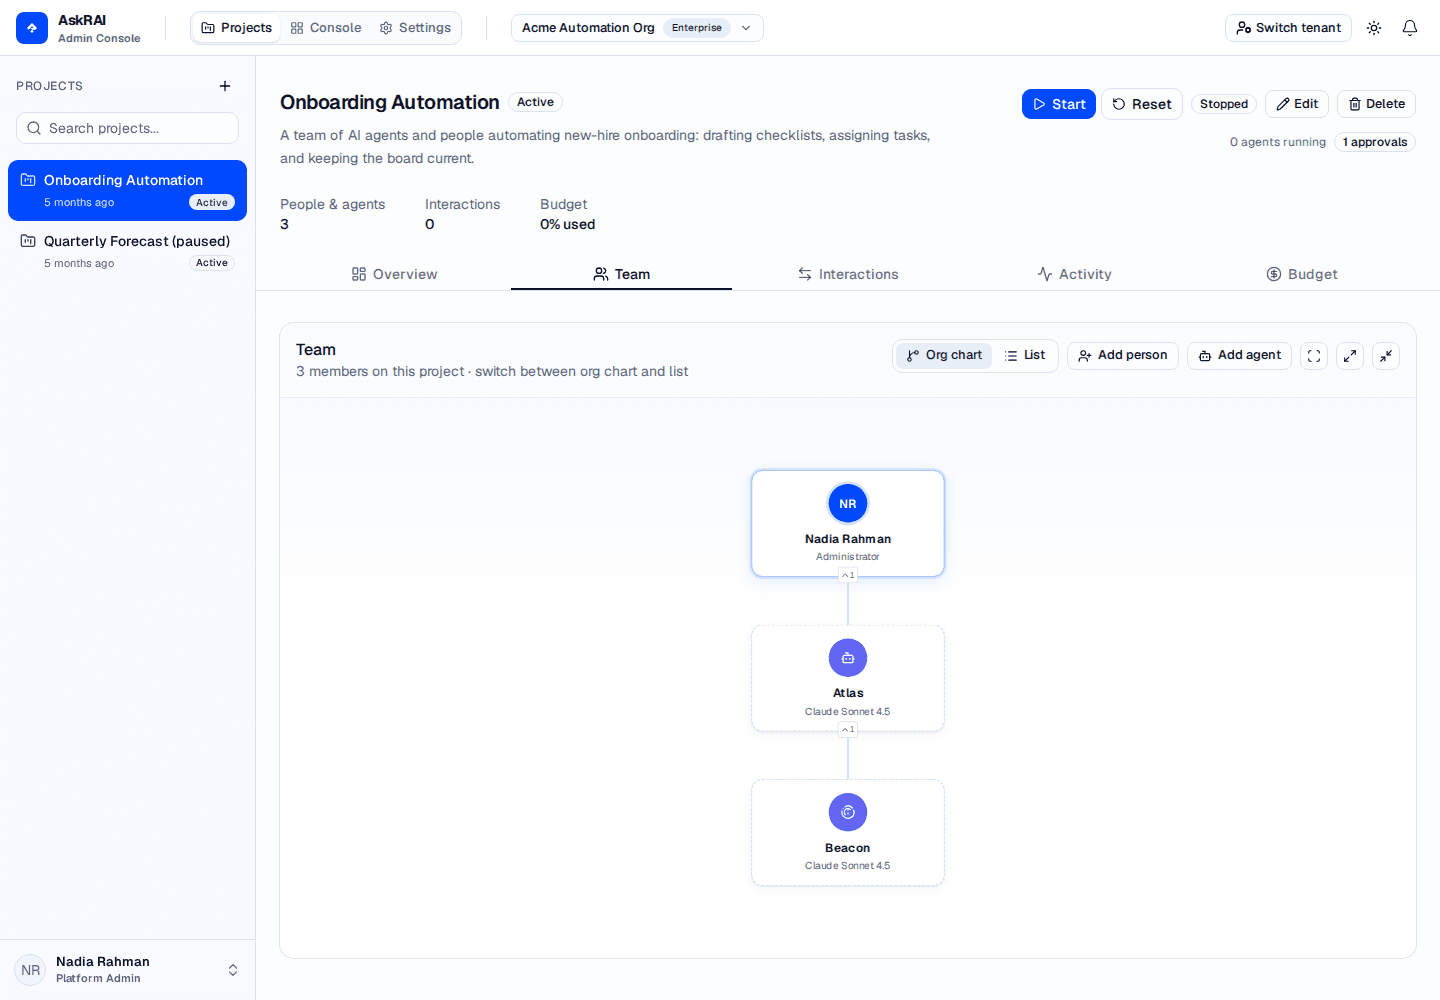
The org chart shows the whole team at a glance — people (solid cards) and AI agents (dashed cards, labeled with their model) connected by reporting lines.
People — members drawn from your organization's directory. Each carries their directory identity (name, email, job title, department).
Agents — AI agents you create on the project, each backed by a model and an optional behavior prompt.
Both kinds share one reporting hierarchy: any member can report to any other member, whether person or agent. The Team header shows the total member count for the project.
Switch between two views of the team using the toggle in the Team header:
Org chart — a visual hierarchy. People appear as solid cards with their initials; agents appear as dashed cards labeled with their model. Paused agents are dimmed, and a dimmed agent is genuinely idle: it is not beating and not spending. Click any card to open that member's details. When viewing the chart, use Fit to screen, Expand all, and Collapse all to navigate large teams.
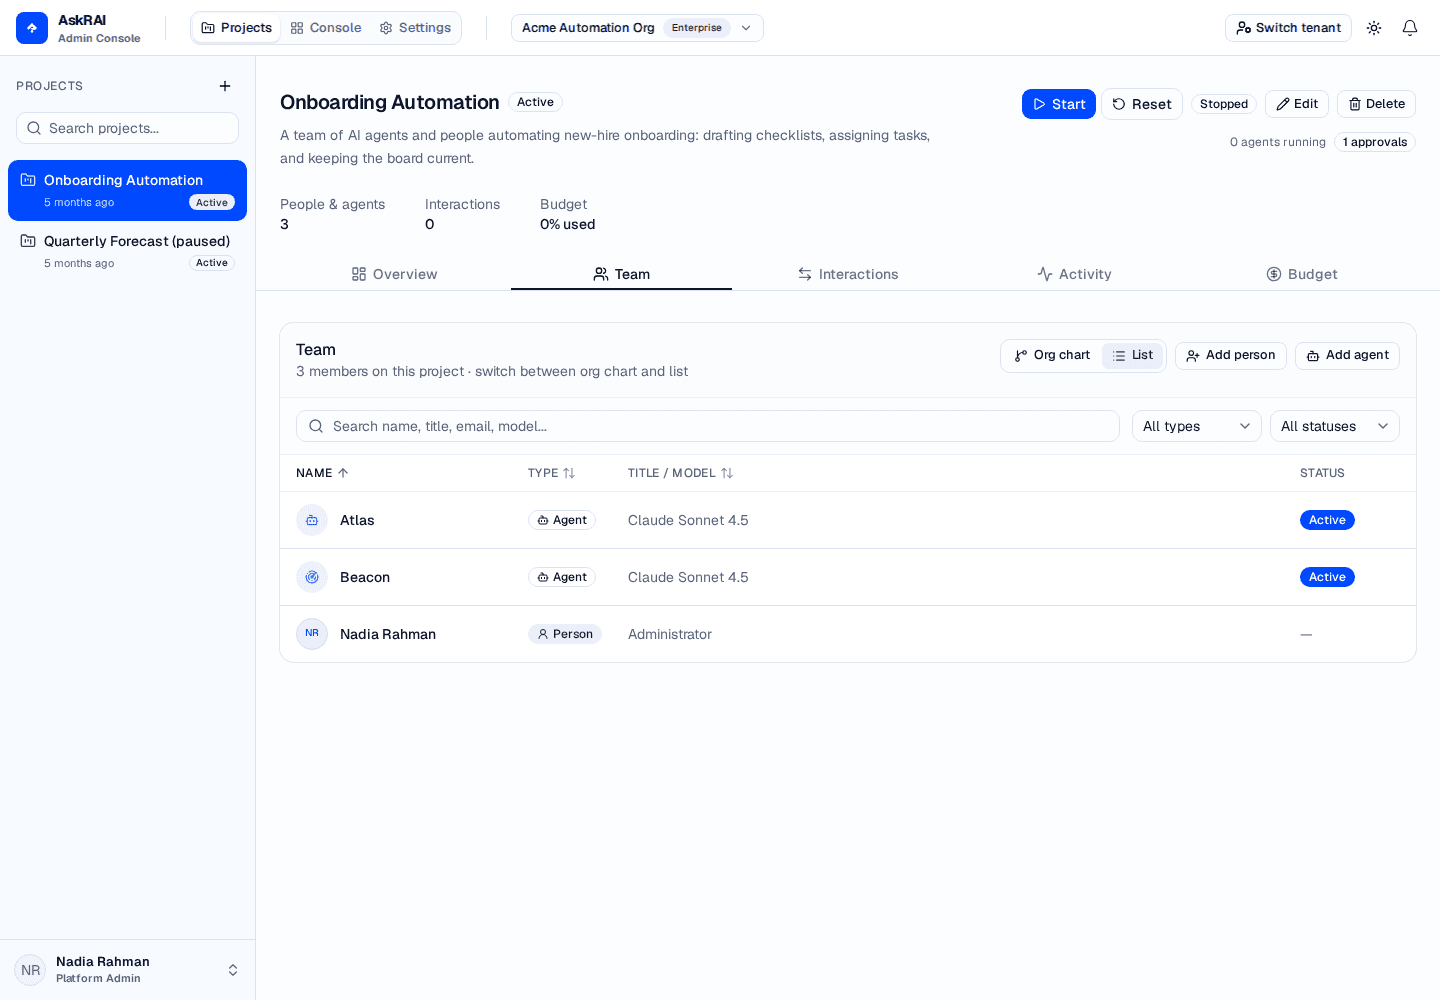
List — a sortable table of every member.
List view shows people and agents together. The Title / Model column holds a person's job title or an agent's model, which is why one column carries both.
In the list view you can:
Search members by name, title, email, or model.
Filter by type — All types, People, or Agents.
Filter by status — All statuses, Active, Paused, or Archived (agents only; people have no status).
Click Add person to assign someone from your directory to the project.
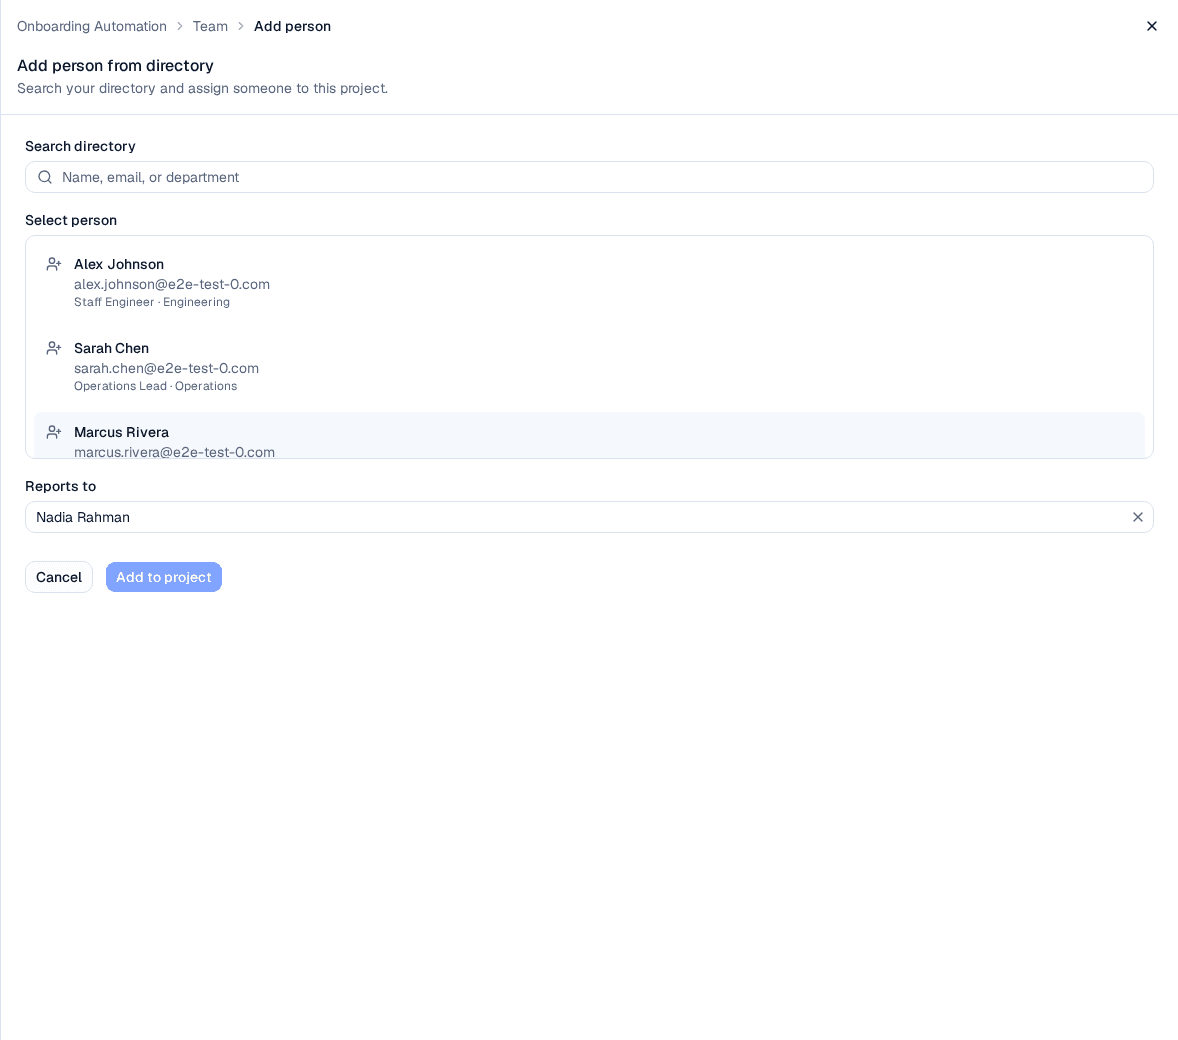
Search your directory, select a person, and choose who they report to before adding them to the project.
Open the panel. Click Add person in the Team header. The panel explains that you are adding someone from your directory.
Search the directory. Type a name, email, or department in Search directory. People already on the project are excluded from the results.
Select a person. Click a candidate in the Select person list to choose them.
Choose a manager. Use Reports to to place the person under another team member, or leave it as No manager (top level).
Add to project. Click Add to project. The person joins the team and appears in both views.
You choose a person's manager when you add them, and you can change it later: open the person from the org chart or list, pick a new manager under Reports to (org chart) in their Project assignment card, and click Save and close. Agents' reporting lines are editable the same way (see Configuring an agent).
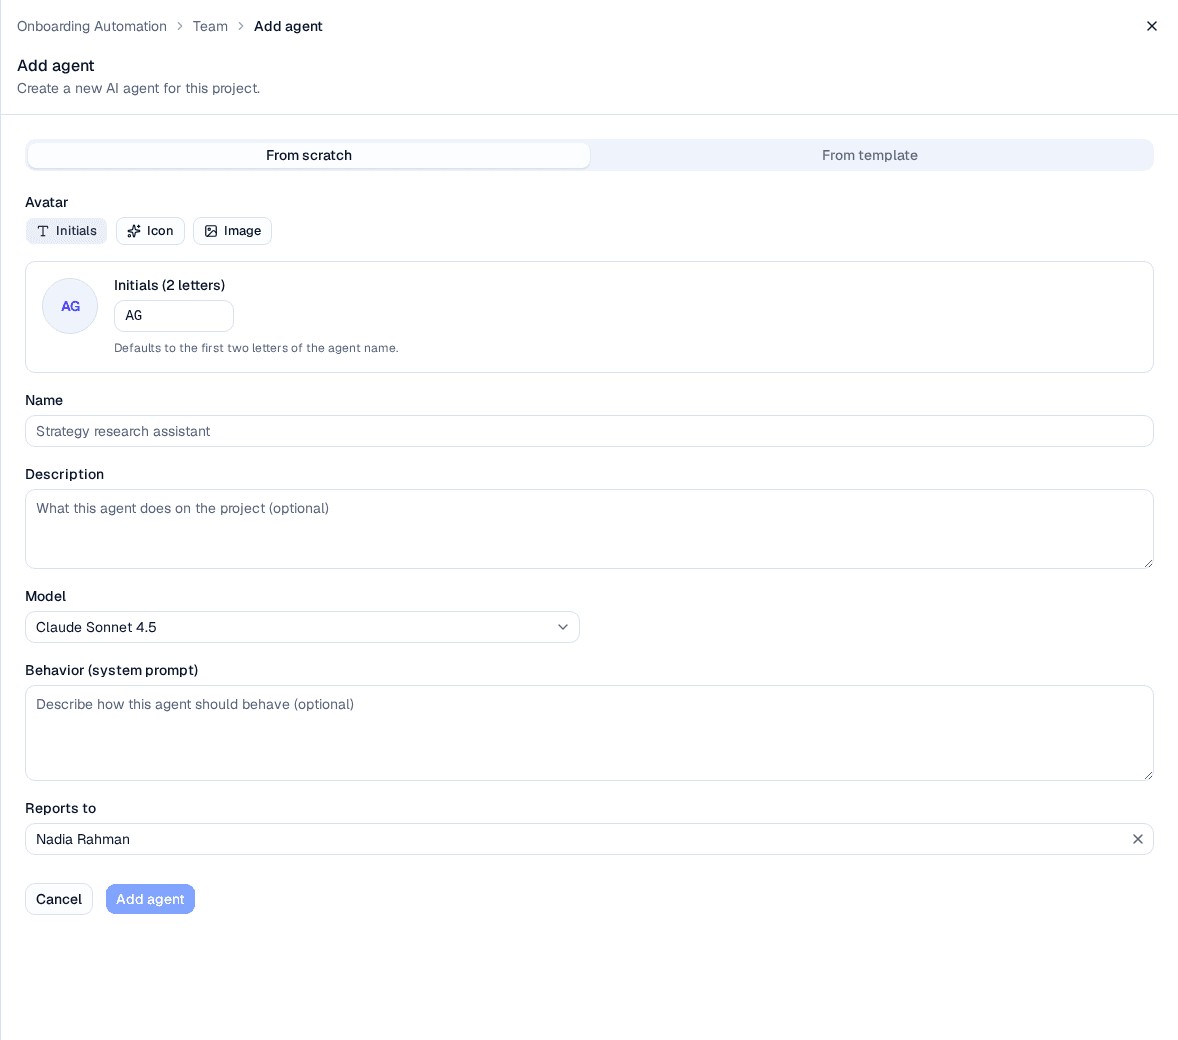
An Initials or Icon avatar (image upload coming soon)
No (defaults to initials)
Name
The agent's display name
Yes
Description
A short summary of what the agent does
No
Model
The model that powers the agent, chosen from the tenant's available models
Yes
Behavior (system prompt)
Instructions describing how the agent should behave
No
Status
Active, Paused, or Archived (set when editing). A Paused agent stops beating and stops spending. Setting Status back to Active is not on its own enough to restart it — the pause is recorded on the agent's run state, so use Resume on its Heartbeat tab afterwards. Archived is the permanent form of the same thing
Click an agent — a card in the org chart or a row in the list — to open its detail panel.
The reporting line is what the org chart draws, and it is how a manager agent knows whose work to oversee: each of its beats includes what its direct reports have been doing.
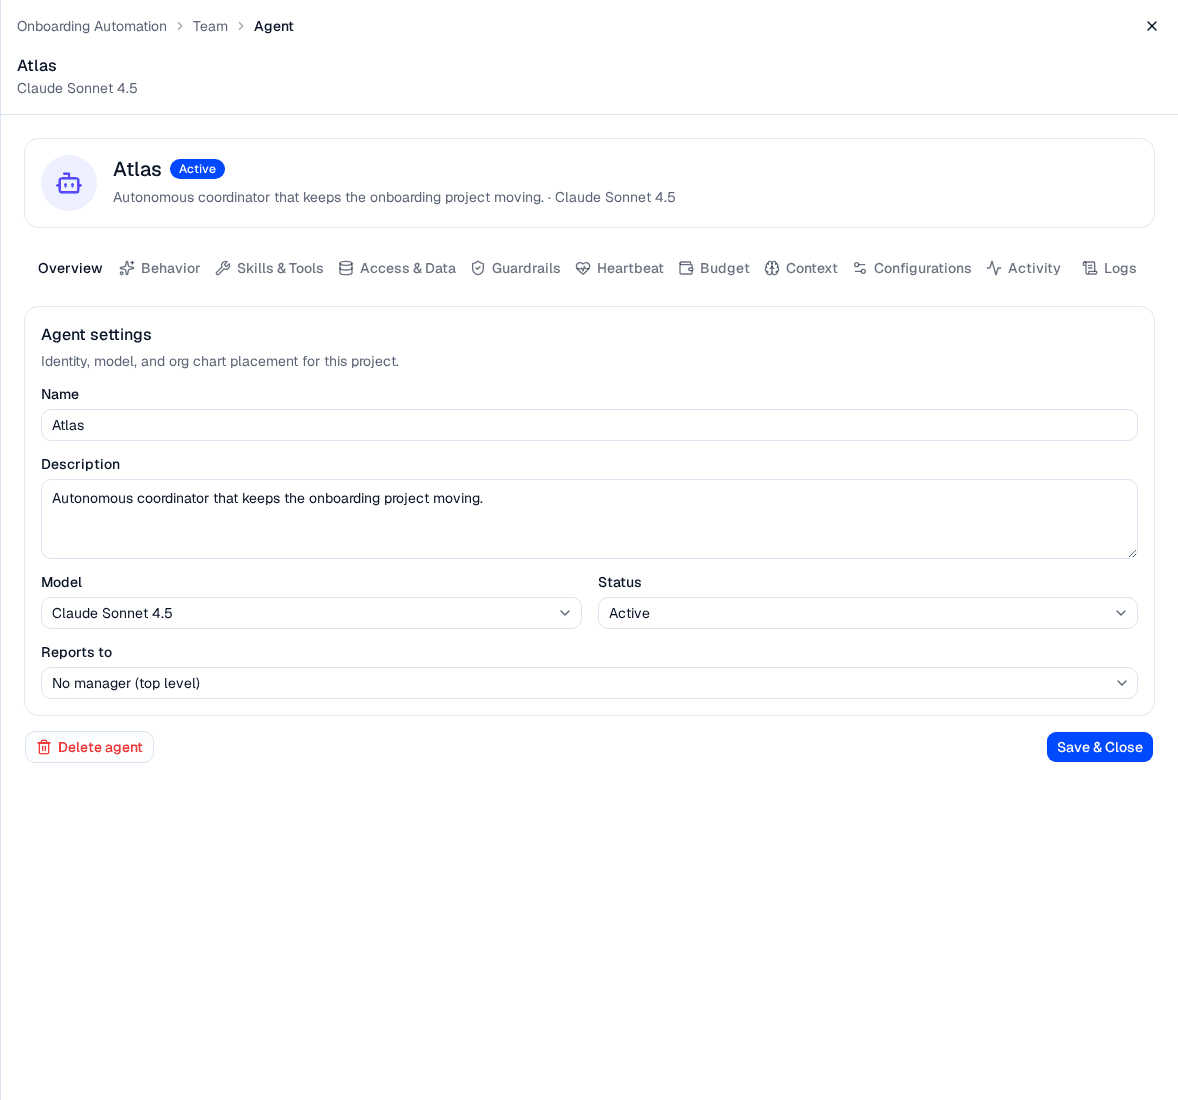
The agent's avatar sits in the panel header — click it to open Edit avatar and choose an Initials or Icon avatar (image upload is coming soon). Below the header, the settings are split across two tabs, each saved with Save & Close:
The Overview tab is the agent's identity: Name, Description, Model, Status (Active, Paused, or Archived — see Status), and Reports to. An agent's reporting line is editable here at any time; AskRAI prevents a reporting loop by excluding the agent and everything beneath it from the options. This tab also holds Delete agent.
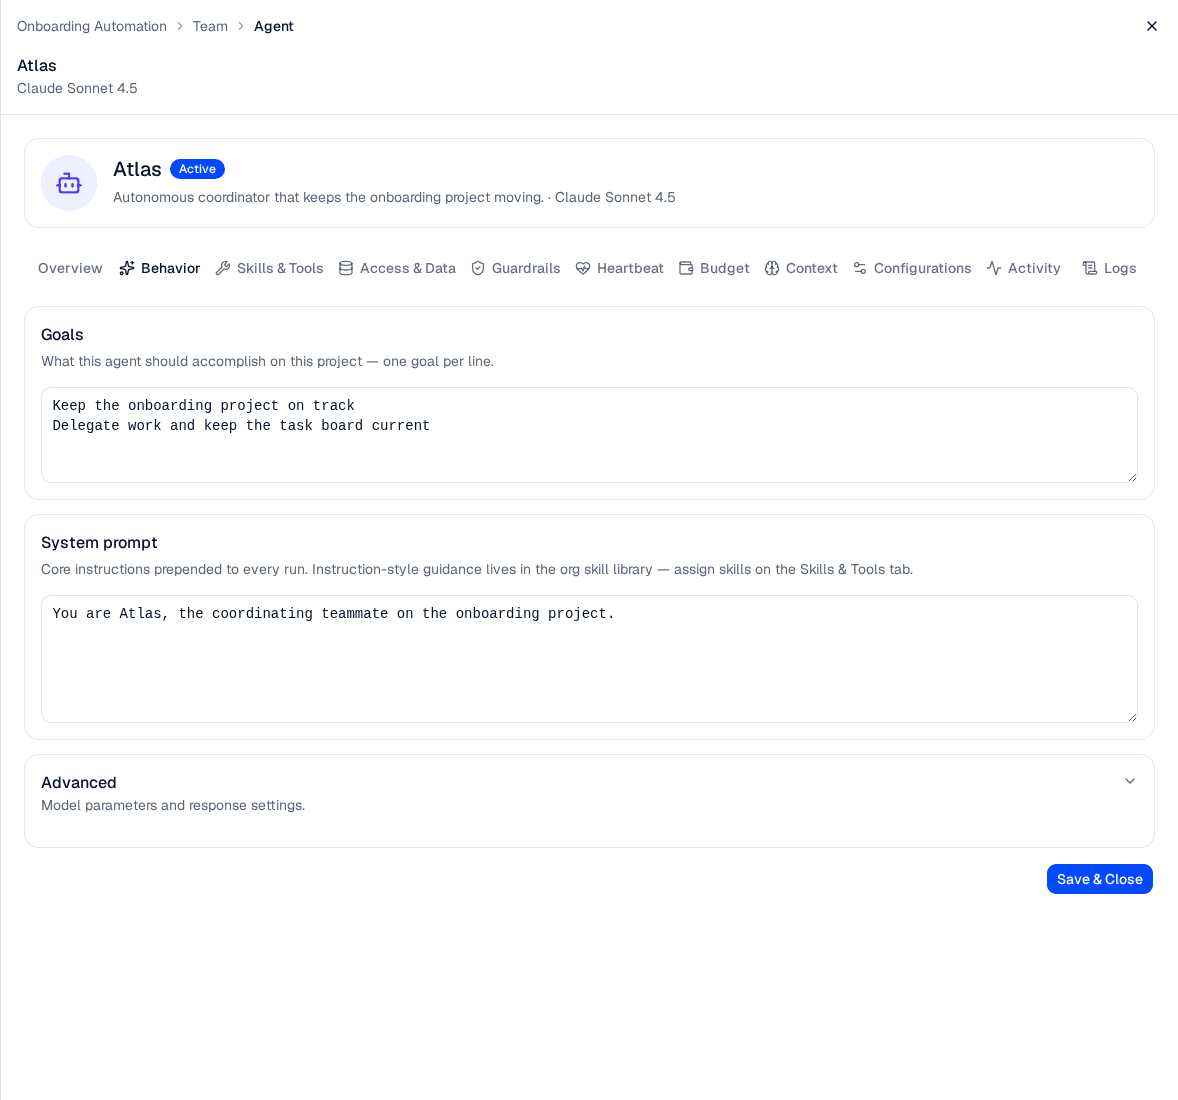
The Behavior tab shapes how the agent works: Goals (one per line), the System prompt prepended to every run, and an Advanced section for model parameters (temperature, max tokens, top P) and response settings (format, language, citation style).
Goals are what the agent is told to pursue on every beat, so editing them changes the agent's behaviour from its next beat onward — there is nothing to restart.
The Heartbeat tab is where you set how often the agent acts and how much it may do without you — see Agent Heartbeat & Autonomy.
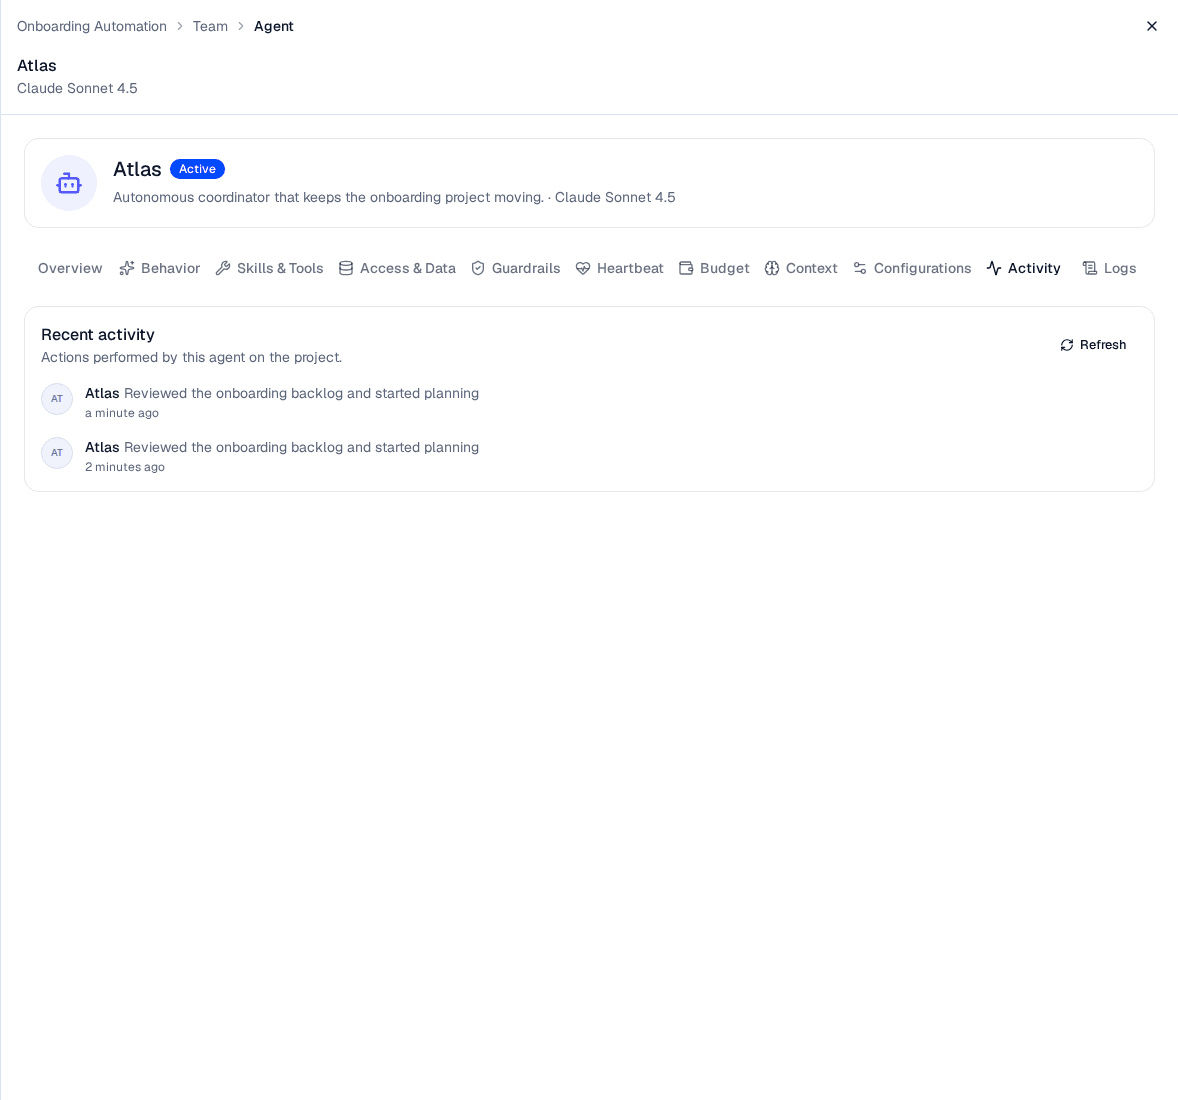
The Activity tab answers what has this agent been doing? It lists the actions the agent has taken on this project — beats, messages it sent, tasks it created, and status changes it made — newest first.
The Activity tab is the agent's own slice of the project activity feed — the fastest way to see whether an agent is pulling its weight.
The feed is a snapshot rather than a live stream — click Refresh to pull the latest actions. It shows the 50 most recent.
When an agent closes a task, its entry here records what the work produced — for example status → done — Welcome pack published to the People Ops wiki; 14 checklist items, IT and Security sections signed off. Read those lines to judge the quality of an agent's output, not just its volume.
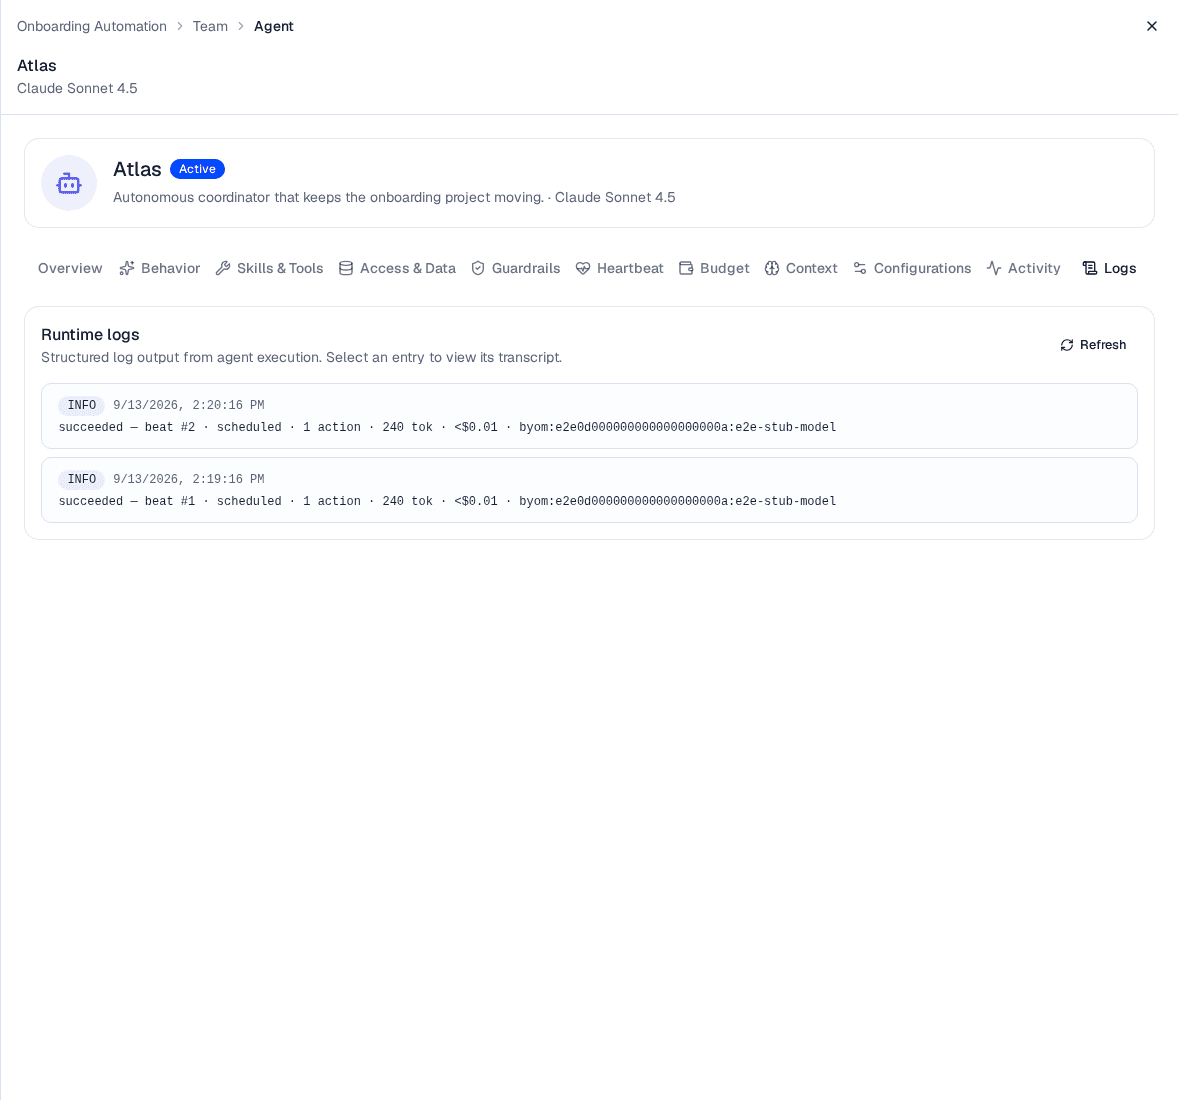
The Logs tab is the operational view: one entry per heartbeat, with the cost and outcome of each.
Each log entry is one beat — its outcome, what triggered it, how many actions it took, and what it cost. The failed beat records why.
Every entry carries a level badge, a timestamp, and a one-line summary in the form succeeded — beat #42 · scheduled · 3 actions · 4,830 tok · $0.02 · gpt-4.1. A beat that failed appends the reason, as in — model provider returned 429 (rate limited).
Level
Meaning
INFO
The beat succeeded, is still running, or is queued
WARN
The beat timed out or was cancelled
ERROR
The beat failed — the summary line ends with the error
Select any entry to open its transcript — the full record of what the agent read, reasoned, and decided on that beat. Some beats have no transcript captured, in which case the dialog says so.
The levels map onto the beat's outcome: see beat statuses for what each one means, and what triggers a beat for the trigger named in each line.
The Logs tab is where a misbehaving agent gives itself away. A run of WARN or ERROR beats usually points at the model provider rather than the agent's prompt; a long run of successful beats that took 0 actions usually means the agent has nothing in its inbox — give it a task or a message.
Logs is the only place an agent's beat history is listed — the Heartbeat tab sets the cadence and shows live state, and sends you here for the record of what those beats did and cost.
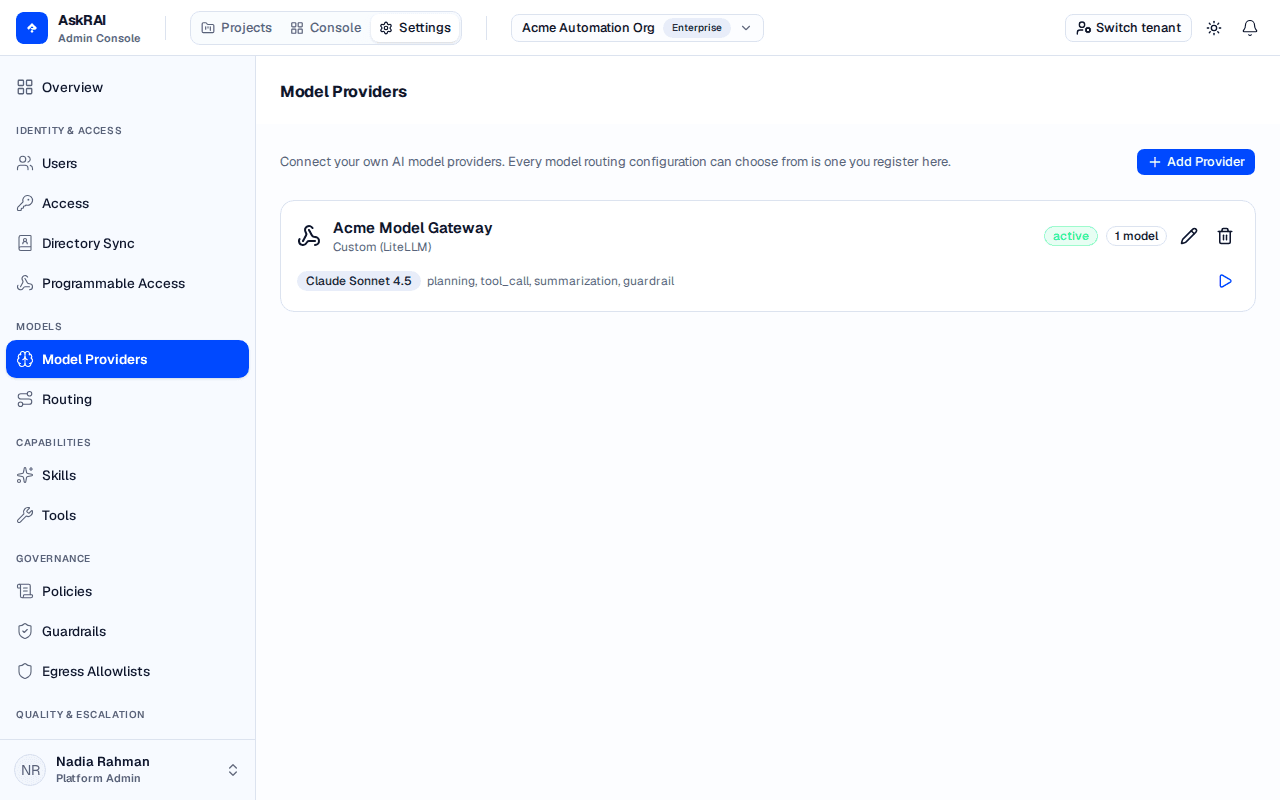
If an agent's model later becomes unavailable (for example, its provider is removed), the agent keeps working with its current selection, shown as (unavailable) until you pick a new model. See Model Providers to manage which models your tenant can use.
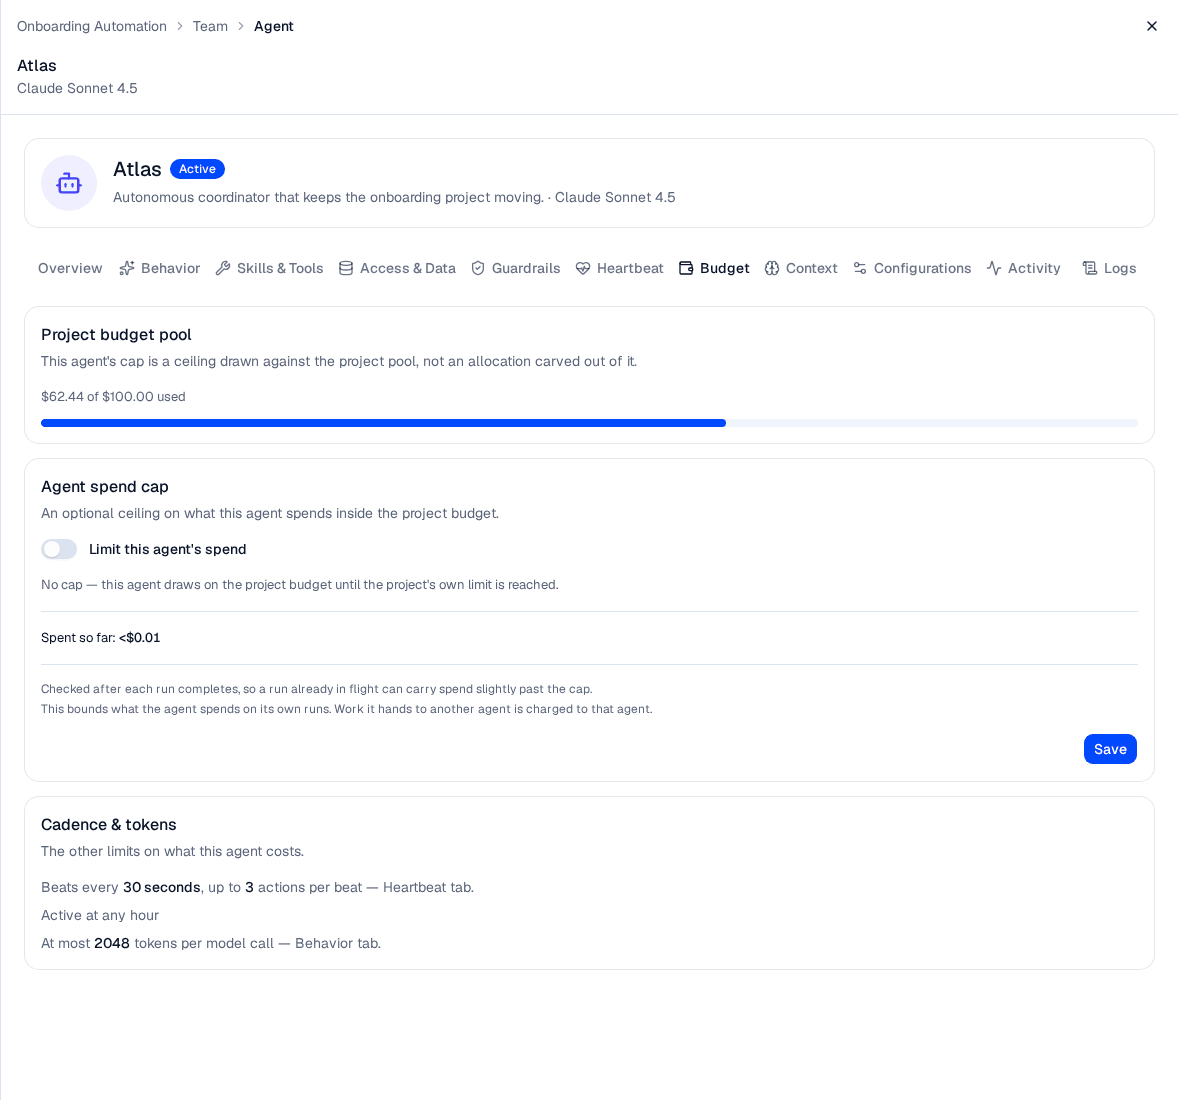
The agent's Budget tab is where you bound what a single agent costs, inside the budget the whole project runs against.
A cap is a ceiling drawn against the project pool — not an allocation carved out of it.
Project budget pool. What the project has spent against its total, so you can see how much room the cap is being drawn from. If the project itself is out of budget, the card says so — no agent on the team runs until the project budget is raised and its status is set back to Active, whatever its own cap says.
Agent spend cap. Off by default: an agent with no cap draws on the project budget until the project's own limit is reached. Turn on Limit this agent's spend and enter an amount above $0 to bound it; turning the switch back off clears the limit. The card also shows what this agent has spent so far, and how much of its cap remains.
Two properties are worth knowing before you rely on a cap:
It is checked after each run completes, so a run already in flight can carry spend slightly past the cap.
It bounds what this agent spends on its own runs. Work it hands to another agent is charged to that agent.
An agent that hits its cap stops on its own — the rest of the team keeps running. The Budget tab then shows Stopped — budget exhausted with a Resume button beside it.
Raise or clear the cap first, then press Resume. Pressing it while the cap is still below what the agent has spent is refused with Agent budget is exhausted, which tells you the cap is the step still outstanding. Resume returns this agent to its schedule and leaves the rest of the team where it is — unlike Start in the project header, which restarts every agent.
Cadence & tokens. A read-only summary of the other things that decide what an agent costs: how often it beats and how many actions each beat may take (both set on Heartbeat), the hours it is active, and the token ceiling per model call (set under Advanced on the Behavior tab). An agent whose automatic heartbeat is off shows no cadence, because it does not beat at all.
Click a person in the org chart or list to open their detail panel. Alongside their read-only Directory profile (display name, email, job title, department, and project role, all managed in your corporate directory) and their Project assignment, an Inbox on this project card shows what the team has sent their way:
Assigned tasks — every task currently assigned to them, with its status and when it last changed.
Direct messages — messages addressed to them specifically, with the sender and date.
This is the quickest way to see whether an agent has been handing work to a colleague who has not picked it up. Agents have no inbox card — use their Activity and Logs tabs instead.
The org chart is built from each member's reporting line, which can span both people and agents:
People and agents alike are assigned a manager when added, and you can change it later from the member's detail panel.
No loops — a member can't be set to report to one of its own reports.
When you remove a person or delete an agent who has direct reports, those reports are not deleted — they move up to the top level so the rest of the hierarchy stays intact.
Remove a person — open the person's detail panel and click Remove from project, then confirm. The person is removed from the team but remains in your directory.
Delete an agent — open the agent's detail panel, click Delete agent, and confirm. The agent is permanently removed from the project.
In both cases, any direct reports move to the top level of the org chart.
Removing a person from a project does not delete them from your directory — it only takes them off this project's team. Deleting an agent is permanent and cannot be undone.
Organizations — the organizations that contain your projects
Agent Heartbeat & Autonomy
Set how often an AI agent acts and how much it can do without you — configure an agent's cadence, autonomy level, and per-beat limits, and review the beats it has run
An agent works in heartbeats: a beat is a single, bounded turn in which the agent reads its inbox, plans, takes a few actions — sending messages, creating or updating tasks — and then stops until its next beat. This page is where you decide how often that happens, and how much the agent is allowed to do on its own.
Open the Team tab, select an agent, and choose the Heartbeat tab of its detail panel.
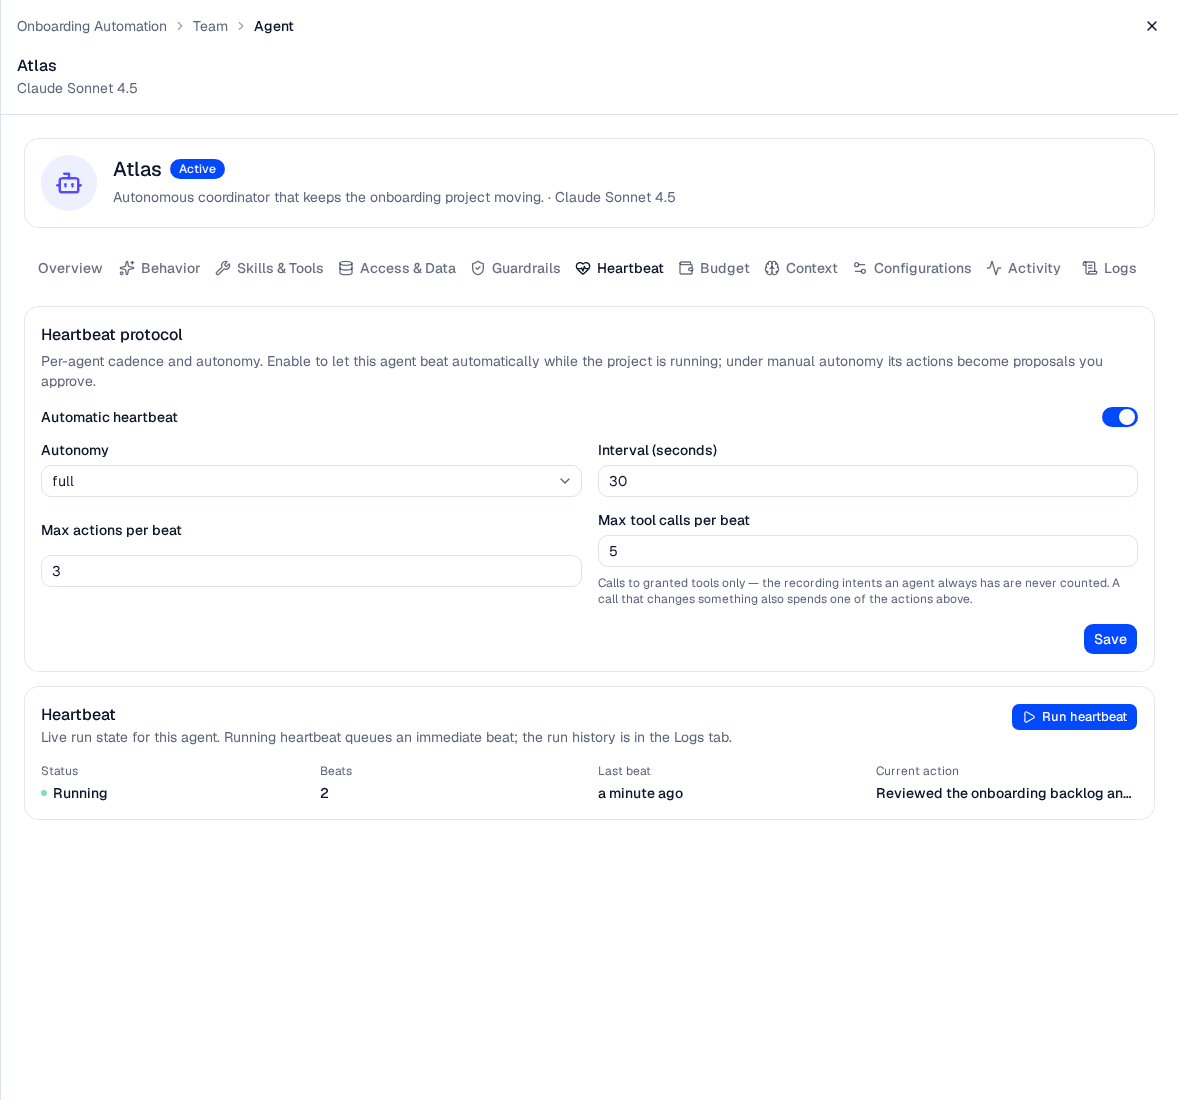
The Heartbeat tab pairs the agent's cadence and autonomy settings with its run state. That state is read when you open the project, not streamed — reopen the agent to refresh it. The history of past beats lives on the Logs tab.
Starting a project's team is not enough on its own. An agent only beats if its ownAutomatic heartbeat is on, and that is off by default — so a new agent sits idle on a running team until you enable it here. This is the most common reason a team appears to do nothing after you press Start.
Enabling it while the team is already running does not start the agent on its own. The team's run controls decide which agents are beating, and they decide it at the moment you press Start. After saving the setting, Stop and then Start the team — that is what puts the agent into the beat schedule.
An agent's autonomy decides what happens to the actions it produces on each beat.
Autonomy
Behavior
Manual approval
Every action except an activity post becomes a proposal you approve or reject before it applies; activity entries always apply, being a log rather than a change. New agents default to manual.
Suggest
Actions apply automatically, within the agent's per-beat limits.
Full autonomy
Actions apply automatically, within the agent's per-beat limits.
Suggest and Full autonomy behave identically today. Every gate in the platform tests for Manual approval and nothing else, and an applied action writes the same activity entry either way — so choosing Suggest over Full buys no extra review or audit. The only difference is a sentence of instruction the agent is given. Use Manual approval when you want a gate.
The Heartbeat protocol card configures the agent's cadence. Edit the fields and click Save.
Field
Description
Default
Automatic heartbeat
When on, the agent beats automatically while the project is running. Off by default, so a new agent never acts until you enable it.
Off
Autonomy
The autonomy level applied to this agent's actions. The closed selector shows the stored value — manual, suggest or full — while the open list shows the names below.
Manual approval
Interval (seconds)
The agent's own cadence, from 30 seconds to 24 hours — and the floor the idle backoff never goes below.
300
Max actions per beat
How many actions the agent may take in a single beat (1–20). Caps the work — and cost — of each turn.
3
Max tool calls per beat
How many calls to granted tools one beat may make (1–20). The recording intents every agent already has are never counted, and a call that changes something also spends one of the actions above.
5
Enable automatic heartbeat only after you have set the agent's model and behavior. Start a newly enabled agent on Manual approval so you can review its proposals, then raise its autonomy to Suggest or Full autonomy once you trust how it works.
A beat is a model call whether or not there is anything to do, so an agent that has finished its work does not keep asking at its full rate. A beat that changes nothing doubles this agent's interval, and it keeps doubling — one idle beat after another — up to the project's Idle check-in ceiling, which defaults to 60 minutes and is set when you edit the project.
A beat counts as changing something when it applied an action or raised a proposal for you to decide. A beat that produced nothing — including one that failed — counts as idle.
Three things reset the backoff and put the agent straight back on its own interval:
Anything sent to the agent. A message, a reply, or a task assigned to it. Any of these wakes it immediately and clears the streak — including a nudge that arrives while a beat is already running.
A beat that changes something. Doing real work is itself the reset.
Starting or resuming the team. Every agent comes back on its own interval, however long the team was paused.
The ceiling never speeds an agent up. The backoff is floored at the agent's own interval, so a daily digest agent under a one-hour Idle check-in still beats daily. A ceiling lower than an agent's interval changes nothing for that agent.
Run heartbeat is outside all of this: a beat you run by hand neither moves the schedule nor resets the idle streak, whatever it does. Use it to test an agent without disturbing its cadence.
It overrides the run state — it works on a stopped project — but not the agent's own configuration. An agent whose Status is Paused or Archived, or one over its spend cap, is refused rather than beaten, so a manual beat cannot spend money an agent has been stood down from spending.
The Heartbeat tab shows this agent's run state: whether it is Running, how many Beats it has completed, when its Last beat ran, and its Current action. These are read when the project is opened rather than streamed, so reopen the agent to see the current figures. Click Run heartbeat to queue a single beat immediately — useful for testing an agent without waiting for its timer.
The history is on the agent's Logs tab, not here. Each entry there is one beat, with what triggered it, its outcome, and the actions, tokens and cost it consumed; select an entry to read its transcript.
A beat is triggered by one of several events, shown next to each entry on the Logs tab:
Trigger
What happened
Scheduled
The agent's interval timer came due.
Manual
You ran a beat on demand with Run heartbeat.
Sending the agent a message, replying to it, or assigning it a task does not produce a trigger of its own — it brings the agent's next Scheduled beat forward to now.
Each agent runs on the model you chose for it, including your own bring-your-own model. The Logs tab makes the trade-off visible: compare tokens and cost per beat across agents so you can safely run cheaper models where they perform well.
Set the cadence and the per-beat limits here; read what they cost on Logs, and cap the spend they add up to on the agent's Budget tab.
The interval is 5 minutes but the agent has not beaten in 40
It has backed off — several beats in a row changed nothing, so its interval has doubled toward the project's Idle check-in. Send it something to wake it, or lower Idle check-in on the project.
A new agent never acts on a running team
Its own Automatic heartbeat is off. It is off by default.
Other symptoms and fixes for a team that is not behaving are collected in one place — see Interactions → Troubleshooting.
Team — staff the project with people and agents, and configure each agent's model and behavior
Interactions — run the team, exchange messages, work the task board, and approve proposals
Projects — the project's budget, which hard-stops the team when it is exhausted
Model Providers — the models an agent can run on, and their token prices
Interactions
Run a project's team of AI agents and people as a live, autonomous workspace — start and stop the team, exchange messages, manage a shared task board, watch activity, and approve agent proposals
The Interactions tab turns a project into a live workspace where its AI agents and people collaborate: they message one another, create and hand off tasks, and post activity, all driven by a multi-agent heartbeat loop that you start and stop. Open it from the Interactions tab inside a project, alongside Overview, Team, Activity, and Budget.
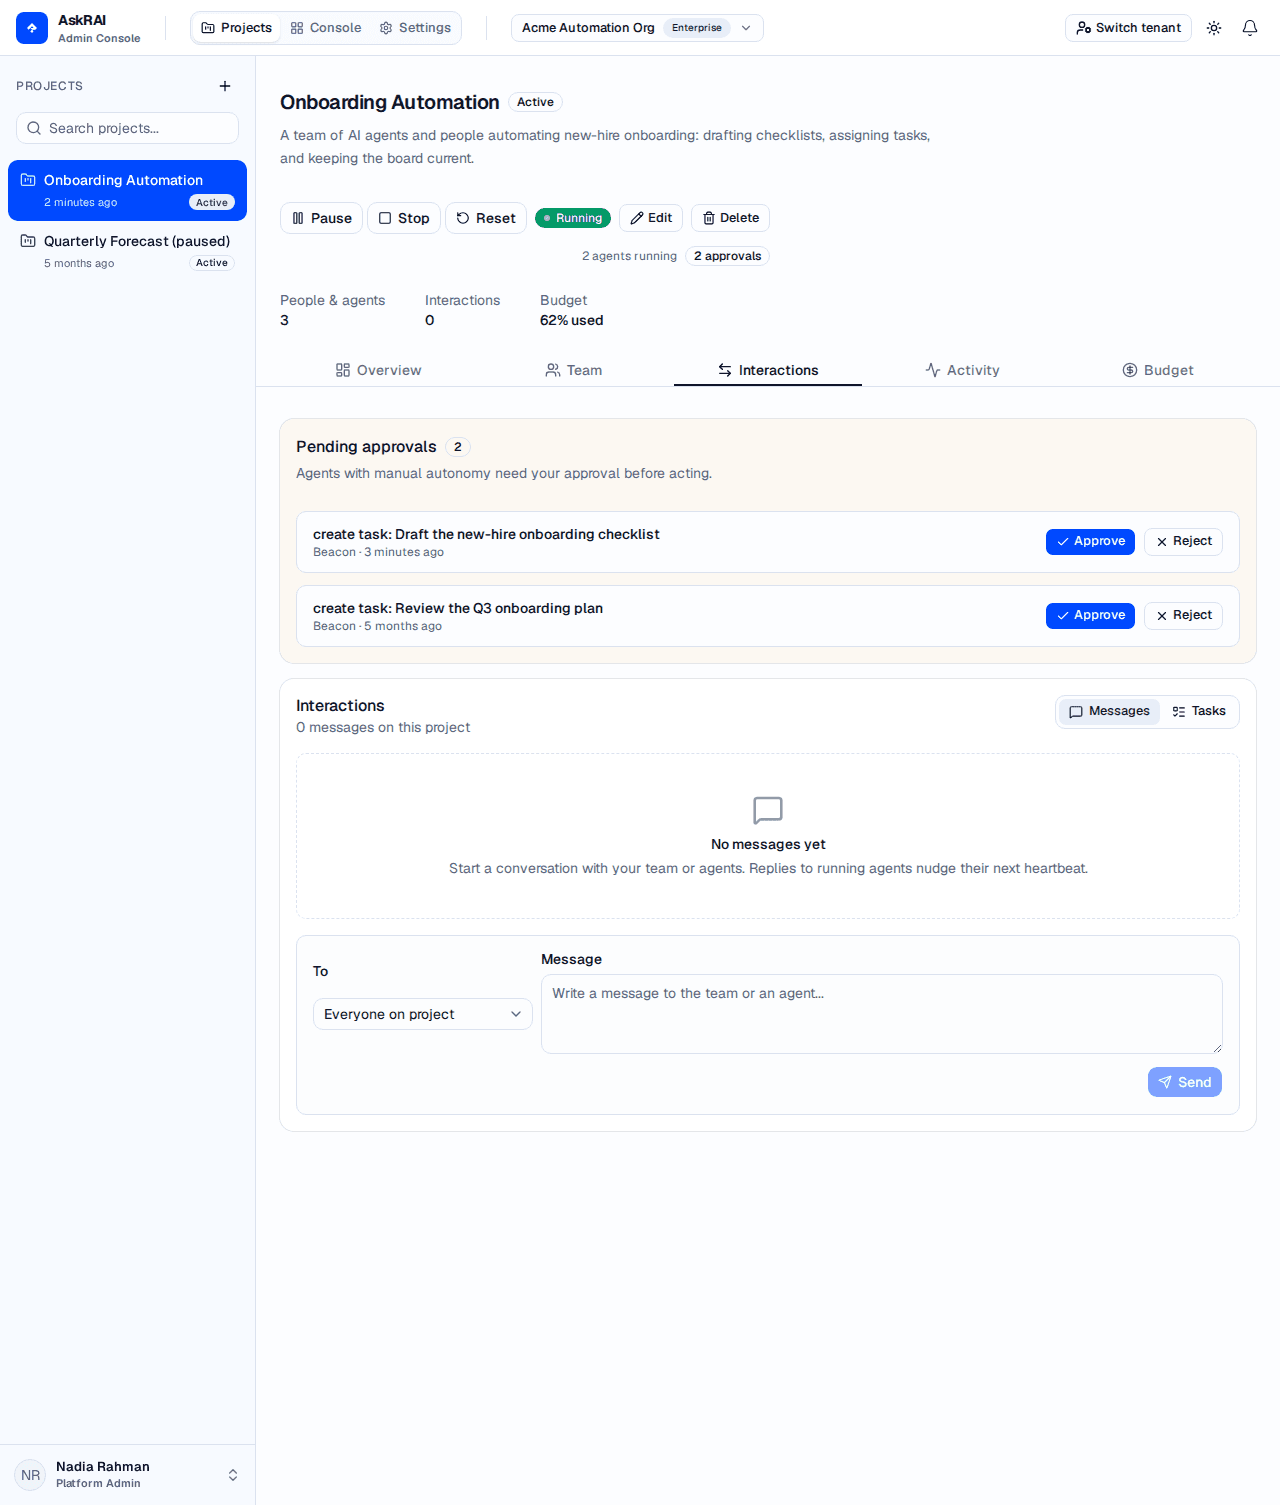
With the team running, the Interactions tab pairs a Pending approvals card with a live message thread between the project's agents — here Atlas and Beacon coordinating a new-hire onboarding run.
Each agent on a project runs a heartbeat: a single, bounded turn in which it reads its inbox, plans, takes a few actions (sending messages, creating or updating tasks, posting activity), and stops until its next beat. Agents coordinate only through the project's shared state — the message thread and the task board — so the team behaves like a set of collaborators working from a common board rather than one monolithic process.
People and agents share one workspace. The same team you staff on the Team tab is the cast here. Agents act on their own cadence; people message, create tasks, and approve agent proposals.
You control the loop. Nothing runs until you Start the team, and a hard budget stop or an explicit Stop ends it. Start requires the project's status to be Active — a paused project is refused however much budget it has.
Autonomy is per agent. Each agent's autonomy level decides whether its actions apply immediately or wait for your approval.
Stopping the team does not erase anything. The message thread, task board, and activity feed keep showing the project's history whether the team is running or not — what stops is the live stream of new updates. While the team is not running, a strip above the feeds reads Team is stopped — showing the latest interactions. Press Start to resume live updates.
The project header carries the run controls: Start, Pause / Resume, Stop and Reset, plus a live run-state badge and a count of how many agents are currently running.
While the team runs, the header shows a green Running badge, the number of agents running, and a badge for any pending approvals.
Start the team. Click Start. The badge turns to Running, agents with automatic heartbeat enabled begin to beat on their own cadence, and the Interactions and Activity feeds go live.
Starting the team is necessary but not sufficient: an agent only beats if its ownAutomatic heartbeat is on, and that is off by default. A brand-new agent therefore sits idle on a running team until you enable it on the agent's Heartbeat settings — and then Stop and Start the team, because which agents are beating is decided when you press Start. If you pressed Start and nothing happened, check this first.
Pause when you need to. Click Pause to hold the team. The badge reads Paused, scheduled beats stop, and the control changes to Resume. The existing messages, tasks, and activity stay visible.
Resume or stop. Click Resume to continue, or Stop to end the run. Stopping returns the badge to Stopped and the Stop button disappears, leaving Start. Your messages, tasks, and activity history stay exactly where they were.
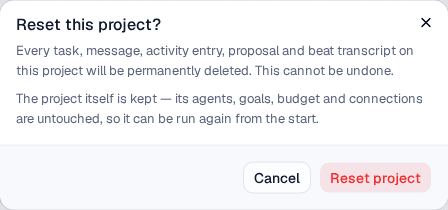
Reset is beside the run controls, and it is the broadest of the three destructive controls on this page — the other two are Delete on a single task card and Clear all on the task board. It clears everything the run produced: every task, message, activity entry, proposal and beat transcript on the project is permanently deleted. This cannot be undone.
The confirmation names both halves — what is destroyed, and what survives.
The project itself is kept: its agents, goals, budget and connections are untouched, so it can be run again from the start. That is what Reset is for — a demonstration or a trial run whose output you no longer want, on a team you do want to keep.
Reset does not stop the team. Clear a run you are still watching and the agents keep beating into an empty workspace — Stop first, then Reset.
A running team spends money on every beat, so AskRAI will stop it for you.
Spending is enforced against the project's budget. When the budget is exhausted, AskRAI hard-stops the whole team: every agent stops, the project run state becomes Stopped, and the project's status is set to Paused. Recovering therefore takes two steps — raise the Budget total (USD)and set the status back to Active — before Start will work again. The second step is not budget-specific: Start refuses any project whose status is not Active, so a project you paused by hand needs it too. Until you do, the Start button is disabled and reads Budget exhausted — increase the budget, then set the project Active to resume.
The Messages view (the default toggle in the Interactions tab) is the team's conversation. A composer sits at the top, with the reverse-chronological thread below. Every message shows its author, an Agent badge for agents, the recipient when it is a direct message, and how long ago it was sent.
Choose a recipient. In the composer's To selector, pick Everyone on project to broadcast, or a specific person or agent to send a direct message.
Write and send. Type your message and click Send. It appears in the thread immediately.
Reply to nudge an agent. Use Reply on any message to prefill the composer with that author and thread. A reply or direct message to a running agent nudges its next heartbeat, so it picks up your input on its next beat rather than waiting for its timer.
Switch the Interactions tab to the Tasks view to see the shared task board — the unit of work agents hand off to one another and to people.
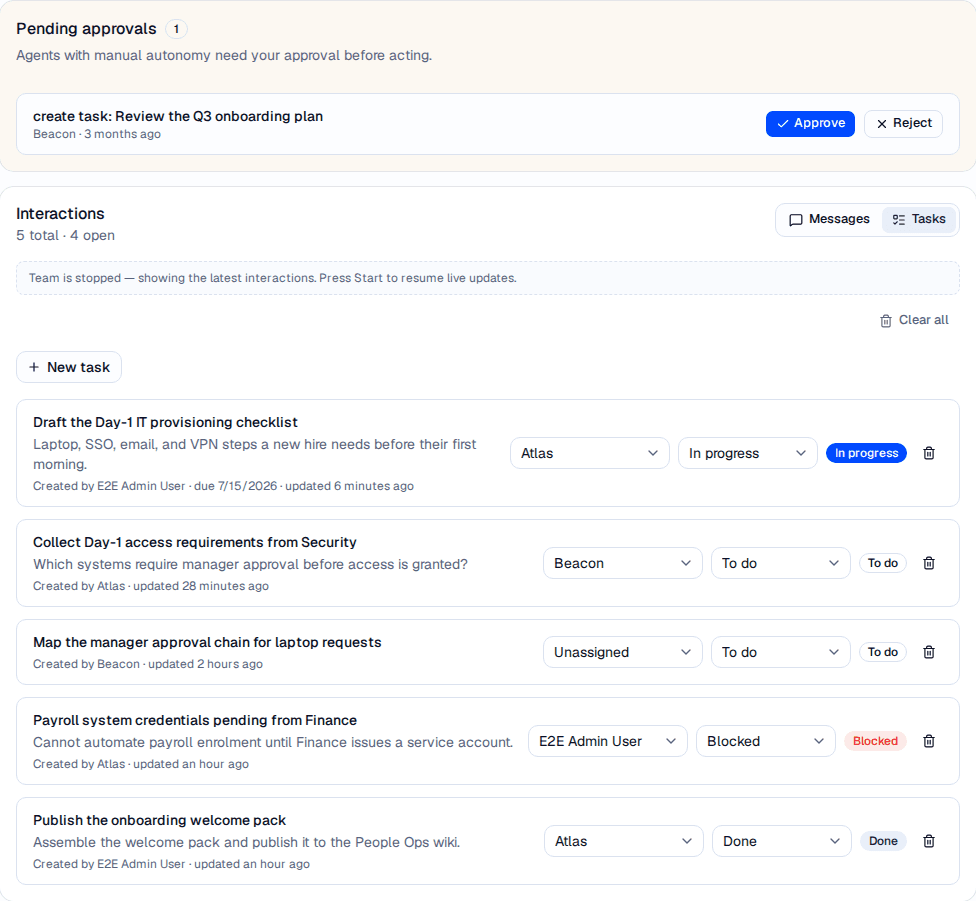
Each task shows its title, description, who created it, when it was last updated, and its status — sorted so in-progress work surfaces first. The header counts the board as 5 total · 4 open.
Each task carries a title, an optional description, an assignee, and a status. Under the title, a meta line records Created by — so you can always tell whether a person or an agent raised the work — followed by a due date if one is set and the time of the last update. Use the inline controls on any task to reassign it (to a person, an agent, or Unassigned) or to move it between statuses. Click New task to add one yourself.
Open the composer. Click New task to expand the inline form.
Describe the work. Enter a Title (required) and an optional Description.
Assign it. Use Assign to to give the task to a person or agent, or leave it Unassigned for an agent to pick up.
Create. Click Create task. It joins the board, and an assigned, running agent is nudged to act on it.
Waiting on a dependency or decision before it can continue.
Done
Completed.
The board sorts In progress first, then To do, Blocked, and Done, and orders each group by most recently updated.
Tasks need only a title. Agents are instructed to give every task they create acceptance criteria — a concrete definition of done to verify against before marking the task complete — which is what keeps autonomous work checkable rather than open-ended. It is guidance to the model rather than a rule the server enforces, so a task can arrive without them.
Assigning a task never makes it happen by itself. An agent only picks work up on its next heartbeat, so if the assignee is not a running agent, AskRAI tells you so as soon as you assign:
Task created, but Atlas won't work it until its heartbeat is running. Start the project to act on it.
The same notice appears (worded Reassigned, but…) when you move an existing task to such an assignee. The assignment always goes through — the message is advisory, not a block.
You will see this notice whenever the assignee is not a currently running agent — including every time you assign a task to a person. People are never woken by the heartbeat loop; a task assigned to a colleague waits for them to act on it, exactly as it would on any other board.
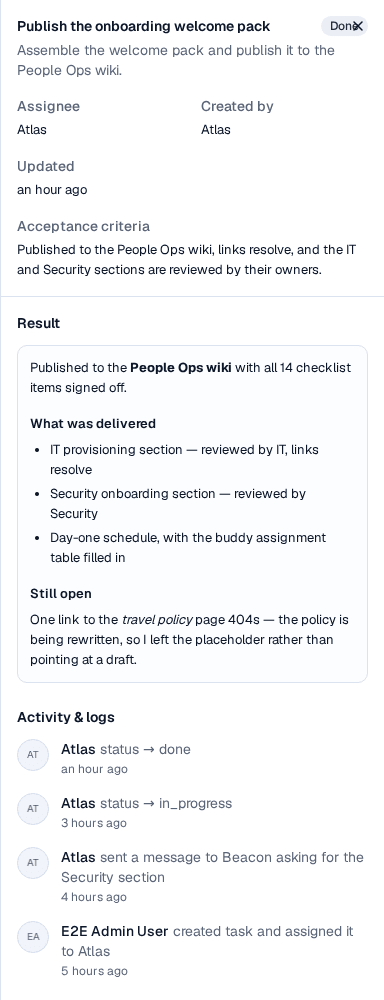
The drawer pairs the task's details with its own activity trail — here the agent's closing entry records exactly what the finished work produced.
The drawer has two parts:
The task's details — its status, description, Assignee, Created by, Due date, when it was last Updated, and its Acceptance criteria when one was set.
Activity & logs — everything that has happened to this task, newest first. Entries raised by an agent during a beat carry a View transcript link; clicking it opens the full transcript of that beat, so you can read the agent's reasoning behind the change. Entries made by a person have no transcript. Use Load More to page back through a long trail.
Where an agent's result shows up. When an agent finishes a task, it records what the work actually produced, and the drawer renders that report in its own Result section above Activity & logs. It is written and displayed as markdown, so an agent can hand back headings, lists and emphasis rather than one flat line — which is what makes the drawer the place to check what an agent delivered, not just that it finished.
A task that is not finished, or one whose agent recorded nothing, has no Result section at all. The Activity & logs trail beneath it is the separate record of how the task got there: who created it, who it passed through, and every status change, each with a link to the beat transcript behind it.
Each task card has a delete button. Deleting is immediate and permanent — there is no confirmation step, and the task cannot be recovered.
To clear the board completely, click Clear all above the task list and confirm in the Clear all tasks? dialog. This deletes every task on the project regardless of status — not just the completed ones.
Deleting a task removes it for everyone. Anyone else with the project open sees it disappear from their board immediately, without refreshing — provided their team is running. A colleague viewing a stopped team receives no live updates, so their board still shows the task until they reload.
Deleting a task removes it from the board; nothing else on the board changes.
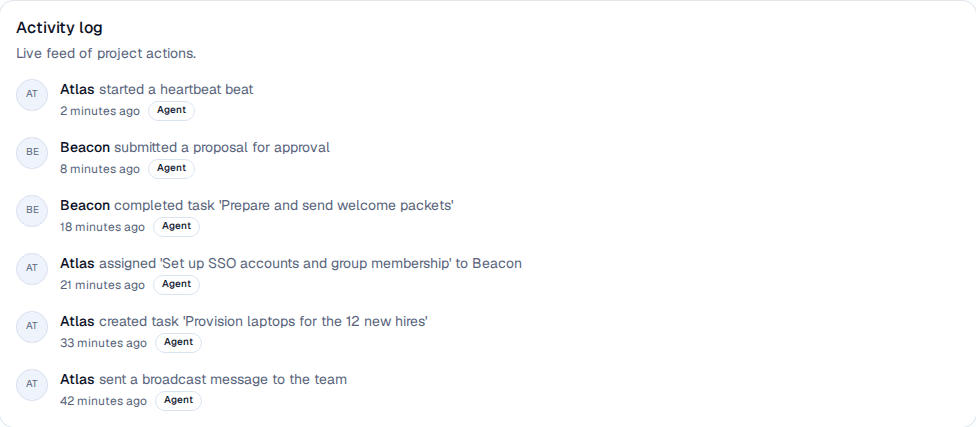
The Activity tab is a reverse-chronological feed of everything happening on the project — agent beats, messages, task creation and hand-offs, and submitted proposals. Each entry names the actor, labels agents with an Agent badge, and timestamps the action. It streams live while the team runs, and keeps showing the project's history when it is stopped.
The message thread, task board, and activity feed each hold the 10 most recent entries, with a Load More button at the bottom to pull in the next ten older ones. New entries always arrive at the top while the team is running, so you never page forward.
The Activity feed is the audit trail of the running team — useful for seeing what the agents did and when. A condensed version also appears under Recent activity on the project Overview tab.
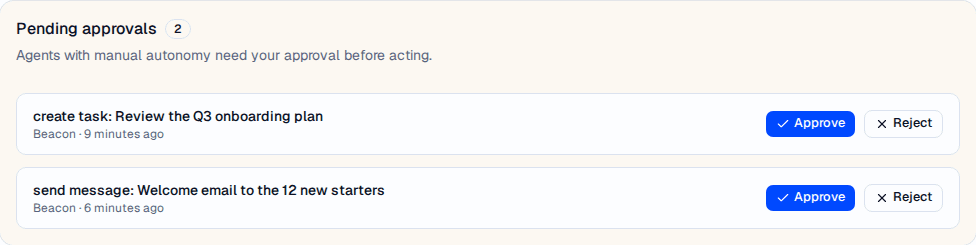
Agents set to manual autonomy do not act directly — every action they want to take becomes a proposal that waits for your decision, apart from an activity post, which is a log entry and always applies. Pending proposals appear in the Pending approvals card at the top of the Interactions tab and as a count badge in the project header.
Each proposal summarizes the action an agent wants to take — here Beacon proposing to create a task and send a message — with Approve and Reject controls.
Approve applies the proposed action — the task is created, the message is sent, or the task update lands — and removes the proposal from the list.
Reject discards the proposed action without applying it.
The card lists each proposal's summary, the agent that raised it, and how long ago. It is hidden entirely when nothing is pending.
Whether an agent proposes or simply acts is decided by its autonomy: Manual approval agents propose, while Suggest and Full autonomy agents apply their actions directly. Autonomy is set per agent — see Agent Heartbeat & Autonomy.
Open the agent's Heartbeat tab, enable Automatic heartbeat and Save, then Stop and Start the team — the setting alone does not add it to a run already under way
An agent's actions never appear, only proposals
The agent is on Manual approval autonomy
Approve its proposals, or raise its autonomy to Suggest or Full autonomy
A task sits untouched after you assigned it
The assignee is a person, or an agent that is not running — neither is woken by the heartbeat loop
Start the team, and confirm the assignee agent's automatic heartbeat is on. A task assigned to a person waits for that person
A colleague still sees a task you deleted
Their team is stopped, so they receive no live updates
Ask them to reload, or start the team
A message to an agent gets no response
The team is paused or stopped, or the agent's heartbeat is disabled
Ensure the team is running and the agent's automatic heartbeat is enabled
You cannot find what an agent actually produced
The task has no result recorded — it is unfinished, or the agent closed it without writing one
Open the task: a recorded result renders as a Result section above Activity & logs. With no Result section, read the trail and the beat transcript behind its closing entry
Monitor platform activity with usage charts, programmable access analytics, and top credential usage
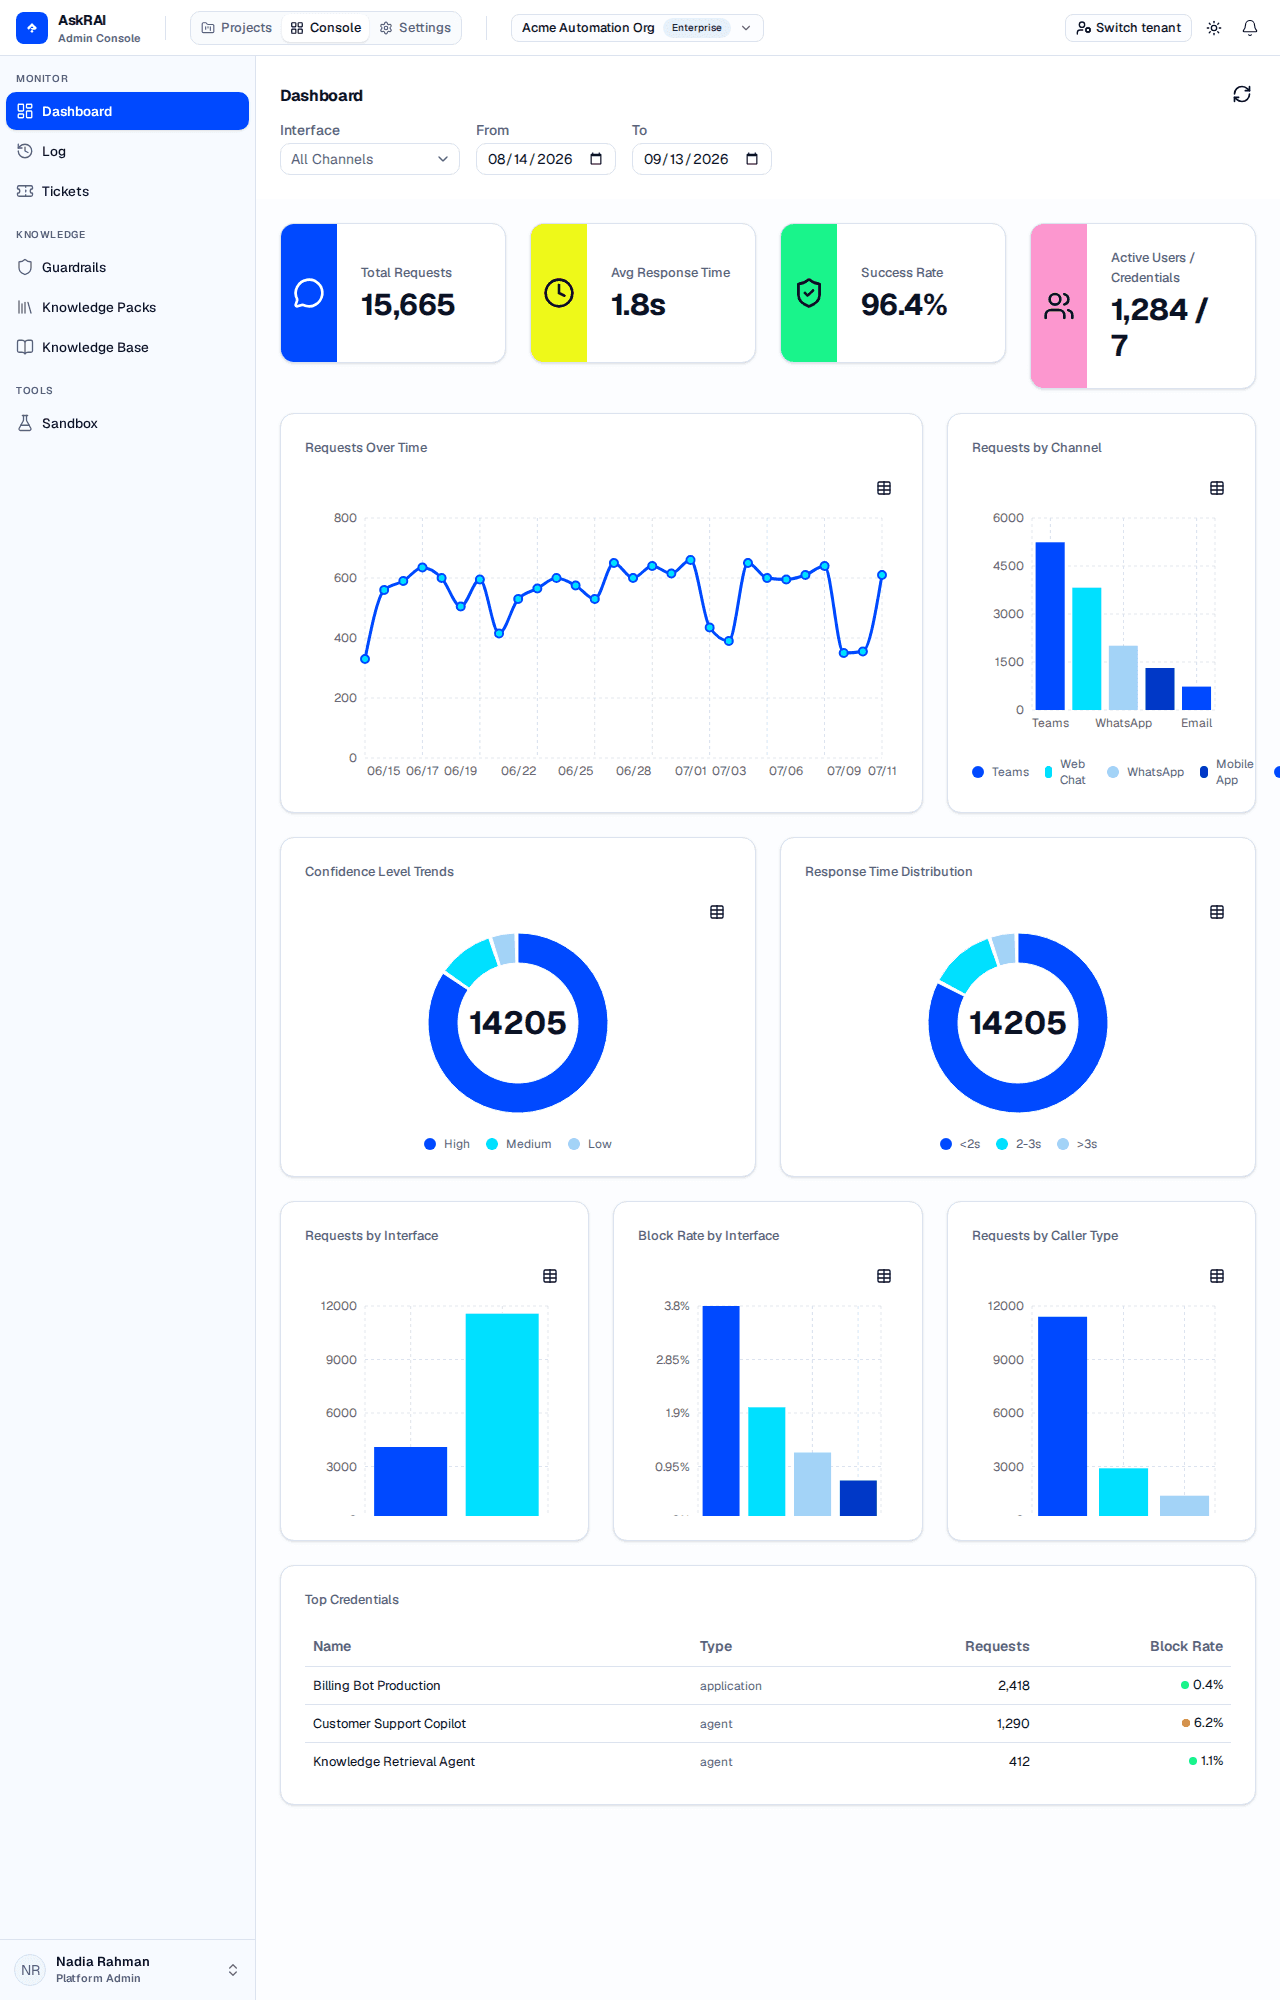
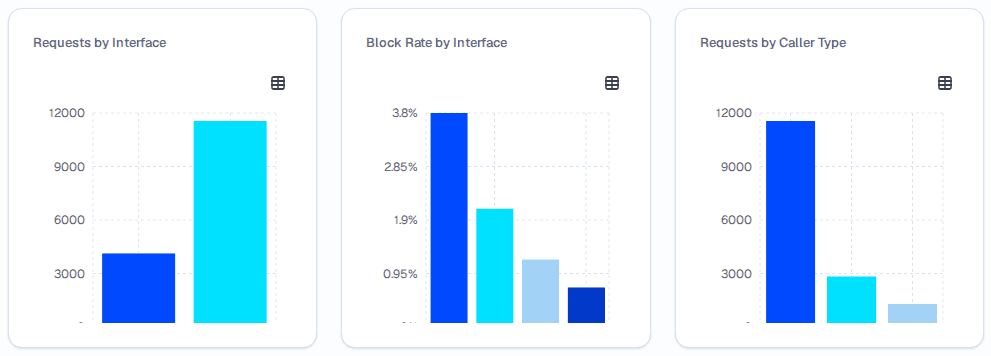
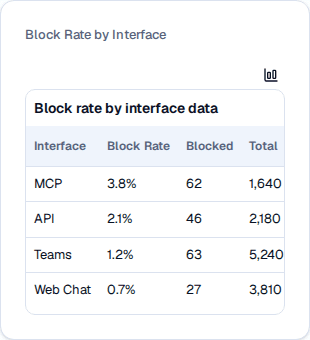
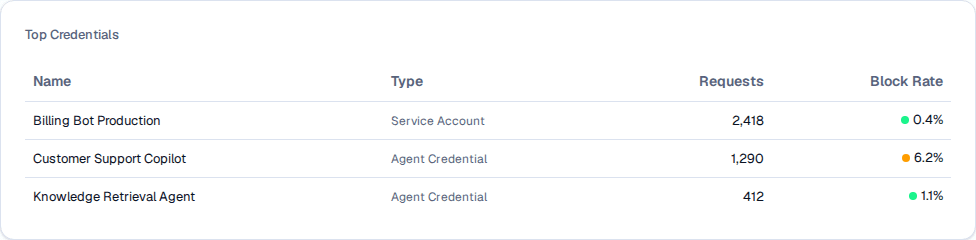
The Dashboard gives you an at-a-glance view of your AI assistant's activity and performance. Four metric cards summarize request volume, response speed, answer quality, and user engagement. Below them, interactive charts break down usage by time, channel, confidence level, and response time — and when programmable traffic is present, additional charts surface interface mix, block rate, caller type, and the credentials driving the most requests.
The Dashboard combines interactive KPIs with usage charts and programmable access analytics.
Four cards at the top of the page show your tenant's key performance indicators for the selected filter range.
Metric cards update automatically whenever you change the date range or interface filter.
Metric
Description
Unit
Total Requests
Number of AI requests (question/answer turns) in the selected period — a multi-turn conversation contributes one request per turn
Requests
Avg Response Time
Mean time the AI takes to generate a response
Seconds
Success Rate
Percentage of scored responses at or above the high-confidence threshold
Percentage
Active Users
Count of distinct user IDs across the audit records in range
Users
Active Users / Credentials
Shown when a credential-issued request is present — distinct user IDs and distinct active service credentials
Users / Credentials
The Success Rate metric uses your tenant's configured confidence thresholds. Adjust them in Confidence Thresholds to change what counts as a high-confidence response.
When a service credential produced at least one request in the selected range, the fourth metric card changes its label from Active Users to Active Users / Credentials and displays a compound value such as 1,284 / 7. The first number is the count of distinct user IDs across every audit record in the range — credential-issued requests carry a user identity too, so this is not a count of interactive humans only. The second number is the count of distinct service credentials that produced at least one request.
A line chart showing daily request volume across the selected range. Use it to identify usage patterns, spot traffic spikes, and track adoption trends.
X-axis — date in MM/DD format
Y-axis — number of requests
Days with no requests render as zero rather than gaps
A toggle in the top-right of every chart switches the view between the visual chart and an accessible data table
A bar chart breaking down request volume by messaging channel. Each channel appears in the legend above the chart. The palette holds four colours and repeats beyond that, so with many channels in range two bars can share one — read the legend rather than the colour. Use this to understand which channels your users prefer — for example, whether Teams traffic is eclipsing Web Chat.
A donut chart categorizing response times. It normally shows three buckets:
Bucket
Range
<2s
Responses generated in less than 2 seconds
2-3s
Responses taking 2 to 3 seconds
>3s
Responses taking more than 3 seconds
Each bucket shows the count and percentage of total responses. Those three strings are the exact labels the UI renders — the legend, the tooltip and the accessible table all print them verbatim — and the table's columns are Range, Count and Percentage. There is no fourth bucket: the ranges are open-ended at the top and response times cannot be negative, so every measured response falls into one of the three.
When at least one request in the selected range came from a service credential — an API, CLI, or MCP integration — an additional row of three charts appears below the core charts. This row is hidden whenever no programmable traffic is present, so tenants that only use Teams or Web Chat continue to see the classic dashboard without visual clutter.
The Programmable Access row appears whenever programmable traffic is detected in the selected range.
Each of these three cards has the same chart/table toggle as the core charts. Use the table view when you need exact values — the charts are sized for a quick read, and their x-axis tick labels can be cut off at the bottom of the card.
A bar chart showing the percentage of requests that were blocked by a guardrail. Despite its title, the breakdown is by channel, not by interface: the chart draws one bar per channel present in the range, with no programmable/traditional bucketing — so traditional channels such as Teams and Web Chat appear alongside API, CLI and MCP.
There is no aggregated programmable-vs-traditional block rate anywhere on the Dashboard. To judge "the programmable side", read the API, CLI and MCP bars individually, or set the Interface filter to Programmable Only, which restricts the chart to those channels. The accessible table's first column is headed "Interface", but its values are channel names — not the programmable / traditional buckets used by Requests by Interface.
In the table view, the rows are channels — the "Interface" column header notwithstanding.
The table view also reports the Total requests and the count of Blocked requests per channel, so you can contextualize the percentage against traffic volume. A sustained high block rate on a programmable channel typically indicates that an integration is sending malformed input or hitting a content-safety rule — review the blocked requests in Conversation Logs to confirm.
A bar chart grouping traffic by the caller type declared on the service credential that issued the request. Caller type is a property of the credential, so only programmable requests (API, CLI, MCP) carry one:
Caller Type
Description
Human
A credential operated by a person — for example, a personal token an engineer drives from the CLI
Application
Back-office services, automations, and integrations
Agent
AI agents that consume AskRAI through the MCP server or API
unknown
Requests that arrived without a declared caller type — that is, all traditional-channel traffic, such as Teams and Web Chat
Human does not mean "interactive user". Teams and Web Chat requests never declare a caller type, so they are counted in the unknown bar, not the Human one. The chart counts every request in the range — not only credential-issued ones — so in a tenant with mixed traffic unknown is normally the largest bar. Set the Interface filter to Programmable Only to exclude the traditional-channel traffic that fills it.
This chart lets you see at a glance whether your agentic traffic is growing relative to human-operated and application traffic.
Below the Programmable Access row, a Top Credentials table lists the service credentials with the highest request volume in the selected range. The table is hidden when no credential usage exists.
The Top Credentials table is sorted by request volume and color-codes block rate for quick triage.
Column
Description
Name
The display name of the credential, as configured in Programmable Access
Type
Credential type — Personal Token, Service Account, Agent Credential, or Scoped API Key
Requests
Total request count in the selected date range
Block Rate
Percentage of the credential's requests blocked by a guardrail
The Block Rate column uses a color dot next to the percentage:
Green — block rate at or below 5% (healthy)
Yellow — block rate between 5% and 20% (investigate soon)
Red — block rate above 20% (urgent — the credential is producing frequent guardrail violations)
Click any row to jump to Programmable Access. The click opens that page, not the specific credential — locate the credential in the table there to open its details drawer or rotate its secret.
Use the filter row in the sticky header to refine every metric and chart simultaneously.
Filter
Options
Default
Interface
All Channels, Programmable Only, Traditional Only, plus an entry for every specific channel (Web Chat, Mobile App, Teams, WhatsApp, SMS, Phone, Email, API, CLI, MCP)
All Channels
From Date
Date picker
30 days ago
To Date
Date picker
Today
The Interface filter is the quickest way to isolate programmable traffic — pick Programmable Only to hide interactive users from every chart and metric, or pick a specific channel like MCP to focus on a single integration type.
The date range is capped at 30 days. If you select a range that exceeds this window, the end date snaps back to 30 days after the start date automatically.
All metric cards and charts update whenever you change any filter. Filter selections are preserved in the URL as query parameters, so you can bookmark or share a filtered view.
Click the refresh icon next to the page title to re-fetch all metrics and charts without changing any filters. This is useful after a burst of traffic — for example, right after a product launch — when you want to see the latest numbers without losing your current filter state.
Conversation Logs — drill into individual conversations and filter by caller type
Programmable Access — manage service credentials surfaced in the Top Credentials table
Tickets — review escalated conversations driven by low-confidence responses
Confidence Thresholds — adjust the bands that drive Success Rate and the Confidence Level chart
Conversation Logs
Browse, filter, and review user conversations with audit details, caller type filtering, and false positive marking
Conversation Logs give you a complete view of every interaction between users — and service integrations — and the AI assistant. Browse conversations, filter by channel, caller type, or confidence, review audit details for individual messages, and flag guardrail triggers as false positives. The page is reachable from the Log item in the main navigation.
One card is a whole conversation, not a single question. Every summary figure on it — message count, confidence, response time, the preview text — describes only the turns that match your current filters, not the whole thread.
The page header carries a List / Table view toggle. The page opens in List view, which renders each conversation as a card; Table view renders the same conversations as rows and is the only view with sort controls.
The user or credential that started the conversation
Channel badge
The interface or messaging channel (Web Chat, Teams, API, MCP, and more)
Message count
Number of messages in the conversation thread
Timestamp
When the conversation occurred
Question text
The user's query
Confidence score
AI confidence as a percentage with a color-coded progress bar
Response time
Processing time in milliseconds
A Refresh button beside the filters re-runs the current query — the page loads once and does not poll, so this is how you pick up conversations that arrived since.
Click any card to open the details drawer on the right side of the page. Every card carries a coloured left border already — that is its confidence band — so the selected one is marked differently, with a tinted background and a ring around it.
Switch the header toggle to Table to see the same conversations as a sortable table:
Table view adds the Last Answer column and the sortable column headers; the active sort column shows a single arrow.
Column
Description
Sortable
User
The user or credential that started the conversation
Yes
Channel
The interface or messaging channel
Yes
Messages
Number of messages in the conversation thread
No
Last Question
The most recent user query in the thread
No
Last Answer
The most recent AI answer in the thread
No
Response Time
Processing time in milliseconds
Yes
Confidence
AI confidence as a percentage
Yes
Last Activity
Date and time of the most recent message
Yes
Last Answer appears only in Table view — the conversation cards do not show it. Clicking a row opens the same details drawer as clicking a card.
The view mode is not persisted. It is in-memory state only and is never written to the URL, so the page returns to List view on a full page reload, and it opens in List view for anyone you send a filtered URL to — they will not see the Last Answer column or the sort controls until they switch to Table view themselves. The filters and the sort in the URL still apply.
The list loads 10 conversations at a time. A Load More button below the list (or table) fetches the next 10. Paging is cursor-based, so changing a filter or a sort restarts the list from the top. The message thread inside the details drawer pages the same way, through a Load More Messages button at the bottom of the thread.
Use the search bar at the top to find conversations by user name, question text, answer text, or session ID. Search is debounced — results refresh roughly half a second after you stop typing.
Click Filters to open the advanced filters popover. It holds five controls — Channel, Caller Type, Response Time (seconds), Confidence Level (%), and Show false positives only — which you can combine without leaving the page. Search is a separate control in the page header, and the page has no date-range filter.
Every filter set here is written into the page URL, so a filtered view can be shared with a colleague as a link.
Filter
Options
Purpose
Channel
Web Chat, Mobile App, Teams, WhatsApp, SMS, Phone, Email, API, CLI, MCP, or All
Restrict conversations to a single messaging or integration channel
Caller Type
Human, Application, Agent, or All Caller Types
Restrict to conversations produced by a specific caller class
Response Time
0–10 seconds (slider)
Cap the maximum response time shown — always applied when you press Apply (see the warning below)
Confidence Level
0–100% (slider)
Cap the maximum confidence score shown; at the 100% ceiling no confidence bound is applied
Show false positives only
Toggle
Show only conversations that contain at least one guardrail result flagged as a false positive
Active filters appear as chips below the search bar. Click the X on any chip to remove that filter.
Apply commits the draft selections in the popover and closes it.
Clear All immediately resets the five filters owned by the popover (Channel, Caller Type, Response Time, Confidence Level, False Positives Only) — their chips disappear and the query re-runs at once, so you do not need to press Apply afterwards — and the popover stays open so you can pick a new filter. It does not clear the search box or the current sort.
Pressing Apply always commits a response-time cap. Leaving the Response Time slider at its 10 s ceiling still filters out every conversation that took longer than 10 seconds, and a "Response Time: Less than 10s" chip appears below the search bar. To remove the cap, drag the slider to 0 s, delete the chip, or press Clear All. Reopening the popover shows the slider at 10 s whether or not a cap is applied, so the chip is the only reliable indication that a response-time cap is active. The Confidence Level slider does not behave this way — at its 100% ceiling no confidence bound is applied.
False Positives Only keeps just the conversations that contain at least one guardrail result a reviewer has flagged as a false positive. One subtlety to expect, and it is not specific to this toggle: every summary figure on a card describes only the turns matching your current filters, because the filter is applied before the conversation is grouped. With this toggle on, a row can read "1 message" though the thread has more; the search box and both sliders narrow the same figures the same way. The details drawer is deliberately unfiltered and still shows the whole thread. To see how often a specific guardrail has been flagged across all conversations, use the per-guardrail false-positive rate on the Guardrails page.
The Caller Type filter is most useful when combined with the Channel filter. For example, selecting MCP channel and Agent caller type isolates traffic from AI agents connected through the MCP server — a common first step when investigating an automation issue.
The Channel filter includes every interface that can produce a conversation, not just the traditional human-facing channels. This makes it possible to investigate programmable traffic directly from the log view:
Channel
Origin
Web Chat
Reserved for the embeddable web widget, which is not shipped yet. The Sandbox simulates this channel
Mobile App
Reserved for a native mobile SDK, which is not shipped yet
Teams
Microsoft Teams bot
WhatsApp
WhatsApp Business integration
SMS
SMS gateway
Phone
Voice channel
Email
Email-to-ticket integration
API
Direct calls to the public API with a credential
CLI
Requests issued through the askrai command-line client
Caller Type describes who produced the request. It is declared by the credential the request was made with, so only programmable traffic carries one:
Caller Type
Description
Human
A person calling through the API, CLI or MCP with a credential issued to a person
Application
A back-office service or automation calling with a service credential
Agent
An AI agent calling through MCP or the API with an agent credential
(none)
Traditional-channel traffic — Teams, Web Chat and the rest — which declares no caller type
Human does not mean "a person asked this". A question typed into Teams or Web Chat carries no caller type at all, so filtering on Human narrows the list to credential-issued traffic and hides every conversation from your traditional channels. The Caller Type chart on the dashboard counts the same way.
Filters are persisted in the URL as query parameters. Share the URL with a teammate to give them the same filtered view.
Sorting is performed in the Table view, reached through the List/Table toggle in the page header — the page opens in List view, and the card list has no sort control. In Table view, click a sortable column header — User, Channel, Response Time, Confidence, or Last Activity — to sort by it. Clicking the active column flips its direction; clicking a new column starts it ascending. The active column is announced to assistive technology through aria-sort. The default sort is Last Activity descending (newest first).
The sort itself is not tied to the view: it is sent to the API in both views and persists in the URL (sortField and sortDirection), so a sort chosen in Table view still orders the cards after you switch back to List. Only the control is missing from List view.
Click a conversation card to open the details drawer with two tabs: Overview and Audit.
This drawer is also where a guardrail trigger is marked a false positive, which is what feeds the per-guardrail false-positive rate on the guardrail analytics.
Select a message in the conversation thread (listed below the tabs) to view its audit record. The Audit tab opens with a stat grid — Audit ID (copyable), Timestamp, Response Time, AI Source, and Execution Mode (shown only when recorded) — followed by these sections:
Model — how the message was routed and which models answered it:
Stat
Description
Routing Source
How the model was chosen. Reads Not configured when a source was recorded but nothing routed the query, and Not recorded when the audit carries no routing metadata at all — two different diagnoses
Summarization
The model used for the summarization stage — the model the request actually ran on, otherwise the configured model, else Not recorded
Matched Rule
The routing rule that matched; labelled Primary Rule when more than one rule contributed to the decision
Extra Details
A collapsible panel — rendered only when there is something to show — listing the per-stage contributing rules, the Refinement model, the Guardrail model, and the Complexity tier
AI Confidence — the confidence score as a percentage with a color-coded progress bar. If the response also has a vector confidence score (the similarity of the best match retrieval found), it is displayed separately. A Degraded chip appears beneath the bars when the answer's low score records a retrieval failure rather than a knowledge gap — the knowledge base could not be searched at all. Treat that as a platform fault to investigate, not as missing content to author.
Nearest Knowledge Base Match — when the confidence score is below the medium threshold, this section shows the closest matching question and answer from the knowledge base.
Governance — compliance status (Compliant, Not compliant, or Not checked), checked timestamp, reasoning, and per-guardrail results. Each guardrail result shows its compliance status, guardrail ID, and reasoning.
Escalation — the confidence band (High, Medium, or Low), whether the conversation was escalated, the escalation reason, and — when a ticket was created — the ticket ID as a copyable value (a truncated monospace string with a Copy button). The ticket ID itself is not a link; a separate View ticket button below it closes the drawer and opens the Tickets page with the ticket ID pre-filled in the search box, which resolves to that single ticket.
Click any message in the conversation thread to switch the Audit tab to that message's audit record. By default, the tab shows the most recent message.
When a guardrail evaluation produces an incorrect result — for example, flagging safe content as non-compliant — you can mark it as a false positive. Flagging records a review annotation on that single guardrail result (who flagged it, when, and an optional reason) and feeds the per-guardrail false-positive-rate metric on the Guardrails page.
Flagging a false positive is an annotation, not a correction. It does not change the audit's compliance status, and it does not lower the Block Rate on the Dashboard — the block rate counts audits whose compliance is false and is blind to the flag. It also cannot undo an escalation or close a ticket that was already created: escalation rules are evaluated once, when the audit event is ingested, and they match on the response's confidence band — a guardrail result never triggers an escalation in the first place. To stop a guardrail producing bad results, edit the guardrail itself.
Open the Conversation Details
Click a conversation card to open the details drawer, then switch to the Audit tab.
Find the Guardrail Result
In the Governance section, locate the guardrail result you want to flag. Each guardrail row shows its compliance status and a flag icon.
Flag as False Positive
Click the flag icon next to the guardrail result. A confirmation dialog appears where you can optionally enter a reason for the flag.
Confirm
Click Flag as False Positive to save. An orange "False Positive" chip appears next to the guardrail result to indicate it has been flagged.
To remove a false positive flag, click the orange flag icon on a flagged guardrail and confirm the removal.
False positive flags are per-guardrail, per-message. Flagging one guardrail result does not affect other guardrails in the same conversation or other conversations.
View and manage escalated support tickets with status tracking, severity classification, and conversation details
The Tickets page displays support tickets created when conversations are escalated by your configured escalation rules. You can search, filter, and update tickets to track resolution progress, review the original conversation, and assign tickets to team members. Tickets are listed newest-updated-first by default, and Table view lets you re-sort them by creation or update time. A Refresh button beside the filters re-runs the current query — the page loads once and does not poll, so this is how you pick up tickets raised since you opened it.
The Tickets page displays all escalated conversations as actionable support tickets.
Ticket — a record created when an AI conversation triggers an escalation rule. Each ticket captures the original question, the AI response, and metadata about the interaction.
Status — tracks where a ticket is in the resolution workflow: Open, In Progress, Resolved, or Closed.
Severity — indicates urgency: Critical, High, Medium, or Low.
Confidence score — the AI's self-assessed confidence in its response, expressed as a percentage. Lower confidence often triggers escalation. Not every ticket carries one — see Conversation Tab.
Tickets appear as cards in list view by default. Each card shows the ticket ID (truncated to its first 8 characters, with a copy button), an Escalation badge, the title and description, the assignee, the creator, status, severity, and the creation date. A confidence badge is shown only when the ticket carries an AI confidence score. Toggle between List and Table view using the buttons in the top-right corner.
The list shows 10 tickets per page. When there is more than one page, a pager appears below the list; it is hidden when all results fit on a single page. The current page is kept in the URL alongside the active filters — the page parameter is zero-based and omitted on the first page (page 2 is ?page=1) — so a filtered, paged view can be shared as a link. Changing a filter returns you to the first page, but opening a ?page=N link takes you straight to that page.
Tickets load newest-updated-first (updated_at descending) by default. To change the order, switch to Table view and click the Created or Updated column header — the two sortable columns. Clicking a column sorts by it; clicking the active column again flips the direction between descending and ascending, shown by the arrow on the header. Those are the only two sortable fields, and the card (List) view has no sort control, so the order can only be changed from Table view.
Use the search bar and filter dropdowns above the ticket list to narrow results:
Filter
Options
Description
Search
Free text
Case-insensitive substring match on the user's display name, the question, and the answer. A ticket ID matches only when you enter the complete ID
Status
All, Open, In Progress, Resolved, Closed
Filter by resolution status
Severity
All, Critical, High, Medium, Low
Filter by urgency level
The truncated 8-character ID shown on a ticket card will not match a ticket by ID — it is still substring-matched against the name, question, and answer text, so it may incidentally hit an unrelated ticket. Use the copy button on the card or in the details drawer to get the full ID, then paste it into the search box.
Active filters appear as dismissible chips below the filter bar. Click the X on any chip to remove that filter.
A Created by Escalation Rule banner is pinned at the top of the tab for tickets tagged escalation — which is every ticket the platform creates, since escalation rules are the only ticket-creation path.
Below the banner, the tab displays the ticket metadata:
Field
Description
Ticket ID
Unique identifier, with a copy button
Created
Timestamp when the ticket was created
Assigned To
The team member responsible for resolution (shown as — while the ticket is unassigned)
Channel
The communication channel where the conversation occurred, copied from the source conversation when the ticket is created. Blank (shown as —) on tickets created before this was added
Chat ID
Session identifier linking to the original conversation, with a copy button
Priority
The ticket's severity level
Description
The rule that escalated the conversation, as Escalated by rule: <rule name>
User
The person who asked the question — display name next to a circle containing their first initial
Channel is populated on new tickets only. Escalation now copies the channel of the originating conversation onto each ticket it creates, so the Channel field in the drawer — and the Channel column in Table view — shows where the conversation took place (Teams, Web Chat, API, and so on). Tickets created before this was added were not backfilled, so their Channel stays blank and renders as an em dash (—). To confirm where any conversation took place, open it in the Conversation Logs.
Shows the original interaction that triggered the escalation:
This is the exchange that triggered the ticket, captured as it was answered — editing the knowledge base afterwards does not change what is shown here.
Original Question — what the user asked
Answer — the response that was provided
AI Response (Raw) — the model's own response text as recorded on the source conversation. Shown only when it differs from the answer that was delivered, which makes it uncommon
AI Confidence — a labeled score with a progress bar showing how confident the AI was in its answer. Shown only when the ticket carries a confidence score
If the escalation rule that created the ticket has Include AI context cleared, the ticket is stored with no AI response and no confidence score: the card shows no confidence badge, and this tab shows only the question and the answer — no AI Response (Raw) and no AI Confidence bar. The same is true when the source conversation recorded no confidence score. See Escalation Rules for the toggle.
Shows governance and tracking information: the audit ID (with a copy button), the last update timestamp, and the ticket's status. When the ticket carries a chat/session ID, a View conversation in Log button appears and navigates to the full conversation in the Conversation Logs page.
Click directly on a ticket card's Status chip, Severity chip, or Assigned To value to edit it in place. Select the new value from the dropdown, or type a new assignee name and press Enter — or clear the field entirely and commit to remove the current assignee (press Escape to cancel; clicking away also commits what you typed). Changes save automatically. Inline editing is available on the cards in List view only — in Table view, use the edit (pencil) action on a row to open the edit dialog.
Clicking the Assigned To value on a card turns it into a text field you can type a new assignee into.
Click the Edit button on any ticket card to open the edit dialog. The dialog lets you update Status and Severity from dropdown menus, and set Assigned To in a free-text field (placeholder "Unassigned"); clearing that field and saving removes the assignee. Save Changes stays disabled until at least one of the three fields differs from its saved value; Close prompts you to confirm before discarding unsaved changes.
Clearing the Assigned To field unassigns the ticket. Empty the field and commit — inline on a card, or in the edit dialog — and the current assignee is removed; the field then reads —. You can also replace one assignee with another at any time. (An unchanged, already-empty field is left alone, so editing only a ticket's status never disturbs its assignee.)
When you change a ticket's status to Resolved, the system automatically records the resolution timestamp. Changing it back to another status clears the resolution record.
The first 100 characters of the user's question (or Low confidence query when no question was recorded)
No
Description
The escalating rule, recorded as Escalated by rule: <rule name>
No
Status
Open, In Progress, Resolved, Closed
Yes
Severity
Critical, High, Medium, Low
Yes
Assigned To
Free text — name or email of the responsible team member. Can be set, replaced, or cleared to unassign
Yes
Confidence Score
AI confidence percentage (0–100%). Absent on tickets stored without AI context or without a recorded score
No
Channel
Communication channel (e.g., Teams), copied from the source conversation when the ticket is created. Blank (—) on tickets created before this was added
No
Created At
Timestamp of ticket creation
No
Updated At
Timestamp of last modification
No
User
Display name of the person who asked the question
No
Question
The original user question
No
Answer
The response provided to the user
No
Escalation Tag
Indicates the ticket was created by an escalation rule
No
Tickets are created automatically by escalation rules — that is the only path that creates a ticket. You cannot create a ticket manually from the Tickets page, and a ticket cannot be deleted from the console. Configure Escalation Rules to control when tickets are generated, and which severity and assignee they are created with.
Create, search, and curate the Q&A pairs and document chunks that power your AI assistant's responses
The Knowledge Base is the central content store that powers your AI assistant's responses. It holds two types of items — Q&A pairs, which you author in the console or which the platform imports or generates from a file uploaded to a Q&A-type content pack, and document chunks that the platform extracts from uploaded files — and gives curators a unified workspace to search, filter, edit, rate, and govern every entry across the entire tenant.
The Knowledge Base page in Text Search mode, with the seeded Employee Handbook entries visible.
Q&A pairs — questions and answers. Each pair has a question (what the user might ask) and an answer (what the assistant should respond with). Pairs reach the Knowledge Base by three routes: authored manually with Add Q&A, imported row-by-row from a CSV or XLSX file uploaded to a Q&A-type content pack, or generated by the platform from a PDF uploaded to a Q&A-type pack. Imported and generated pairs are created as Draft.
Document chunks — when you upload a PDF to a document-type content pack, the system splits it into chunks. Each chunk contains a portion of the document together with the page numbers it came from. The same file uploaded to a Q&A-type pack produces Q&A pairs instead.
Content packs — containers that group Q&A pairs or document chunks together. Most items belong to a pack, but a Q&A can be saved without one.
Status workflow — items move through statuses that control visibility: Draft (hidden from users), Approved (live), Needs Attention (flagged for review), and Discarded (soft-deleted). Only Approved items are retrievable, so a new Q&A — which starts as Draft — is invisible to the assistant until you approve it.
Vector index — Q&A pairs and document chunks are embedded as they are written, so there is nothing to rebuild and no reindex to schedule: a curator's change is searchable as soon as it saves. Every search is scoped to your tenant.
The toolbar exposes two search modes via a toggle on the left of the search field. Switch between them by clicking the magnifying-glass icon (Text Search) or the sparkles icon (AI Search).
The search-mode toggle sits to the left of the search field, with Filters and Add Q&A to its right.
Text Search is the default mode. As you type in the search field, results filter in real time across the question, answer, title, section heading, chunk content and tag fields — so a free-text tag that the Filters popover cannot offer is still findable by typing it here. Combine it with the Filters popover to narrow by tag, item type, status, sensitivity, and rating, and to change the sort order.
Active filters other than Item Type appear as chips beneath the toolbar, where you can clear them individually. Item Type has no chip — reset it from inside the Filters popover, either by setting Type back to All or by clicking Clear All, which lives inside the popover and resets every filter at once.
AI Search runs a vector similarity search across the entire tenant knowledge base: your query is embedded and the nearest items are returned. Use it when you cannot remember the exact wording of an item, want to find paraphrased duplicates, or need to discover items by intent rather than by keyword.
It matches on meaning only — there is no keyword matching underneath it. An exact string such as a policy code, a part number or a person's name is what Text Search is for; a short identifier carries almost no meaning to embed, so AI Search is the wrong tool to look one up with.
AI Search returns ranked semantic matches with confidence labels, highlighting the full query phrase wherever it appears in a title or preview.
Each result card shows:
A type badge (QnA or Document) with an icon
A confidence chip combining the qualitative label (Low / Medium / High) and the normalized score percentage
The current status of the underlying item
For document chunks, the chunk position within the source file (Chunk 3/12)
The title and content preview, with the full query phrase highlighted wherever it appears verbatim
The result list is sorted by score. The score is a cosine similarity between your query and the item, expressed as a percentage: it is a measure of closeness in meaning, not a percentage of correctness, and unrelated text still scores around 50%. The colored bar on the left of every card mirrors the confidence level so you can scan a busy result set quickly.
AI Search only ever finds Approved items. Every vector query filters out anything that is not Approved — every Draft, Needs Attention, and Discarded item. So AI Search cannot be used to review unapproved content, and a Q&A missing from the results is far more likely to be unapproved than absent. To find items in any status, use Text Search with the Status filter.
Click the sparkles icon in the search-mode toggle. The query field updates to the AI Search variant with a "Search semantically across the entire knowledge base" placeholder.
Type a natural-language query
Enter a question, paraphrase, or topic — anything from a single keyword to a full sentence. Queries are limited to 500 characters: the field does not stop you typing past that, but a longer one is refused when you run it.
Run the search
Press Enter or click the arrow button on the right of the field. A loading indicator replaces the arrow while the search runs; the response usually arrives within a couple of seconds.
Open a result
Click any Q&A card to open it in the details modal where you can edit, change status, or review history.
Document chunk hits are read-only in the result list. Clicking one does not open a preview — it shows a "Document hits are preview-only" notice. To edit the underlying chunk, switch to Text Search and find the parent document.
Click Filters in the toolbar to open the filter panel. The panel opens in both search modes, but not every filter is applied in both — see the warning below.
Four of these — Tags, Sensitivity, Rating and Sort — narrow Text Search only. In AI Search their chips still render, but just Status and Item Type reach the query.
Filter
Options
Tags
Multi-select from a fixed built-in list. Matches items carrying any of the selected tags. Q&A pairs only
Type
All, QnA, Document
Status
All, Approved, Needs Attention, Draft, Discarded
Sensitivity
All, Public, Standard, Sensitive, Secret. Q&A pairs only
Rating
All, 5 stars through 1 star. Matches items rated exactly that number of stars — a "4★" filter does not include 5★ items. Q&A pairs only
Sort
Relevance, Newest, Oldest. "Relevance" sorts by most-recently-updated, identical to "Newest"
In AI Search, only Status and Item Type are applied. The Filters popover still offers Tags, Sensitivity, Rating and Sort in AI Search mode, and their chips still render, but those four selections never reach AI Search — they narrow Text Search results only. Changing any filter while in AI Search also does not re-run the query: press Enter (or the arrow button) again to run it with the new Status or Item Type.
Even Status has little room to work in AI Search: only Approved items are retrievable, so filtering AI Search by Draft, Needs Attention or Discarded returns nothing. Use Text Search to review unapproved content.
Tags, Sensitivity and Rating apply to Q&A pairs only. In Text Search, selecting any of them narrows the result set to Q&As — every document chunk is excluded, even when Item Type is set to All, and even though chunk cards display a "Public" sensitivity badge and an empty 5-star rating (those are placeholder values the console paints; chunks carry no tags, sensitivity or rating). Combining one of them with Item Type = Document therefore always returns an empty result set.
"Relevance" is not a relevance ranking. In Text Search it sorts by most-recently-updated, exactly like "Newest": text results are ordered by date and never scored for relevance. Only AI Search ranks results by semantic relevance, and it ignores this Sort setting entirely.
The tag vocabulary is a fixed built-in list — it is not derived from the tags in your tenant, so a tag you invented on an item will not appear as a filter option.
Click Add Q&A in the top-right corner of the Knowledge Base page.
A pair saved here starts as Draft and is invisible to the assistant until you approve it. The content pack is optional — a Q&A can stand on its own.
Enter the Question and Answer
Type the question your users might ask in the Question field and the response the assistant should provide in the Answer field. Both fields are required.
(Optional) Select a Content Pack
Choose a content pack from the Content Pack dropdown. Only Q&A-type packs appear in this list. You can leave this empty — Create is enabled as soon as the question and answer are filled in — but an unfiled Q&A is harder to find and to manage in bulk, so pick a pack unless you have a reason not to.
Create the Item
Click Create. The item is saved with Draft status. A success notification appears and the dialog closes automatically.
The item is not searchable yet. A draft is excluded from the index, so the assistant cannot use it. Open the new item, click Approve, then click Save to publish it. In the details modal the quick-action buttons only stage the status change (the footer shows "You have unsaved changes"); closing without saving discards it. To publish in one click instead, use the card's three-dot menu — that writes the change immediately.
Write questions in natural language that matches how your users actually ask. For example, use "How do I request time off?" rather than "Time Off Request Procedure."
Click any card — a Q&A pair or a document chunk — to open the details modal. The modal exposes two tabs at the top:
Details — the editable view with status and sensitivity badges, quick-action buttons (Approve, Flag for Attention, Discard), inline-editable question and answer fields, rating, tags, and metadata.
History — a chronological list of every prior version. The Compare button (enabled once two or more versions exist) opens a side-by-side diff view where you can pick a base version and a comparison target to inspect exactly what changed and who changed it.
For document chunks, the modal includes chunk navigation buttons (Previous / Next) to step through all chunks from the same source file, with a "Chunk N of Total" indicator.
Save your changes before navigating between chunks: the Previous / Next buttons are disabled while you have unsaved edits. Switching tabs is not blocked, so it is possible to move from Details to History with unsaved edits still pending — save first.
There are two ways to move an item through the workflow:
From the card — open the three-dot menu on any card (Q&A pairs and document chunks both have one) and choose Approve, Discard, or Flag as Needs Attention. The change saves immediately.
From the details modal — open the item and use the quick-action buttons (Approve, Flag for Attention, Discard). These buttons only stage the new status in the open modal; you must click Save to persist it. If you close the modal without saving, the staged status change is discarded.
Approving is what publishes an item: every query filters out anything that is not Approved, so the assistant cannot retrieve a draft until the item is approved and the change is saved.
Open the item's details modal and click Delete at the bottom-left. The item is deleted the moment you click — there is no confirmation prompt and no undo. This is a hard delete, distinct from the Discarded status, which only hides the item from users and can be reversed.
Delete has no confirmation step. Unlike closing the modal with unsaved edits — which raises a discard-changes dialog — clicking Delete removes the Q&A item or document chunk immediately and permanently. Export your content first if you need a backup.
Edits you make here take effect when you save them — there is nothing to rebuild afterwards. To see what the platform ingested from an uploaded file, and how much knowledge came out of it, click Processing History in the toolbar; the page is described under Knowledge Packs.
A file uploaded to a Q&A-type pack becomes Q&A pairs, not document chunks. There are two paths:
CSV or XLSX — imported directly, row by row, into question/answer pairs. Document parsing is skipped entirely. Both formats are accepted by Q&A-type packs only.
PDF — parsed and chunked like a document, after which the platform generates Q&A pairs from the chunks.
Both paths create the pairs with Draft status, so nothing they produce is retrievable until you review and approve it.
There is a size ceiling of 100 MB per file, refused before the transfer starts. A second ceiling applies after parsing: a source that yields more than 10,000 items — chunks or Q&A pairs — fails at that point, so a large, text-dense PDF can upload successfully and then fail during processing. Document-type packs accept PDF only; Q&A-type packs accept PDF, CSV and XLSX.
Which collection this item belongs to. Optional — a Q&A saved without one is simply unfiled
No
Status
Controls visibility: Approved (live), Draft (hidden), Needs Attention (flagged), Discarded (removed). New Q&As start as Draft and are not searchable until approved
Set on create
Sensitivity
Access level: Public, Standard, Sensitive, or Secret
No (defaults to Public)
Rating
Curator quality assessment from 1 to 5 stars
No (defaults to 0)
Tags
Categorization labels. The Filters popover offers a fixed built-in list; the item's own editor also accepts free text, which is saved on the item but cannot be filtered on
Position within the source document (e.g., Chunk 3 of 12)
No
Status
Same status workflow as Q&A items. Chunks are created Approved
Yes
Page numbers are captured during parsing and kept on the record, but the console does not display them today. Chunks carry no section heading: text extraction yields the page's text, not the document's structure.
Knowledge Packs — create content pack containers and upload documents
Guardrails — set safety policies that evaluate user input
Conversation Logs — see how the assistant uses knowledge items in responses
Confidence Thresholds — tune the minimum scores the runtime accepts before answering from a knowledge item
Knowledge Packs
Organize knowledge base content into collections with file uploads, content type selection, processing history, and bulk status management
Knowledge packs let you organize your knowledge base content into logical collections. Each pack groups related question-and-answer pairs or documents, making it easier to manage, upload, and maintain the content that powers your AI assistant's responses.
The Knowledge Packs page displays all packs as cards with content type badges, source counts, and action buttons.
Before working with knowledge packs, understand these core concepts:
Content type — each pack is either QnA (question-answer pairs for direct lookup) or Document (whole documents for agent search without creating QnAs). You choose the type when creating a pack and it cannot be changed later. The console spells the content typeQnAand an individual pairQ&A— this page follows the same convention.
Sources — files you upload to a pack. Each source is first transferred from your browser (Uploading), then goes through the processing pipeline (Queued → Parsing → Chunking → Generating QnA → Indexing) before its content becomes searchable. Per-source progress and failures are shown inside the pack's details modal.
Status — packs display an overall status derived from their sources: Syncing while any source is Queued, Parsing, Chunking, Generating QnA or Indexing; Error if a source failed and no source is in flight (in-flight work outranks a failure, so a source that is being retried reads Syncing, not Error); Active otherwise. A source that is still Uploading is deliberately not counted as in flight — the bytes are still with the browser — so on its own it does not make the pack Syncing: such a pack reads Active (or Error, if a sibling source failed). Stopped (cancelled) sources are likewise excluded from the in-flight set.
Bulk actions — you can approve or draft all QnAs or document chunks in a pack at once, controlling whether content appears in search results.
Searchable on write — there is nothing to sync. Processing embeds each chunk or Q&A as it stores it, so content is searchable the moment it lands. What decides whether the assistant may use an item is its status: only Approved items are retrievable, and approving one takes effect immediately. Past processing runs are listed on the read-only Processing History page.
The Knowledge Packs page displays all packs as cards in a responsive grid. Each card shows the pack name, description, content type badge (QnA or Document), source and file counts, a Last processed timestamp for that pack (see the field reference), and quick-action buttons. The quick actions are Delete and, for QnA and Document packs only, the ⋮ bulk-actions menu.
Use the Search knowledge packs field at the top of the page to find packs by name. For more precise filtering, click Filters to open the advanced filters popover, where you can filter by status — Active, Syncing, or Error (the three states a pack can be in; see the status reference).
Active filter selections appear as chips below the search bar. Click the x on any chip to remove that filter, or use Clear All Filters in the popover to reset all filters at once.
Click the Add Knowledge Pack button in the top-right corner of the page.
Select a Content Type
Choose between QnA and Document using the toggle buttons. QnA packs store or generate question-answer pairs for direct lookup. Document packs store whole documents for agent search without creating QnAs.
The content type is fixed at creation and decides which files the pack accepts: Document packs take PDF only, Q&A packs take PDF, CSV and XLSX.
Enter Name and Description
Provide a descriptive Name (up to 200 characters) and Description (up to 1,000 characters) for the pack. Both fields are required.
Create the Pack
Click Create to save the new knowledge pack. The dialog closes automatically and the pack appears in the grid.
The content type cannot be changed after creation. If you need to switch between QnA and Document, create a new pack with the correct type.
Click any knowledge pack card to open its details modal. From here you can edit the pack's name and description, upload files, and manage sources.
The modal opens on the Files tab. The drop zone names the formats this pack accepts, and every source already uploaded to it is listed beneath, with its processing state.
Files is the only working tab. The Connectors and Settings tabs are disabled and cannot be opened — they are reserved for a future release.
To rename a pack, hover over (or tab to) the pack name in the modal header and click the pencil button that appears — clicking the name itself does nothing. The description is directly clickable. Make your changes and press Enter to confirm or Escape to cancel, then click Save Changes to persist your edits to the server.
In the details modal, select the Files tab (selected by default).
Add Files
Drag and drop files onto the upload area, or click Select Files to browse. You can upload multiple files at once. The hint under the drop zone names the formats for the pack you opened, and they depend on its content type:
Document packs: PDF only
QnA packs: PDF, plus CSV and XLSX for importing question/answer pairs you have already written
PDF is the only document format, and it must carry a text layer. Word, PowerPoint and image files (.doc, .docx, .pptx, .png, .jpg, .tiff, .bmp) are refused, and so is a spreadsheet added to a Document pack — XLSX is accepted only by QnA packs, as a table of pairs to import. The console refuses them before anything is transferred: Select Files offers only the accepted extensions, and a file that gets in anyway — dropped onto the upload area, or chosen after switching the picker to "All Files" — is dropped from the selection with the toast <file> is not a supported file type. Supported: .pdf. It never reaches Selected Files, and no source row is created. Convert before you upload, not after.
There is no OCR. A scanned page or a photograph of a document uploads successfully and then fails during processing with "No extractable text layer was found in this file" — export a text-based PDF from the original instead. Convert Office documents to PDF before uploading.
Review Selected Files
Selected files appear in the Selected Files list below the drop zone. Remove any unwanted files by clicking the x button next to each file, or click Clear All to remove all pending files.
Upload and Process
Click Upload Files to start the upload. Each file goes directly from your browser to AskRAI's object storage over a short-lived signed URL — the bytes never pass through the AskRAI API — and processing begins automatically. You can track the processing status in the Uploaded Files list:
Uploading / Queued — file is being transferred or waiting to process
Parsing / Chunking / Generating QnA / Indexing — file is being processed through the pipeline
Completed — file has been fully processed and content is searchable
Error — processing failed. The chip shows the beginning of the error message inline (it is truncated, and there is no tooltip with the full text)
You can stop a source that has entered the processing pipeline (Queued, Parsing, Chunking, Generating QnA or Indexing) by clicking the stop button next to it. Stopped sources show a Stopped status and their content is not included in search results.
The transfer and the processing are two separate steps, and the second one can be refused after the bytes have already landed. When that happens the toast names the reason, the file stays safely in storage, and the source waits in Uploading with Retry processing offered — nothing has to be uploaded again.
Message
What it means
What to do
Too many active processing jobs (N). Please wait for some to complete.
The tenant already has the maximum number of sources in the pipeline at once — five by default, across every pack.
Wait for one to reach Completed, then Retry processing. Uploading a batch larger than the limit is fine: the first files process and the rest queue up behind this message.
The processing queue is not accepting work right now. Please retry shortly.
The bounded work queue refused the job. The source is put back exactly where it was, rather than left in a state that is neither retryable nor cancellable.
Retry processing. It is a transient refusal, not a rejection of the file.
Content pack is being modified concurrently. Please retry.
Another change to the same pack — an upload, a delete, a status change, or a running job reporting progress — won the race to write it. Nothing was changed.
Retry processing. Packs are edited as a whole, so two writes landing together is routine; the second one is asked to try again rather than silently overwriting the first.
All three refusals happen before any parsing, so nothing is half-ingested and no partial content becomes searchable. Retrying costs nothing beyond the retry itself.
A row stuck in Uploading has two causes — try Retry processing before you delete it. The source is registered before the signed URL is issued, so if the browser tab is closed or the transfer fails, the source stays in Uploading. There is no server-side work to stop, so no stop button is offered for it, and the automatic recovery that re-queues genuinely stuck sources deliberately leaves it alone. The Retry processing button (the circular arrow, offered for Uploading and Error sources) covers the case where the transfer did land and only the follow-up processing call failed: it re-queues the file already in storage, with nothing to transfer again — and a refusal from the table above is the most common reason that call failed. If the transfer never landed, retrying cannot help — use the trash icon, which stays available for this status, and upload the file again. An abandoned upload does not make the pack read Syncing — the pack reads Active (or Error, if another source failed).
Every row in the Uploaded Files list carries a Download button that retrieves the original file exactly as it was uploaded — useful for checking what was actually ingested, or for recovering a file whose local copy is gone. It is disabled only while the source is still Uploading, when there is nothing stored yet to fetch. Retry processing and Stop processing appear only for the statuses described above.
In the same list, click the trash icon next to a source to remove it, along with everything derived from it and the uploaded file itself. The trash icon is disabled only while the source is in the processing pipeline (Queued, Parsing, Chunking, Generating QnA or Indexing) — stop it first, then delete it. Completed, failed, stopped and abandoned Uploading sources can all be deleted directly.
Bulk actions let you approve or draft all items in a knowledge pack at once. This is useful when you have uploaded new content and want to make it all searchable, or when you need to temporarily hide all content from users.
Open the Bulk Actions Menu
On the knowledge pack card, click the three-dot menu icon (⋮) to open the bulk actions menu. This option is only available for QnA and Document type packs.
Choose an Action
Select either:
Bulk Approve All QnAs (or All Chunks on a Document pack) — marks every item in the pack as approved, making it retrievable
Bulk Draft All QnAs (or All Chunks) — marks every item as draft, taking it back out of retrieval
Confirm the Action
A confirmation dialog explains the impact. Click Approve All or Mark as Draft All to proceed, or Cancel to abort.
Approving all items makes them immediately visible in AI assistant responses. Review your content before bulk-approving to avoid surfacing incomplete or inaccurate information.
To delete a pack, click the trash icon on the pack card. A confirmation dialog warns that the action is permanent and will remove the pack, all Q&A entries, and all uploaded files. Click Delete Knowledge Pack to confirm.
Deleting a knowledge pack is permanent and cannot be undone. All associated content — including Q&A entries, document chunks, and uploaded files — is permanently removed.
There is no index to rebuild and nothing to trigger: each chunk and each Q&A pair is embedded and written as it is processed, so it is searchable as soon as it lands, and changing an item's status to Approved makes it retrievable immediately. What the platform records instead is the ingestion itself — one run per file processed.
Click Processing History at the top of the Knowledge Packs page to open that record. It is read-only, and it shows:
Active run banner — while a file is being processed, a banner shows the run's status, when it started, who started it, and the file it is working on
History table — a paginated table of past runs: what was ingested, how long it took, and how much knowledge came out of it
The page polls automatically every 3 seconds while a run is in progress, so you can watch it complete without reloading. Processing continues whether or not the page is open.
A run is recorded for each file that goes through the pipeline, whether it was uploaded to a Document pack, uploaded to a QnA pack for pair generation, or imported as a CSV or XLSX table of pairs. Bulk status changes and deletions are applied directly and are not runs, so they never appear here.
Brief summary of the pack's content (truncated to 2 lines on cards)
Content Type
QnA or Document — determines how uploaded files are processed
Status
Active, Syncing, or Error — derived from the state of the pack's sources. A source that is still Uploading does not count as in flight, so it does not make the pack Syncing
Files
Number of uploaded files in the pack
Sources
Number of sources connected to the pack
Last processed
When a file in this pack last finished processing successfully. A failed run does not move it, and neither does an edit, a status change or a deletion — it tracks ingestion, not content changes. Reads Never until the pack's first file completes
The card gives you the summary; the details modal gives you the detail. If a pack reads Error, open it — the Files tab shows which source failed and why.
Q&A Import for a CSV or XLSX table of ready-made pairs; Document Upload for every other file, including a PDF uploaded to a QnA pack for pair generation
Triggered By
The user whose upload started the run, or system when the platform started it itself
Produced
What the run stored, as "N Q&A, N chunks". A run that stored nothing reads "Nothing stored from N parsed chunks", or "Nothing parsed" when no text could be extracted at all
Settings — configure confidence thresholds that affect how knowledge pack content is used
Sandbox — test your AI assistant's responses using knowledge pack content
Guardrails
Review how each guardrail is performing — fire rates, compliance trend and false positives — and set its name, category and priority
Guardrails are the safety and compliance checks AskRAI runs over an interaction. This page is where you review how they are performing — how often each one fired, against what, and how many of those were false positives — and where you set a guardrail's name, description, category and priority.
What a guardrail actually does is defined elsewhere. Its kind, the stage it reads, the action it takes and whether it is Active all live on the Settings → Guardrails page, which is also where guardrails are now created. Every editor here links there with Edit in Settings. See Guardrails (concept) for what those three decisions mean.
Each card carries the guardrail's category, its priority and a preview of its prompt — the fields this page owns.
A guardrail that nothing lists screens nothing, for anyone. Guardrails are attached to a subject, never applied tenant-wide: a person's guardrails come from their groups, an agent's from the agent. This page has no attachment control. To put one into effect, add it to a group under Settings → Users → Groups (see Users, Roles & Groups), to an agent on the project's Team pane, or to a policy attached to either.
Six kinds, five of them free. PII, regex deny, word deny, secret scan and link domain are evaluated in code and cost no model call. Only an LLM judge reaches a provider — and only a judge has a prompt.
Three stages. A guardrail reads the user's question (Input), the generated answer (Output), or the arguments an agent is about to send to a tool (Tool call). A rule about how answers should be worded belongs on Output.
Three actions.Block stops the turn, Warn lets it continue and leaves a record, Redact substitutes what it found and continues. One blocking guardrail is enough — there is no majority rule.
Priority is evaluation order. The deterministic kinds run one after another in priority order, and the first one to block is the one reported as the reason. Judges run afterwards, at most three at a time. Once something has blocked, only the judges that would also Block are skipped — a Warn judge still runs, so it keeps firing on exactly the turns it was attached to watch. (A judge cannot be set to Redact: it returns a verdict, not the position of what it objected to.)
Audit recording. Every evaluation, pass or fail, is recorded and counted in the analytics. No setting reduces this.
Only Active guardrails run. A draft is listed and attachable and evaluates nothing. The status badge is in the editor here; the status itself is set in Settings.
List view (default) — a card per guardrail with its name, category badge, priority chip, a preview of its prompt, and a fire badge.
Table view — columns for name, description, category, priority, reporting level, fire count, fire rate and a sparkline trend.
Analytics view — a compliance trend line, a category distribution breakdown, and a top-fired guardrails chart.
Table view sorts on Name, Category and Priority only — Description, Fires, Fire Rate and Trend carry no sort control. Note the pager: the list is ten guardrails to a page.
Guardrails are listed highest-priority first by default. Sorting, filtering and paging are all done by the server, so the sort applies to the whole set rather than to the page you are looking at.
The card (List) view relabels the category badge: compliance shows as Regulatory, quality as Behavioral, privacy as Legal, and custom as Procedural. The underlying names are what you see in the editor, the filter dropdown, and Table view.
Filter the list from the toolbar:
Search — case-insensitive substring match across the name, description and prompt fields.
Category — Safety, Compliance, Quality, Privacy, or Custom.
Priority — a band: High (8–10), Medium (5–7), or Low (1–4).
Reporting level — None, Alerts or All. This is stored metadata that no longer has an editor control and does not affect what is audited (see below); the filter is here because the value is still recorded and still shown in Table view.
Active filters appear as removable chips below the toolbar. Clear All lives inside the Filters popover, not next to the chips.
The priority scale is not coherent across the product. The filter bands and the editor dropdown both assume 1–10, but priority is an unbounded integer on the API and real guardrails carry values well outside it — the shipped and seeded examples run from 5 to 100. Two consequences: the Table view priority chip always renders the value out of ten, so it shows readings such as 60/10 and 100/10, as in the screenshot above; and a guardrail whose priority sits outside 1–10 matches no band, so every priority filter hides it. Filter by category or search by name instead.
Add Guardrail navigates to Settings → Guardrails, where authoring happens. That is the only surface carrying kind, stage, action and status — the four fields that decide whether a guardrail does anything at all — so a guardrail cannot be created from this page.
The button is shown only to Platform Admin, because that is what the Settings route is gated on. This page itself is not gated, so a reader who may review guardrails but not author them sees the list without the button rather than a button that only reaches a denial.
Once the guardrail exists, come back here to set its category and priority, and to watch it perform.
Click any guardrail card or table row to open the editor. Name and description are edited in place from the header; category, priority and — for an LLM judge — the prompt are below.
The strip at the top is what this guardrail does at runtime — status, kind, stage and action — none of which this editor can change. It is shown because the fields beneath it read as the whole of a guardrail without it.
The Prompt field appears only for an LLM judge, and Save Changes is held until it has one: a judge with an empty prompt asks the model nothing. Every other kind is refused by the server for carrying a prompt at all, so no prompt is offered for them.
Priority never holds Save. A guardrail already carrying a value outside 1–10 has that value offered as its own option in the dropdown, so renaming a guardrail does not silently rewrite its priority.
Saving applies from the next turn onward, including turns in conversations already under way, and is in force everywhere within five minutes at the outside.
Guardrails that ship with AskRAI are read-only on both pages — an edit or a delete is refused. Neither List nor Table view marks them: the Platform badge appears once you open one, alongside the notice that it cannot be changed.
Every control is disabled and Delete is absent — the editor says so rather than letting you reach a permission error. To change one, duplicate it under Settings → Guardrails to get an editable copy.
Switch to the Analytics view to see guardrail performance over a configurable date range. That view has its own date picker (with 30d/60d/90d presets) and a Channel filter, separate from the Analytics period picker used by List and Table view. The Analytics picker allows up to 90 days; the List/Table picker is limited to a 30-day span. In both, a wider selection is silently clamped — and the fire-rate API backing the List/Table fire badges rejects ranges over 30 days.
Compliance trend — the share of blocking guardrail evaluations that passed. Warn and Redact results are left out: they found something and let the turn through, so how often those fire is what the fire count and the Top Triggered chart show instead. It counts evaluations rather than conversations, so a message screened by three guardrails contributes three results.
Category distribution — fires broken down by category.
Top Triggered Guardrails — guardrails ranked by fire count, not by priority. Each bar's label also carries that guardrail's fire rate and, where one exists, its false-positive rate — the share of its fires later marked as false positives in the conversation logs. There is no separate false-positive chart. Clicking a bar opens that guardrail's editor, but only when the guardrail is on the page of the list currently loaded — the list is ten to a page, so for anything further down, page to it in List or Table view first.
In List view each card shows a fire badge with the total for the selected range, and beneath it the fire rate as a percentage of conversations plus a sparkline. The badge colour reflects the rate: green below 15%, orange from 15% up to 50%, red at 50% or more. Table view shows the same numbers as plain columns.
Manage user accounts, define roles with mapping rules including caller and credential types, and organize access through groups
User Management is your central hub for access management. Users represent real people in your organization, roles define usage patterns with automatic mapping rules, and groups tie users and roles together with access to specific knowledge packs and guardrails. Find it under Settings → Users.
The Users tab displays all user accounts with their status, department, and group memberships.
User Management lives in Settings, so only a Platform Admin can open it — see Access. The older /users link still works and redirects here.
Everything on this page — groups, roles, mapping rules — decides which knowledge and guardrails apply to an interaction. It does not decide who may administer AskRAI. That is a separate, tenant-level question answered on the Access page, which grants the Platform Admin and Member roles. Adding someone to an "Admin Access" group here does not let them into Settings.
The Users tab shows all user accounts provisioned through Directory Sync — whether your identity provider pushes them over SCIM 2.0 or AskRAI pulls them from Google Workspace. Each user card displays the person's name, job title, department, contact information, last login time, and group memberships.
Use the search bar and filter dropdowns to narrow the list:
Filter
Options
Description
Search
Free text
Matches user names, display names, and email addresses
Status
All, Active, Blocked
Filter by account status
Department
All
Not yet selectable — see the note below
Group
All
Not yet selectable — see the note below
Search and the Status filter are live. The Department and Group dropdowns currently offer only All — their option lists are not yet populated, so you cannot filter by a specific department or group from this screen. Narrow the list with search or the Status filter instead. Department and group are still shown on each user card and in the details drawer.
Groups are permission containers that connect users and roles to knowledge packs and guardrails. A user's access to knowledge base content is determined by their group memberships.
Each group card shows its members, assigned roles, accessible knowledge packs, and applied guardrails.
Switch to the Groups tab and click Add Group in the top-right corner.
A native group created here can carry guardrails and knowledge packs exactly like a synced one — the difference is only where its membership comes from.
Enter Group Details
Type a group name (required) and an optional description, and choose the group's Access level — Public, Internal, Confidential or Restricted, defaulting to Internal. Click Create to save.
Configure the Group
After creation, the group details modal opens automatically. Use its six tabs to configure the group:
Members — add users and roles to the group. Toggle between Users, Roles, or Both views, search, and click the + icon to add them.
Knowledge Packs — select which knowledge packs this group can access. Search and add packs from the available list.
Guardrails — assign the guardrails that apply to this group's interactions.
Policies — attach governance policies to the group, each bringing its own guardrails and ceilings.
Credentials — a read-only list of the programmable-access credentials mapped to this group, each with its type and an Active or Revoked status. Credentials themselves are issued and managed on the Programmable Access page.
Directory — link this group to a SCIM directory group so its membership is provisioned from your identity provider. While linked, members are synced from the directory and managed there; unlink to return to manual membership. This requires directory groups provisioned through Directory Sync.
Members are assigned automatically from user attributes. Not yet functional — the console creates only Manual groups, and automatic assignment is not evaluated at query time
Roles represent usage patterns rather than individual people. Each role defines mapping rules that automatically classify incoming interactions — for example, routing requests from a specific channel to the appropriate access level.
Each role card displays its mapping rules, active user count, and enabled/disabled status.
Mapping rules define when a role applies based on interaction properties:
Rule Type
Description
Example
Channel
Communication channel
Teams, Web Chat, Mobile App, WhatsApp, SMS, Phone, Email, API, CLI, MCP
Auth
Authentication method
Authenticated, Unauthenticated, API Key, Executive SSO, Service Credential
Device
Device type
Desktop, mobile, tablet
Referrer
Source website
URL pattern of the referring page
Caller Type
Who initiated the request
Human, Application, Agent
Credential Type
How the caller authenticated
Personal Token, Service Account, Agent Credential, Scoped API Key
All of a role's rules must match for the role to apply, and a user receives the combined access of every role that matches — there is no ordering between roles and no first-wins.
Caller Type and Credential Type rules are designed for programmable traffic. Pair them with the Programmable Access page to declaratively route machine callers — for example, map every Agent credential to a read-only role, or give Service Accounts a higher-privilege role that Personal Tokens do not receive.
Roles are assigned to groups, not directly to users. To give a role access to knowledge packs or guardrails, add it to a group with the appropriate configuration.
Switch to the Roles tab and click Add Role. Enter a name, select a category, and optionally add a description. After creation, open the role to configure mapping rules.
You cannot delete a role that is assigned to any group. Remove the role from all groups first, then delete it.
The Directory tab is a read-only view of the identities provisioned through Directory Sync, shown separately from the native Groups and Roles you manage in AskRAI. Use it to confirm that a sync took effect and that the right people and groups arrived.
The Directory tab lists every synced user and group, each tagged Synced from directory.
The tab is split into two sections:
Directory Users — every synced person, with their name, email, and a Synced from directory badge. A user suspended or removed in the source directory is tagged Deprovisioned.
Directory Groups — every synced group, with its member count and source badge.
Use the Search directory box to filter both lists by name or email. If no source is enabled yet, the tab prompts you to configure Directory Sync; if a source is enabled but the first sync hasn't completed, it shows an "awaiting first sync" state.
The Directory tab reflects exactly what your identity provider sent. To change who appears here, manage users in your IdP or Google Workspace — not in AskRAI. Native Groups and Roles (the other tabs) remain yours to configure and can be linked to synced identities.
Users are real people synced from your identity provider
Roles classify interactions automatically via mapping rules
Groups bundle users and roles together
Groups grant access to knowledge packs and guardrails
A user's effective access is the union of all knowledge packs and guardrails from every group they belong to.
Administrative access runs on a separate track: a user's tenant role — Platform Admin or Member — is granted on the Access page and decides whether they can open Settings at all. The two are independent, so a Member can still hold rich content access through their groups, and a Platform Admin has no extra knowledge access just for being an admin.
Programmable Access — issue credentials whose Caller Type and Credential Type are matched by the role rules described above
Sandbox — test how a credential resolves to a role and group before pointing live traffic at it
Settings — configure system-wide settings and escalation rules
Directory Sync
Provision users and groups into AskRAI from your identity provider via SCIM 2.0, or pull them from Google Workspace with the Admin SDK Directory API
Directory Sync keeps AskRAI's users and groups in step with your identity provider so access management always reflects your real org. Open it under Settings → Directory Sync. AskRAI supports two directory sources — pick the one your identity provider uses.
Directory Sync presents both sources on one page: generic SCIM 2.0 at the top and Google Workspace below. A tenant uses one source at a time.
Directory Sync lives in the Settings area, which is restricted to the Platform Admin role. A member who opens Settings → Directory Sync is redirected to the Projects workspace and won't see the Settings entry at all. Roles are assigned under Settings → Access.
Microsoft Entra ID, Okta, or any SCIM 2.0 identity provider
Google Workspace
AskRAI pulls your directory from Google
Google Workspace tenants (Google does not support outbound SCIM 2.0)
A tenant uses one directory source at a time. Enabling Google Workspace sync is blocked while generic SCIM is enabled, and vice-versa — the inactive source shows a reminder to disable the other one first. Switch sources deliberately.
With SCIM provisioning, your identity provider pushes user and group changes to AskRAI in near real time. Enable it, generate a bearer token, and paste the endpoint URL and token into your IdP's provisioning settings.
Enable SCIM provisioning. Turn on the SCIM Provisioning switch. The Connection details card then exposes the endpoint URL and token controls.
Generate the bearer token. Click Generate token. AskRAI shows the SCIM endpoint URL and the token together — once.
The bearer token is revealed only at generation time. Copy it before closing — you cannot view it again.
Configure your identity provider. Paste the SCIM endpoint URL and bearer token into your IdP's SCIM provisioning settings (for example, Entra ID's Provisioning blade or Okta's Provisioning tab). Your IdP then pushes users and groups to AskRAI.
To replace a token, click Rotate token — this immediately invalidates the previous one, so update your IdP right away. Revoke removes the token entirely and stops inbound provisioning.
Google Workspace can't push SCIM 2.0 to third-party apps, so AskRAI reads your directory through the Google Admin SDK Directory API using a service account with domain-wide delegation. There is no service-account key to download, upload, store, rotate, or leak — AskRAI authenticates with keyless Workload Identity Federation (WIF). AskRAI acts as its own OpenID Connect identity provider, mints a short-lived token, and federates it into your GCP project, which you configure to trust AskRAI. You connect AskRAI with six non-secret identifiers — your workspace domain, an admin email, the service-account email, your GCP project number, and the workload identity pool and provider IDs. No credential ever leaves Google.
The issuer, subject and JWKS URI are values you paste into GCP, not values you enter here — they are what your project trusts, which is why no key ever changes hands.
Create a service account. In the Google Cloud console, create (or reuse) a project, enable the Admin SDK API, then create a service account. Note its email — you do not create or download a key.
Grant domain-wide delegation. In the Google Admin console, go to Security → Access and data control → API controls → Manage Domain-Wide Delegation and add a new client using the service account's client ID and the three read-only scopes below. AskRAI shows you the exact scopes to paste.
Create a workload identity pool and provider. In your GCP project, create a workload identity pool and add an OIDC provider to it. Configure the provider to trust AskRAI as the identity provider:
Issuer (URL) — the AskRAI federation issuer shown on the Google Workspace card (for example https://api.be.askrai.ai/oidc/federation).
JWKS — AskRAI publishes its public signing keys at the JWKS URI shown on the card (the issuer's discovery document points to it). Google fetches these keys to verify the federation tokens AskRAI presents.
Allowed audiences — keep GCP's default, which is the provider's own full resource name. AskRAI binds every federation token it mints to exactly that resource, so a token issued for your provider is accepted only by your pool — this per-tenant audience binding is what isolates your directory.
Grant the service account to the federated identity. On the service account, grant the roles/iam.serviceAccountTokenCreator role — notroles/iam.workloadIdentityUser — to the federation principal AskRAI shows on the card:
The serviceAccountTokenCreator role lets AskRAI's federated identity call iamcredentials signJwt to build the domain-wide-delegation assertion — there is no key for it to use instead.
Configure AskRAI. Enter your workspace domain, an admin email for the service account to impersonate, the service-account email, your GCP project number, the workload identity pool ID, and the workload identity provider ID. Click Save connection.
Test and enable. Click Test connection to confirm federation and the delegation work, then turn on the Google Workspace switch. AskRAI runs an initial sync and then keeps the directory current.
The Google Workspace domain to sync (e.g. acme-corp.com)
Yes
Admin email to impersonate
A Workspace admin the service account acts as when reading the directory
Yes
Service-account email
The email of the service account you created in your GCP project (e.g. directory-sync@acme.iam.gserviceaccount.com)
Yes
GCP project number
The numeric ID of the project that holds your service account and workload identity pool
Yes
Workload identity pool ID
The ID of the workload identity pool you created
Yes
Workload identity provider ID
The ID of the OIDC provider you added to the pool
Yes
Real-time user sync
Registers a Google users.watch channel so user changes (including offboarding) propagate within seconds. Groups are always reconciled on the scheduled pull
No
AskRAI also displays, read-only, the federation issuer, federation subject, and JWKS URI you authorize in GCP (steps 3 and 4). These are AskRAI-side values — copy them into your pool and IAM binding; you never enter them.
AskRAI reconciles your Google directory into the same directory store as SCIM, so synced users and groups appear in Users, Roles & Groups and can back native groups — the rest of the platform doesn't care which source provisioned them.
Scheduled pull — users, groups, and group members are polled on an interval. Use Sync now to run an on-demand sync.
Near-real-time user changes — when Real-time user sync is on, AskRAI registers a Google users.watch channel so user changes (including offboarding) propagate within seconds. Groups and members are always reconciled on the scheduled pull (Google offers no group watch channel).
Deprovisioning — a user suspended or removed in Google Workspace is marked inactive in AskRAI on the next sync, revoking their access. Identities map by Google's stable user id, so a synced user lines up with the same person who signs in via Google.
Grant the service account only the three read-only scopes above, and impersonate a dedicated admin rather than a personal account. With keyless federation there is no long-lived credential to store, rotate, or leak — AskRAI mints a short-lived token per sync and federates it into your project. AskRAI never writes back to your directory — it reads it.
Provisioned users and groups land in the directory store and show up on the Users, Roles & Groups page. The Directory tab there lists every synced identity with a Synced from directory badge, so you can confirm a sync took effect.
Settings → Directory Sync is missing, or opening it redirects to Projects
You're signed in as a member; directory configuration is Platform-Admin-only
Ask a Platform Admin to make the change, or to grant you the Platform Admin role under Settings → Access
Can't enable a source
The other source is still enabled
Disable the active source first — a tenant uses one directory at a time
Test connection fails
Federation not trusted, or domain-wide delegation not authorized
Confirm the pool's issuer matches the federation issuer and serves AskRAI's keys at the JWKS URI, the provider's allowed audience is its own resource name (GCP's default), the IAM binding grants roles/iam.serviceAccountTokenCreator (not workloadIdentityUser) to the federation subject, and the three read-only scopes are authorized in the Google Admin console
Last sync failed badge
Revoked delegation, a wrong admin email, or a changed pool/provider
Open the error shown on the card, fix the connection, then click Sync now
Offboarded user still active
Real-time user sync is off, or the change is awaiting the scheduled pull
Enable Real-time user sync, or click Sync now to reconcile immediately
Lost the SCIM token
The token is shown only once
Click Rotate token to issue a new one and update your identity provider
Group your projects under tenant-scoped organizations, switch the active organization to scope the Projects workspace, and manage each organization's name, slug, and plan tier
Organizations are tenant-scoped containers that group your projects. The active organization scopes the Projects workspace, so switching organizations switches which projects you see and work in. Manage them under Settings → Organizations, in the Platform section of the Settings sidebar.
Each row shows an organization's name, slug, and plan, with the active organization marked. The header switcher (top) reflects the same active organization.
Managing organizations — creating, editing, and deleting them — requires the Platform Admin role. The Settings area is admin-only, so a member who opens Settings → Organizations is redirected to the Projects workspace. Every user can still switch the active organization from the header org switcher, which stays available regardless of role — though its New organization shortcut leads to the admin-only Organizations page, so a member who follows it is returned to Projects. Roles are assigned under Settings → Access.
A tenant can hold many organizations, and each organization groups its own projects. Exactly one organization is active at a time. It scopes the Projects plane and also the Skills library and tool-server grants, so switching organization changes what Settings shows you as well as which projects you see. The choice is remembered across sessions.
Tenant → organizations → projects — organizations sit between your tenant and your projects. Creating projects requires an organization to put them in.
Active organization — the organization currently in context. It carries an Active badge in the list and its name appears in the header org switcher.
Identity — every organization has a name, a slug that is unique within the tenant, and a plan tier shown as a badge.
Organizations live entirely within your tenant — they are an internal way to structure projects, not a billing boundary or a separate login. Switching the active organization never changes your tenant or your sign-in.
The active organization is shown in the org switcher in the top header — the button labelled with the organization's name and plan. Open it to move between organizations without leaving the page.
The org switcher lists every organization in the tenant and highlights the active one; the New organization item jumps to the Organizations page with the create dialog open.
You can switch the active organization two ways:
From the header switcher — open it and choose an organization.
From the Organizations page — click any organization's name to make it active.
Switching the active organization reloads the Projects workspace, and the Skills library with it — both are org-scoped, so Settings changes under you as well as the Projects plane. The switcher appears only once the tenant has at least one organization.
Click New organization — either the button on the Organizations page or the shortcut at the bottom of the header org switcher — to open the create dialog.
The slug is derived from the name as you type; you can override it before creating.
Open the create dialog. Click New organization. The dialog explains that an organization groups your projects.
Enter a name. Type the organization's display Name (for example, Acme Partners). As you type, AskRAI derives a URL-safe Slug automatically.
Adjust the slug (optional). Edit the Slug if you want a specific value. It may contain only lowercase letters, numbers, dashes, and underscores. Leave it blank to let AskRAI generate one from the name and guarantee it is unique.
Choose a plan. Pick the Plan tier — Starter, Growth, or Enterprise. New organizations default to Starter. The closed selector shows the stored value (starter, growth, enterprise); the open list shows the names.
Create. Click Create. The new organization is added, becomes the active organization, and a confirmation appears. The header switcher updates to show it.
The organization's display name, shown in the list and the header switcher
Yes
Slug
A URL-safe identifier, unique within the tenant. Lowercase letters, numbers, dashes, and underscores only. Auto-derived from the name; leave blank on create to have AskRAI generate and de-duplicate it
No (auto-generated)
Plan
The plan tier — Starter, Growth, or Enterprise — displayed as a badge
The plan tags an organization with a tier and is shown as a badge in the list and the switcher. Nothing else in AskRAI reads it — it changes no limit and unlocks no feature. Tiers are listed in upgrade order.
Plan
Badge
Starter
Starter
Growth
Growth
Enterprise
Enterprise
Slugs must be unique within your tenant. If you type a slug that's already taken, AskRAI reports That slug is already in use — pick another. When you leave the slug blank, AskRAI derives one from the name and appends a numeric suffix (-2, -3, …) if needed to keep it unique.
Choose Edit to open the edit dialog, where you can update the Name, Slug, and Plan. The slug is required when editing and must stay unique within the tenant. Click Save changes to apply.
Choose Delete to open a confirmation dialog titled Delete organization?. It names the organization and warns that the deletion is permanent and cannot be undone; click Delete to confirm.
You can't delete an organization that still has projects. AskRAI blocks the deletion with This organization has projects and cannot be deleted — move or remove its projects first, then delete the organization.
Test AI responses with configurable guardrails and credentials, and inspect search, audit, identity, and guardrail results
The Sandbox lets you test AI responses in a safe environment before deploying configuration changes. Send messages, select which guardrails and knowledge packs to apply, and inspect every detail of the response pipeline — including guardrail evaluations, search results, audit records, and model information.
Nothing you send here reaches an end user, and nothing is written to your audit trail — the Audit tab shows a preview of the record this query would have produced. It is still a real model call, so it costs tokens.
Choose one of two modes at the top of the configuration panel:
Mode
Description
Custom
Toggle individual guardrails and knowledge packs on as chips
Group
Select a pre-configured group — guardrails and knowledge packs are resolved from the group settings
When you switch modes, selections from the previous mode are cleared automatically.
In Custom mode, two chip lists appear — each a scrollable bordered box, not a dropdown:
Guardrails — click a chip to toggle that guardrail on or off for the next message
Knowledge Packs — click a chip to toggle that knowledge pack into the search scope
Selected chips are highlighted. If nothing is configured yet, the list shows None available.
In Group mode, a single dropdown lets you select a group. After selection, the panel displays the knowledge packs resolved from that group's configuration, and the guardrails attached to the group directly. Guardrails the group inherits from an attached policy are not listed here, though they do run — so the preview can show fewer controls than the turn actually applies.
Expand the Context Overrides section to simulate different user contexts and, for programmable access work, impersonate a specific credential:
Override
Options
Purpose
Channel
None, Teams, WhatsApp, Web, API, CLI, MCP
Simulate the channel the request arrives on. None leaves the channel unset, and the request is recorded as Web Chat
Auth Status
None, Authenticated, Anonymous
Simulate how the caller authenticated. Anonymous is currently broken — the value the console sends is not one the server accepts, so the request is rejected. Use None or Authenticated
Execution Mode
None, Interactive User, Agent Augmentation
Choose whether responses are rendered for a human or structured for an agent
Test as Credential
Active credentials only (first 100), listed as <name> (<credential type>)
Run the sandbox query as if it came from the selected credential, inheriting its caller type, its channel, and — conditionally — its group
Caller Name
Free text
Label the test request with a friendly caller name (for example finance-bot) for audit preview clarity
The Channel selector offers only those six channels (plus None). SMS, Phone, Email and Mobile App exist in the platform-wide channel list but cannot be simulated from the Sandbox.
Channel — taken from the credential, unless you set the Channel override to something other than Web yourself.
Group — taken from the credential only when you have not selected a group and have not selected any guardrails in Custom mode.
Impersonation covers identity resolution only. The credential's rate limits are never evaluated in the Sandbox — a sandbox query is not rate-limited no matter what limits the credential carries, so this control cannot be used to check that a credential's rate limits behave as configured.
The picker lists only credentials whose status is active, capped at the first 100. A revoked credential does not appear — it must be re-issued on the Programmable Access page before it can be tested here. Credential status is independent of expiry, so a credential that is past its expires_at date but has not been revoked still appears in the list.
The Test as Credential selector only appears to a Platform Admin. Members see the other four overrides — Channel, Auth Status, Execution Mode and Caller Name — but no credential picker.
Click New Conversation to abort any in-flight request and clear the messages, the thread ID and the open Results Inspector.
New Conversation does not keep your whole configuration. It also resets three Context Overrides — Execution Mode, Caller Name and Test as Credential. The mode (Custom or Group), the selected guardrails, knowledge packs and group, and the Channel and Auth Status overrides are preserved. Re-select the credential before re-running an identity test.
Type a message in the text field at the bottom of the chat panel and press Enter or click the send button. The Sandbox runs your message through the full pipeline under the configuration you selected.
Each response appears as a chat bubble. User messages align to the right, assistant responses to the left, each with a timestamp.
Messages within the same conversation share a thread ID, and history is carried across them, so follow-up questions have full context.
The Sandbox always evaluates your draft routing configuration — there is no toggle. When your tenant has a draft model-routing configuration, the Sandbox evaluates the draft; if there is no draft, it falls back to the published configuration. There is nothing beneath that — a stage your configuration never assigns a model to has no platform model to fall back on. This is what lets you exercise unpublished routing rules before publishing them, but it also means the Routing Decision shown on the Model Info tab reflects the draft, not necessarily what live traffic is using.
A rule on Group ID is exercised here, against whichever group is actually governing the turn — the one you selected, or the credential's own group when you simulate a credential and override neither the group nor the guardrails. Choose explicit guardrails alongside a credential and no group governs the turn, so a Group ID rule matches nothing. A rule on Role Category is never exercised: the Sandbox names a group outright instead of matching the caller against your roles, so it has no matched role to report a category for, whatever that rule does in production.
Click the eye icon on any assistant message to open the Results Inspector panel below the chat. The inspector has five tabs, in this order — Guardrails (the default active tab), Audit Preview, Identity & Access, Search Debug, and Model Info.
Displays the audit record that would be created in production. The panel renders these sections, in order:
Section
Details
Governance
Compliance status (compliant/non-compliant), a Reason when the guardrail engine returns one, and how many guardrails were evaluated
Channel
Channel Type (always shown), plus Caller Type, Caller Name and Credential ID when they are set — the fields that prove a Test as Credential impersonation reached the audit record
AI Response
Confidence score with color-coded indicator, response source
Escalation
Matched escalation rule (if any), action type, confidence band
Execution Mode
The mode the request ran under — the second field, beside Channel, proving a Test as Credential impersonation reached the audit record
Below the sections, the tab shows the Processing Time in milliseconds and ends with an expandable Raw Audit JSON viewer (with copy-to-clipboard) containing the full preview payload.
The audit preview also evaluates the response against your tenant's escalation rules in real time.
The Identity & Access tab shows how AskRAI resolved the caller for this request — essential when debugging Programmable Access credentials, role mapping rules, or agent pipelines. The tab is organised into up to four sections:
Section
Fields
Identity
Credential Name, Credential Type, Caller Type
Access
Group (or No group assigned)
Context
Channel, Execution Mode
Agent Augmentation
Suggested Action (proceed, retry_with_context, or abort), Answer Format, Knowledge Grounded flag, Source Type, and an optional blocked-reason alert
This tab is populated only when the message was sent with a credential selected in Test as Credential. Without one, it shows the empty state "Select a credential in the config panel to see identity and access details" — even though the request still ran with your Channel, Auth Status and Execution Mode overrides applied.
The Agent Augmentation section requires both conditions: the request must have been executed in Agent Augmentation mode and run against a credential, since the section renders inside this tab. Its fields mirror the structured context that the runtime returns to downstream agents, letting you verify the exact payload your agent will receive before shipping.
If the Group field shows No group assigned for a credential you expected to inherit access, check the credential's Group setting in Programmable Access — Personal Tokens inherit from the user's groups instead of carrying a group directly.
The Routing Decision section is always shown — including when no routing rule applied, in which case the source reads Not configured. Because the Sandbox evaluates your draft routing configuration, this section tells you what a draft rule would do before you publish it.
Field
Description
Source
Where the model choice came from — Tenant Default, Routing Rule, Merged Rules, Auto-Route, or Not configured when nothing assigned this stage a model. Always shown
Generation Model
The model that generated the response — the routing decision's configured model, falling back to the summarization model. Always shown
Matched Rule
The routing rule that matched. Shown as Primary Rule when more than one rule contributed. Only appears when a rule matched
Complexity
The complexity tier assigned by the classifier — simple, moderate, or complex. Only appears when the classifier ran
When more than one distinct rule contributed, an Extra Details (N rules contributed) expander appears. Expanded, it lists the non-summarization contributing rules by stage (for example Tool Call Rule or Guardrail Rule) and then shows the Refinement and Guardrail model chips.
Users, Roles & Groups — configure groups used in Group mode and Caller Type or Credential Type role rules
Programmable Access — issue the credentials impersonated by the Test as Credential selector
Settings — set confidence thresholds and escalation rules that affect audit previews
Model Routing
Configure which AI models handle different pipeline stages and define rules to route requests based on context
Model Routing controls which AI models process each stage of the response pipeline. Configure default models, enable automatic complexity-based routing, and create rules that match requests by channel, authentication status, device type, or user group. Changes follow a draft-and-publish workflow with full version history and rollback support.
To open it, switch to the Settings plane from the top navigation bar and select Routing in the Settings sidebar.
Routing is restricted to Platform Admins. A Member who opens it is redirected away, and the Settings control is hidden for them entirely — see Access.
Everything below the publish bar is a draft. Nothing on this page affects a live query until you publish it.
Before configuring routing, understand the three layers that determine which model handles a request. They are evaluated in order of precedence:
Layer
Description
Precedence
Routing Rules
Match requests by context (channel, auth status, device type, group, role, complexity) and assign specific models
Highest
Auto-Route
Classify query complexity as simple, moderate, or complex, then map each tier to a model
Medium
Defaults
Tenant-level fallback models for each pipeline stage
Lowest
There is no fourth layer beneath these. Every model AskRAI runs is one your tenant registered under Model Providers, so a stage that no layer assigns has nothing to fall back on — and what happens then depends on the stage. Summarization has nowhere to go without one, so the request fails; guardrail evaluation fails the same way, but only for a tenant whose guardrails include an LLM judge — the deterministic kinds need no model. Query refinement is the only stage that degrades quietly — it answers on the unrefined question. Confidence assessment fails closed: every answer it scores comes back 0.0, so the answer bands Low for the user, 0.0 is what the audit record keeps, and any Escalation Rule on the Low band fires on that conversation. It scores every generated answer — a curated answer served straight from the knowledge base is banded from its own score and is unaffected. The retrieval relevance score is recorded alongside it but is not what bands the answer. Set a tenant default for every stage you rely on.
Routing configuration uses a draft-and-publish workflow. Changes you make on the page are local edits until you save them as a draft. The draft must then be published to take effect in production.
The publish bar at the top of the page shows:
Control
Description
Validate
Checks the configuration for errors — for example a rule that sets no model at all. A rule with no target model is valid provided it overrides at least one stage
Save Draft
Persists your edits as a draft without affecting production
Discard
Reverts all unsaved local edits back to the last saved draft
History
Opens the version history drawer to compare or rollback versions
Publish
Promotes the saved draft to production (disabled until a valid draft is saved)
Publishing a routing configuration takes effect immediately for all new requests in your tenant. Test changes in the Sandbox before publishing to production.
The Default Models section sets tenant-level fallback models for each pipeline stage. If no routing rule or auto-route tier assigns a model for a stage, the default is used.
Select a model from the Summarization Model dropdown to set the primary default. Expand the Advanced section to override the Query Refinement, Guardrail and Confidence Assessment models separately.
Leave a dropdown on No override and that stage has no tenant default at all. Nothing falls through to the Summarization Model — it is the summarization stage's own default and no other stage's. The single exception is Confidence Assessment, which reuses the Query Refinement Model when its own is left on No override. Routing rules and auto-route tiers fall through to these defaults; nothing falls through beneath them, which is the state the note above describes.
Every model dropdown lists your tenant's own models from Model Providers, tagged with the provider each came from, and, for the per-stage selects, only those a model declares support for that stage. The classifier select is not stage-filtered and lists every registered model. A dropdown with nothing in it reads "No model supports this stage" — register a provider, or enable a model on one you already have.
Auto-route automatically classifies each incoming query by complexity and routes it to the most appropriate model. This optimizes cost and performance by sending simple queries to faster models and reserving powerful models for complex requests.
The classifier is itself a model call on every query, so it is worth pointing at a cheap, fast model — its only job is to decide which tier the question belongs to.
Straightforward factual queries that require minimal reasoning
Moderate
Multi-step questions that need some analysis or comparison
Complex
Queries requiring deep reasoning, multi-document synthesis, or specialized knowledge
For each tier, select a primary model from the dropdown. Expand Advanced under each tier to set stage-specific overrides for query refinement and guardrail models.
Routing rules let you assign models based on request context. Rules are evaluated by priority — lower numbers run first. Multiple matching rules can contribute different stages (one rule might set the summarization model while another sets the guardrail model).
Click Add Rule in the top-right corner of the Routing Rules section.
The rule editor, filled in — a rule that routes Teams requests to one model. The Target Model list offers only the models you registered under Model Providers.
Set the Rule Name and Priority
Enter a descriptive name for the rule. Set the Priority number — rules with lower priority values are evaluated first. Toggle Enabled to activate or deactivate the rule without deleting it.
Choose the Target Model
Select a Target Model (Summarization) from the dropdown. This is the primary model assignment for matching requests. The dropdown offers No override plus your tenant's own registered models that support the summarization stage — there is no platform-supplied entry to pick, and the control is disabled outright when none of your models support the stage.
Expand Stage Overrides to optionally set different models for query refinement and guardrail stages.
Define Conditions
Add one or more conditions that a request must match for this rule to apply. All conditions must match (AND logic).
Save the Rule
Click Save to add the rule to your configuration. The rule appears in the list sorted by priority.
Each condition matches a request attribute against a value:
Each field below (except Group ID) is a fixed dropdown — these are the complete option lists, not examples:
Field
Description
Values
Channel
The communication channel the request arrived on
Teams, Web Chat, WhatsApp, SMS, Phone, Email, Mobile App, API, CLI, MCP
Auth Status
How the caller authenticated
Authenticated, Unauthenticated, API Key, Executive SSO, Service Credential
Device Type
The device category
Desktop, Mobile, Tablet, API
Group ID
The groups the caller resolved into
Free-text group ID
Role Category
The categories of the roles the request matched
Public Access, Employee Access, Admin Access, API Access, System Access
Complexity Tier
The auto-route complexity classification (requires auto-route enabled)
Simple, Moderate, Complex
Group ID matches against every group the caller resolved into — those assigned to them directly, and those reached through a role whose mapping rules matched the request. Automatic groups are not among them: nothing supplies the user attributes those rules read, so an automatic group never contributes to routing. Role Category matches the categories of the roles the request matched, whether or not those roles lead to a group. A caller who resolves into no groups at all is a real answer, not a blank: a not_in rule is satisfied by it.
Do not route on Device Type. No shipped caller sets it — Teams, the web API, the CLI and the MCP server all leave it empty — so a rule on it matches nothing, whichever operator you choose. It is the only condition field in this table that is not populated.
Rules override auto-route and defaults. If a rule assigns a summarization model, it takes precedence over the auto-route tier mapping and the default model for that stage.
The Test Rules section at the bottom of the page lets you simulate a request and see which rules match and which models are resolved for each stage.
Select values for the context fields (channel, auth status, device type, group ID, role category, and complexity tier if auto-route is enabled), then click Evaluate. The result shows:
Source — where the final model selection came from (Tenant Default, Routing Rule, Auto-Route, Merged Rules, or Not configured when nothing assigned the stage a model)
Resolved Models — which model handles each pipeline stage (summarization, refinement, guardrail) and the source of each assignment
Matched Rules — which rules matched the test inputs, sorted by priority
The rule tester evaluates against your current unsaved configuration, so you can try changes before saving or publishing. It is a separate implementation from the runtime, and two differences are worth knowing. Leaving a field blank means "not supplied" in both, so a blank never matches — but the tester has no way to say "resolved into no groups", which in production does satisfy a not_in rule. And Device Type is a live control here while no real caller sets it, so a rule the tester matches on Device Type will never match a real request.
Click History in the publish bar to open the version history drawer. Each published configuration is stored as a numbered version.
For each version, you can:
Compare an archived version with the current published version to see what changed
Rollback to restore an archived version as the active configuration
Rolling back to an earlier version permanently deletes every routing version newer than the rollback target. This action cannot be undone. Other versioned areas behave differently — rolling a skill back keeps its history and republishes the older content as a new version.
Configure a tenant — identity and access, model providers and routing, agent capabilities, the governance plane, confidence and escalation, and organizations
Settings is where a tenant is configured: who administers it, which models it may call, what its agents can do, what governs them, and how AskRAI handles an answer it is not confident in. Open Settings with the Settings control in the top navigation bar — this switches the console to the settings plane, where each area below appears in the left Settings sidebar, grouped exactly as it is here. Select Console or Projects in the same top bar to leave it.
Settings is Platform Admin only. A Member does not see the Settings control at all, and a Settings link they open sends them back to Projects. Grant the role on the Access page.
The overview and the sidebar are built from one list, so an area appears in both or in neither.
Alerts — notification channels for escalations and platform events — carries a Coming soon badge. It is the one Settings area with no permission of its own, so anyone who can reach Settings can open the placeholder.
Switch tenant in the sidebar is an AskRAI support control rather than a tenant setting. It is shown only to AskRAI staff, and because it is an action rather than a page it has no card on this overview.
Access
Grant the Platform Admin and Member tenant roles to directory users or groups, and control who can reach Settings
Access is where you decide who administers your tenant. Everyone who signs in is a Member by default and can use the console and their projects; only a Platform Admin can open Settings and change how the tenant is configured. Manage those grants under Settings → Access.
Each row is one role assignment: who it applies to, whether that principal is a user or a group, and which role they hold.
A tenant role is a bundle of permissions, and each permission unlocks one area of Settings. AskRAI ships with two roles:
Role
What it grants
Who should hold it
Platform Admin
Every permission — the full Settings surface, including this Access page
The small group who configure the tenant
Member
No Settings permissions
Everyone else — the default for any signed-in user
Members are not locked out of the product. A Member keeps full use of the console (Dashboard, Log, Tickets, Guardrails, Knowledge Packs, Knowledge Base, Sandbox) and of the Projects workspace. What a Member cannot do is reach Settings — the Settings control never appears in their top navigation, and a Settings URL they open directly returns them to Projects.
You never have to assign the Member role. A user with no assignment at all is already a Member. Assigning Member explicitly is only useful as documentation — a visible record that you considered this person and deliberately left them without administrative access.
Each area is protected separately behind the scenes, so the model extends without redesign: a future role that grants only some of these areas is a configuration change, not a rebuild.
You do not have to bootstrap access by hand. The first genuine user to sign in to a tenant is promoted to Platform Admin automatically, so the tenant is never left with nobody who can administer it. Every user who signs in after that is a Member until an admin says otherwise.
Open the dialog. On Settings → Access, click Add assignment.
Choose whether you are granting the role to a user or a group, pick the principal, and choose the role.
Choose what you are assigning to. Set Assign to to User or Group. Switching between them clears the picker, so you cannot accidentally submit a user you selected as a group.
Pick the principal. Type in the picker to search your directory. The list searches the server as you type, so you are never limited to a first page of results — anyone in the directory can be found by name or email.
Choose the role. Select Platform Admin or Member, then click Assign. The new assignment appears immediately in the table.
Assigning is idempotent: granting a role a principal already holds changes nothing and reports no error, so it is safe to re-run.
Granting a role to a group is the better choice for anything but a one-off. Everyone in the group inherits the role, and membership is managed where it belongs — in your identity provider, through Directory Sync — rather than in a list you have to remember to update when someone joins or leaves.
Grant Platform Admin to a group and every member of that group becomes an admin, with membership managed in your identity provider.
A user's effective role is the union of their own assignment and the assignments of every group they belong to. Holding Platform Admin from any one of them makes them a Platform Admin.
You can only assign a role to a user or group that exists in your directory. If someone is missing from the picker, provision them through Directory Sync first — AskRAI will not grant a role to an identity it does not know.
Click the trash icon on any row to revoke that grant. The user (or every member of that group) drops back to whatever their remaining assignments give them — usually Member.
The tenant always keeps at least one admin. Removing the last Platform Admin that is assigned directly to a user is refused, so a tenant can never lock itself out. Note that a group assignment does not satisfy this — a group can be emptied in your identity provider, which would strip the tenant's last admin. Grant Platform Admin to at least one individual user, and assign the second admin before removing the first.
Role changes take effect within about 30 seconds, the lifetime of the permission cache. A user whose role you just changed may need to reload the console to see Settings appear or disappear.
Configure the score boundaries that classify AI responses into high, medium, and low confidence bands
Confidence thresholds determine how the platform categorizes each AI response into high, medium, or low confidence bands. These bands drive escalation rules, dashboard metrics, and the confidence labels shown in conversation logs — tuning them is one of the fastest ways to change how the AI assistant behaves without touching any content. The page also shows a Minimum Relevance Threshold slider, which decides how close a knowledge base match must be before the assistant will answer from it at all — see Minimum Relevance Threshold below.
The two controls act at different moments: the relevance threshold decides whether an answer is generated at all, and the bands classify an answer that already exists.
Viewing and saving confidence thresholds is reserved for the Platform Admin role, assigned to users or groups under Settings → Access. Members do not see the Confidence Thresholds item in the Settings navigation and cannot open the page.
The upper panel displays a dual-handle slider. Its rail is labelled 0% and 100%, but the two handles travel only between 1% and 99%, and they can never meet: the API rejects 0 and 1 as threshold values and additionally requires Medium to stay strictly below High, so the slider clamps to the reachable window (step 1%, minimum one step between the handles) rather than producing a pair the save would reject.
Drag the handles to set two boundaries that split every scored response into three bands:
High confidence — responses scoring at or above the upper threshold (default: 90% and up)
Medium confidence — responses scoring at or above the lower threshold but below the upper one (default: 60% up to, but not including, 90%)
When you adjust either threshold, a reclassification preview appears below the slider. The preview analyzes the last 30 days of conversation data and shows:
Current vs. proposed counts — how many conversations fall into each band under the current and proposed thresholds
Reclassification impact — conversations that would move to or from the Medium band (High → Medium, Medium → Low, Low → Medium, Medium → High)
This helps you understand the effect of a change before you save it.
The reclassification list is not a complete account of the change. It only reports moves that touch the Medium band — a conversation that jumps straight from High to Low (or Low to High) is discarded before it reaches the preview. If your proposed bands cause only such jumps, the reclassification section does not render at all, even though the Current vs. Proposed band counts visibly shift. Trust the Current vs. Proposed counts, not the reclassification total, as the measure of how much a change moves.
The preview uses 30 days of historical data. If your tenant is new or has low conversation volume, the preview may show limited results — make small threshold changes and watch the dashboard for a day or two before tightening them further.
The second panel on the page holds a single slider labelled Minimum Relevance Threshold, which defaults to 0.65. It is a floor on retrieval: when the best knowledge base match for a question does not reach it, the assistant declines to answer rather than answering from weak material. Your tenant's saved value is what the assistant applies.
The number is a similarity score in the range 0–1, not a percentage of correctness. Text with nothing to do with the question still scores around 0.5 on that scale, which is why the default sits above it — a threshold at or below roughly 0.5 admits everything and switches the gate off. Raise it to answer only on strong matches; lower it to answer more often from weaker ones.
Both directions have a cost, and neither reports an error. Set it too high and answerable questions turn into the canned low-confidence reply for every user. Set it near or below 0.5 and the assistant will summarise whatever came back nearest, however unrelated. Do not expect that to quieten your escalation queue: Escalation Rules are keyed on the confidence band of the answer that was generated, never on this floor. An answer synthesised from weak material still bands Low when it scores below your Medium threshold, and still fires the same rule — except the ticket now cites a wrong answer that reached a user instead of a clean decline. If instead the assessment rates a fluent but unfounded answer Medium or High, the rule stops firing and you lose the signal entirely. This slider is a lever on answer quality, not on escalation volume. Move it a step at a time and watch the dashboard.
0.65 is a deliberately permissive starting point rather than a tuned value. Tune it from your own traffic, and note that a value saved before the slider was recalibrated was not carried forward — every tenant starts from the default until it is set again.
The gate itself runs after knowledge base retrieval and before answer generation — earlier in the pipeline than the confidence bands, which classify answers that have already been generated. AskRAI compares the highest relevance score from the retrieval step against your saved threshold:
If the best match reaches the threshold — an answer is generated and scored for confidence as usual
If every result scores below it — generation is skipped entirely and a fixed low-confidence reply is returned ("I couldn't find sufficient information to answer your question…") instead of a generated answer
The same floor is applied on the streaming and non-streaming paths — on the streaming path it is evaluated before the first token is sent, so a declined answer never starts rendering. A curated Q&A answer returned verbatim from the knowledge base is held to a stricter bar instead: a fixed 0.85, or your threshold if you have raised it above that. Anywhere at or below 0.85 — the default 0.65 included — this slider therefore changes nothing about which questions get a verbatim curated answer. A saved change applies to new queries as soon as the assistant picks the settings up, which is within five minutes at the outside.
Drag the band slider to change the High and Medium boundaries, and the Minimum Relevance Threshold slider to change the retrieval floor. Both are applied once saved.
Review the Preview
Check the impact preview under the sliders to confirm the effect of your proposed bands. Read the Current vs. Proposed band counts — the reclassification list below them omits any conversation that moves directly between High and Low.
Save Changes
Click Save Changes at the bottom of the page. The button is disabled until you make a change. To undo your edits without saving, click Discard.
A confidence band is not stored on a conversation — it is derived from the stored score against the current thresholds every time it is read. Saving new thresholds therefore re-bands your history immediately: dashboard band counts and success rate for periods that have already elapsed will shift, which is exactly what the impact preview is showing you. The stored confidence scores themselves are never rewritten, and escalation rules that already ran against past conversations are not re-evaluated.
Define automated actions that fire when AI response confidence falls into specific bands
Escalation rules define automated actions that fire when a conversation's confidence score falls into a specific band. Rules are evaluated in order — the first matching enabled rule wins.
The Escalation Rules section displays each rule as a draggable card. Rules are evaluated top to bottom.
Escalation runs after the answer has already been delivered. AskRAI answers the user first, and your rules are then evaluated against the record of that turn. Escalation is therefore a follow-up mechanism — it can open a ticket for a human to pick up, but it cannot intercept, alter, or withhold a response the user has already received. To stop an answer, use a guardrail: one on the Input stage refuses the question before an answer is generated, and one on the Output stage can withhold or rewrite the answer before anyone reads it.
Escalation Rules is a Platform Admin surface. A Member does not see Escalation Rules in the Settings sidebar and cannot open the Settings plane at all, so the Test Rule dialog on this page is admin-only too. Rules are still evaluated for every user's queries — only authoring them is restricted. Two exceptions are worth knowing: the Sandbox only previews which rule would match and never runs its action, and a turn whose retrieval failed is skipped by rule evaluation entirely, so no ticket opens for it. See Access for the role model.
Which band triggers this rule — High, Medium, or Low
Yes
Action Type
What happens when the rule matches (see below)
Yes
Enabled
Toggle to activate or deactivate the rule without deleting it
Yes
Order
Priority position — drag cards to reorder
Auto
Each rule card also carries a trash icon (Remove rule) that deletes the rule from the list. Like every other change on this page, the removal is staged in the browser and only takes effect when you click Save Changes.
Opens a support ticket automatically. The only action with a runtime effect.
Priority (Default/Low/Medium/High/Critical), Assigned To, Include AI Context
Flag for Review
Not yet implemented — records a log line on the server and nothing else. No conversation is marked and no notification is sent
Notify User ID (not read)
Suppress Response
Not yet implemented — records a log line on the server and nothing else. It cannot block a response: escalation runs only after the answer has been delivered
Fallback Message (not read)
Auto Respond
Takes no automated action — the AI responds normally
None
Expand a rule card to configure action-specific settings. The configuration section only appears for action types that have additional options.
Only Create Ticket currently does anything.Flag for Review and Suppress Response can be selected and saved, and their configuration fields accept input, but no code acts on them — a rule using either one will appear to be configured correctly while having no effect whatsoever. Until they are implemented, route anything you actually need a human to see through Create Ticket.
For Create Ticket, all three settings are honoured. Priority left at Default stores the ticket as Medium, and Assigned To takes a free-text user or group ID (it is copied onto the ticket verbatim and is not validated). Include AI Context is much narrower than its name suggests. It gates only the ticket's ai_context block — the stored confidence score and a copy of the raw AI response. It is on by default, and rules created before the setting existed keep including the AI context, so clearing it is an explicit opt-out.
Include AI Context is not a privacy control for the answer. The assistant's answer is copied onto every escalation ticket regardless of the toggle, and is always shown under Answer in the ticket drawer. Clearing the toggle removes only (a) the confidence score — so the AI Confidence badge disappears from the ticket card and drawer — and (b) the ai_context.response copy of the AI response, which the drawer displays as AI Response (Raw) only when it differs from the delivered answer.
When the assistant streams its answer, the stored AI response and the delivered answer are the same string, so clearing the toggle withholds no answer text at all — the only visible change is the missing confidence badge. The two differ only on the non-streamed low-confidence path, where the user is sent a clarification request while the model's best-effort answer is carried separately; there, clearing the toggle does keep that separate text off the ticket. In every case the answer the user received is still stored on the ticket and rendered, so there is no setting that keeps a model-generated answer out of a ticket queue.
Apart from those two fields, a ticket created with Include AI Context cleared is unchanged: it still carries the question, the answer text, the reporting user, the chat (session) id, the priority, the assignee and the originating Audit ID, and renders normally. Rule-created tickets now also record the Channel of the conversation that triggered them — copied from the source audit event — so the Channel field in the ticket drawer shows where the conversation took place. It is blank only on tickets created before this was added.
Open the Settings plane from the top navigation bar, then select Escalation Rules in the Settings sidebar.
Add a Rule
Click Add Rule. A new rule card appears at the bottom of the list with default values (Low confidence, Create Ticket action).
A new rule card appears with default settings ready to configure.
Configure the Rule
Enter a name, select the confidence band and action type, then expand the card to set action-specific options.
Reorder if Needed
Drag rule cards to change evaluation order. The first matching enabled rule is the one that fires — disabled rules are skipped entirely.
Save Changes
Click Save Changes to persist all rule modifications. Saving replaces the tenant's entire rule set with what is currently on screen — rules you removed are deleted, and reordered cards are stored in their new order.
While there are unsaved changes, a Discard button appears next to Save Changes. It reverts every staged edit — additions, removals, reorders and field changes — back to the last saved state.
Edits on this page are staged in the browser until you save. Closing or reloading the browser tab with unsaved changes prompts for confirmation, but navigating to another page inside the console does not — the page re-fetches on its next load and unsaved edits are silently discarded. Click Save Changes before you leave.
Click Test Rule to open a dialog where you can set a confidence score (0–100%) and see which rule would match. The test result shows the confidence band the score falls into and, if a rule matches, its name and action type — otherwise it reports that no rule matches. Testing evaluates the last saved rule set, not unsaved edits on screen.
Rules are evaluated in the order shown. If multiple rules match the same confidence band, only the first enabled rule fires. Drag cards to set the right priority.
Connect the AI model providers AskRAI runs on — every model routing can choose from is one you register here
The Model Providers section is where you connect the AI providers AskRAI runs on. Every model the platform can use is one you register here — AskRAI ships none of its own — so this page is a prerequisite for answering queries at all, not an optional extension. Once connected, these models appear in Model Routing configuration, where they can be assigned to routing rules. You can also check any connected model on its own — directly from its provider card — using Test Model.
Each connected provider is listed with its type, status, and the models you enabled on it — with the stages each model may serve and a button to test it.
Until one provider is active with at least one enabled model, nothing that needs a model works. Queries cannot be answered, and the Sandbox replaces its chat with a Configure a model provider empty state. Set this up first.
Model Providers is a Platform Admin surface. A Member does not see Model Providers in the Settings sidebar — they cannot open the Settings plane at all — and a Member who follows a direct link to it is sent back to the Projects workspace. Roles are assigned under Settings → Access.
Open the Settings plane from the top navigation bar, then select Model Providers in the Settings sidebar.
Click Add Provider
Click Add Provider in the top-right corner. The Add Model Provider dialog opens.
The dialog adapts its credential and configuration fields based on the selected provider type.
Enter Provider Details
Fill in the required fields:
Provider Name — a display label for this provider (for example, "Production OpenAI" or "Internal Azure GPT-4")
Provider Type — select from the dropdown (OpenAI, Anthropic, Azure OpenAI, AWS Bedrock, GCP Vertex AI, or Custom)
Credentials — enter the required credentials for the selected provider type. Credentials are encrypted at rest and are never included in the provider list or detail responses (those return only which fields have been set, never the values).
If your provider type requires additional configuration (such as a Base URL for Azure OpenAI or a Region for AWS Bedrock), those fields appear automatically.
Add Models
Click Add Model in the Models section. For each model, enter:
Model ID — the provider's model identifier (for example, gpt-4-turbo or claude-3-5-sonnet-20241022)
Display Name — a human-readable label shown in routing configuration
Supported Stages — select which pipeline stages this model can handle: tool call, summarization, or guardrail. A planning checkbox is also offered and is currently inert: no stage of the pipeline requests it and no model dropdown filters on it, so a model marked only planning cannot be selected anywhere
Input $ / 1K tokens and Output $ / 1K tokens — what this model costs you, in US dollars per 1,000 tokens. Both are optional; see Token pricing
Click Add to save the model. You can add multiple models to a single provider.
Create the Provider
Click Create Provider to save. The provider appears as a card in the Model Providers section with its status and model count.
Click the edit icon on a provider card to open the edit dialog. You can update:
Provider Name — change the display label
Status — toggle between Active and Inactive using the switch
Credentials — leave blank to keep current values, or enter new credentials to replace them. Click the eye icon to reveal a stored credential value on demand.
Configuration — update Base URL, API Version, Region, or Project as applicable
Models — add new models or remove existing ones
The provider type cannot be changed after creation. To switch provider types, delete the existing provider and create a new one.
Click the play icon next to any model in a provider card to open the test drawer. Enter a prompt and click Send Test to verify the model responds correctly. The result shows:
Success — the model's response text and latency in milliseconds
Failed — the error message from the provider
Credentials are encrypted at rest and are never included in the provider list or detail responses — those carry only which fields have been set, never the values. When editing a provider, existing credentials appear as masked dots; a Model Providers administrator can reveal a stored value on demand by clicking the eye icon, which fetches it through a dedicated, permission-gated endpoint.
When you bring your own model, AskRAI does not know what your contract with the provider costs. Input $ / 1K tokens and Output $ / 1K tokens are where you tell it — and they are what makes project budgets accurate.
Token prices sit alongside the model's identifier in the Add Model form. Both are optional — leave them blank and the model bills at the platform's fallback rate.
Both fields take US dollars per 1,000 tokens — so a model billed at $2.00 per million input tokens is entered as 0.002. They are available on every provider type.
Field
Description
Required
Input $ / 1K tokens
What you pay for 1,000 prompt tokens
No — leave blank and beats are costed at the flat fallback rate
Output $ / 1K tokens
What you pay for 1,000 completion tokens
No — leave blank and beats are costed at the flat fallback rate
Leave a price blank and that side of the model bills at the platform's fallback rate. The two sides fall back independently, so you can price only the one that matters.
Zero is a valid price. Enter 0 for a model that genuinely costs you nothing — a self-hosted deployment, for example. A negative number is rejected with Token prices must be zero or a positive number.
Once a model is saved, its row summarizes the rates as · in $0.002 / out $0.008 per 1K, and shows platform rate for whichever side you left blank.
Prices are used for budget accounting, and only for that — they do not influence routing or which model handles a query. Getting them wrong does not break anything, but it does make every project budget wrong in the same direction: a model priced too low will overspend its allocation before the budget stops it.
Pricing is read fresh on every agent beat, so correcting a rate takes effect immediately — there is no cache to wait out and no need to restart a running team. A saved model's price is read-only on the form: correcting one means removing the model and adding it again with the new rate.
Model Routing — configure which models handle different query types using your connected providers
Confidence Thresholds — set the score boundaries that band an answer and drive escalation. They do not feed routing, whose conditions are the request-context fields listed on that page
Sandbox — test AI responses with different model configurations
Programmable Access
Issue and govern API, CLI, and MCP credentials that let external applications and AI agents query AskRAI with enterprise-grade controls
Programmable Access turns AskRAI into a governed data plane for your external applications, CLI workflows, and AI agents. From this page you decide which machine-to-machine interfaces are enabled for your tenant, set tenant-wide rate limits, and issue named credentials that authenticate every request with full audit context.
The interface toggles are the outer gate, and they fail closed: turning one off refuses every credential carrying that Channel, however the credential itself is configured.
Programmable Access is a Platform Admin surface. A Member does not see Programmable Access in the Settings sidebar — they cannot open the Settings plane at all — and a Member who follows a direct link to it is sent back to the Projects workspace. Roles are assigned under Settings → Access.
Before issuing credentials, understand the three layers that govern programmable traffic. They are enforced on every request in the order listed:
Layer
Scope
What it controls
Interface toggles
Tenant
Which programmable interfaces are available at all (Runtime API, CLI, MCP)
Concurrency limits
Tenant and per credential
How many streams may run at once. This is the one traffic limit that is enforced today
Credentials
Per credential
Identity, scoping, IP allowlist, expiry, and lifecycle state
Every request to a programmable interface must present a credential. The credential determines the caller identity and what group access its queries are evaluated against.
The rate-limit panels also expose requests-per-minute, requests-per-day and max prompt characters. Those three are stored but not enforced anywhere on the request path today. Treat concurrency, credential expiry, revocation and the IP allowlist as your real controls.
The Interfaces panel toggles each programmable surface on or off for the entire tenant. Disabling an interface immediately rejects new requests on that surface — existing sessions are not affected, but no new traffic will be accepted.
Interface
Protocol
Typical caller
Runtime API
REST over HTTPS
Backend services, internal applications, server-side jobs
CLI
REST over HTTPS (via askrai command)
Power users, operators, scripts in terminals
MCP
Model Context Protocol over HTTP
AI agents (Claude, Copilot, Cursor, custom agents)
Leaving an interface disabled is the fastest way to prevent programmatic access entirely. Treat interface toggles as the tenant-wide kill switch for programmable access — credential-level controls sit inside this boundary.
The Rate Limits panel holds the tenant-wide ceilings for programmable traffic. Three knobs are exposed:
Field
Description
Default
Enforced today
Requests per minute
Intended peak throughput per tenant
300
No
Requests per day
Intended rolling 24-hour request ceiling
50,000
No
Max concurrent streams
Maximum simultaneous streaming connections
50
Yes
Type new values and click Save to apply them. The Save button is disabled until you have made a change. Updates take effect for all requests made after the save completes.
Only the concurrency limit is enforced.Max concurrent streams is checked on every request and a caller that exceeds it is rejected. The requests-per-minute and requests-per-day values are stored but not yet enforced — no per-minute or per-day counter runs on any request path, so raising or lowering them changes nothing today. Do not rely on them to cap spend or to throttle a misbehaving integration; use Max concurrent streams, or revoke the credential.
Concurrency is checked at two independent levels, and both must have headroom: the credential's own Max Concurrent override (if set) and the tenant's Max concurrent streams. The tenant value is a hard cap, not a floor — a credential cannot be granted more concurrent streams than the tenant allows.
The Credentials table lists every credential issued for this tenant, regardless of status. Each row summarises identity, interface, lifecycle, and usage in a compact form:
Column
Description
Name
Human-friendly identifier chosen when the credential was created
Type
One of Personal Token, Service Account, Agent Credential, or Scoped API Key
Channel
Interface this credential authenticates against (API, CLI, or MCP)
Status
Active, Revoked, or Expired (shown as an additional pill)
Last Used
Relative timestamp of the most recent successful authentication
Choose the type that best reflects who or what will hold the secret. The type drives how the credential is displayed and how its traffic is attributed in the audit trail and on the dashboard.
Type
Intended holder
Typical lifetime
Notes
Personal Token
A named human, tied to their identity
Short (days to weeks)
Revoke it by hand when the user is offboarded — see the warning below
Service Account
An unattended backend service
Medium (months)
The most common choice for server-side integrations
Agent Credential
An AI agent acting on behalf of a user
Medium (months)
Carries an agent-specific audit tag. It does not by itself enable agent_augmentation — execution modes are set separately and are available to every type
Scoped API Key
A narrowly-scoped integration
Varies
Used when you want an IP allowlist and a tight concurrency cap
The credential type is a label, not a control. It changes how the credential is displayed and audited — it does not change what the credential is allowed to do. In particular, deleting or deprovisioning a user does not revoke their Personal Tokens: nothing in the offboarding or directory-sync path touches credentials. When someone leaves, revoke their credentials on this page by hand.
Click Create Credential in the top-right of the page. A modal opens with the full credential form.
The Create Credential dialog collects identity, scoping, and per-credential override settings in a single form.
Enter Identity Fields
Fill in the required identity fields:
Field
Required
Description
Name
Yes
Alphanumeric identifier (max 128 chars). Must start with a letter or digit and may contain hyphens and underscores. Used in logs and the credentials table
Description
No
Free-text explanation of what the credential is for (max 500 chars). Appears in the details drawer
Credential Type
Yes
One of the four types described above
Scope the Credential
Choose which interface and audience this credential belongs to:
Field
Description
Channel
Records which programmable interface the credential is meant for — API, CLI, or MCP. It selects which tenant interface toggle is checked; it is not a per-surface restriction (see below)
Group
Optional. When set, the credential is added as a member of that group, so its queries are evaluated against the group's knowledge pack and guardrail assignments. Personal Tokens inherit from the user's groups instead
Caller Type
Human, Application, or Agent. Drives role mapping rules of the Caller Type rule type — a rule's type is what it reads, its operator is how it compares (equals, contains, in, not_in, between)
Execution Modes
Select one or both of Interactive User (a human is in the loop) and Agent Augmentation (an agent synthesises the response). Leaving this empty allows either mode
Channel does not fence a credential to one surface. The CLI and the MCP server both authenticate to the public API with the same Authorization: Bearer <key> header and send no surface identifier, so the server cannot tell them apart. A credential created with Channel API works from the CLI and from an MCP client. What the Channel value actually does is decide which tenant interface toggle must be enabled for the request to proceed — and if that interface is disabled, the request fails with 401, not 403.
When a credential has execution modes set and a request does not name one, the least-augmenting mode the credential allows is applied — Interactive User whenever it is one of them, whatever order you ticked the boxes in. A request that names a mode outside the credential's list is rejected with 403.
Agent Augmentation is additive, not a replacement. A caller in agent mode still receives the rendered answer; it simply arrives alongside an extra agent_context block (suggested next action, blocked reason, whether the answer was knowledge-grounded, and the source type). The mode also reshapes the summarisation prompt. It never suppresses the answer, so do not use it to withhold prose from a downstream agent.
Add Security Boundaries
Two optional fields further constrain the credential:
Field
Description
IP Allowlist
Comma-separated list of IPv4 addresses or CIDR ranges. Requests from other addresses are rejected with 403. Leave empty to allow any source
Expires At
Optional absolute expiration. After this timestamp the credential is treated as expired and rejects new requests with 403. Leave empty for a non-expiring credential
The allowlist is evaluated after the API key itself is verified, not before it — it narrows where a valid key may be used, and is not a pre-authentication network filter.
(Optional) Override Rate Limits
Expand Per-credential rate limit overrides to set limits for this credential alone:
Field
Default
Enforced today
Requests per minute
60
No
Requests per day
10,000
No
Max concurrent streams
5
Yes
Max prompt characters
10,000
No
As with the tenant panel, only Max concurrent streams is enforced. The other three values are persisted and shown in the details drawer but no code reads them on the request path, so they neither throttle a caller nor cap prompt size. They are also not validated against the tenant values — a credential can be saved with numbers larger than the tenant's, and nothing clamps them. The one real ceiling is concurrency, where the tenant cap and the credential cap are both checked and the stricter one wins.
Create and Copy the Secret
Click Create. The server generates the API key and returns it exactly once in a modal:
The API key is shown only at creation time. Copy it to a secret manager immediately — there is no way to retrieve it again. If the secret is lost, rotate the credential to issue a new one.
Use the copy button, paste the key into your secret store, check I have copied this API key, and click Done to dismiss the modal. The new credential appears in the table with Active status and a usage count of zero.
Click any credential row to open the details drawer on the right. The drawer is organised into three sections that mirror the create form:
The secret itself is never shown again after creation. Rotate Key issues a new one and invalidates the old immediately, keeping the credential's ID, groups, rate limits and usage history.
IP Allowlist, per-credential rate limit overrides (RPM, Daily Limit, Max Concurrent, Max Prompt Chars). If no overrides are set, the drawer displays Using tenant defaults
Lifecycle
Created timestamp, Created By, Expires At, Last Used (relative), Last Rotated, Usage Count
The footer exposes three lifecycle actions. Which actions are available depends on the current status of the credential:
Action
Available when
Effect
Revoke
Status is Active
Marks the credential Revoked. Future requests are rejected immediately. The credential remains in the table for audit purposes
Rotate Key
Status is Active
Generates a new secret for the same credential ID and shows it in the secret modal. The old secret stops working immediately. Usage counts, groups, and rate limits are preserved
Delete
Always
Removes the credential permanently. Use Revoke instead if you want to keep an audit trail
Rotating an active credential invalidates the previous secret immediately. Schedule rotations for windows where callers can pick up the new secret, or rotate credential pairs if you need zero-downtime handover.
Click the credential row or choose Revoke from the actions menu (⋮) on the row.
Confirm the Revocation
A confirmation dialog asks you to confirm. Revoking is a soft-delete: the credential stays visible in the table with Revoked status so auditors can still see who issued it and when, but any further API calls using the secret return 401 Unauthorized.
The Usage Overview panel at the bottom of the page summarises programmable traffic at a glance. It reads directly from the credential list and updates automatically as you filter or paginate:
Metric
What it shows
Total Requests
Sum of Usage Count across all displayed credentials
Active Credentials
Count of credentials currently in Active status
Enabled Interfaces
How many of the three interfaces (API, CLI, MCP) are turned on, out of three
Below the metric cards:
Requests by Interface — bar chart grouping total requests by channel, useful for spotting interface-level surges
Top Credentials by Usage — a two-column table (Name, Requests) ranking the busiest credentials. A quick way to find noisy callers
The Usage Overview is scoped to whatever filters you have applied to the credentials table. Clear filters to see a tenant-wide view, or narrow to a single type to spot which credential class is driving load.
Programmable Access sits alongside the human channel — Teams, the only one delivering traffic today — in the runtime pipeline. A request from a programmable credential is handled the same way as a human request — it is evaluated by guardrails, routed through auto-route or routing rules, and audited into the same conversation log — with two key differences:
Identity comes from the credential, not from an end-user SSO session. The caller type, channel, caller name, credential ID and credential type travel with the request and surface in the Conversation Logs, Dashboard, and Sandbox panels. The group is not sent with the request — instead, the credential is enrolled as a member of the group when you create it, so group-scoped knowledge and guardrails resolve from that membership.
Execution modes let you opt into agent-friendly response shapes. agent_augmentation adds a structured agent_context block (suggested next action, blocked reason, grounding, source type) alongside the rendered answer.
Credentials also participate in the role system. When you create a role under Users, Roles & Groups, you can match on Caller Type or Credential Type in addition to Channel, Auth status, Device or Referrer — giving you the same declarative access model for machine traffic that you use for human traffic.
Users, Roles & Groups — define Caller Type and Credential Type rules that map programmable traffic to roles
Sandbox — test credential behaviour, including group resolution and execution modes, before pointing live traffic at the credential
Dashboard — monitor programmable traffic volume and top callers across your tenant
Conversation Logs — filter by API, CLI, or MCP channel and by caller type to investigate specific credential activity
Model Routing — set tenant-level fallback models for the pipeline stages exercised by programmable traffic
Skills
Author, validate, publish and version the SKILL.md instruction packs an agent can be pinned to, and adopt the ones the platform ships
A skill is a SKILL.md file — instructions an agent loads when it needs them, rather than guidance you paste into every system prompt. Settings → Skills is where an organization's skills live: the platform catalog you can adopt from, the custom skills you write, and the version history an agent is pinned to. Open it with the Settings control in the top navigation bar, then choose Skills under Capabilities.
Authoring skills is reserved for Platform Admin, and so is the Skills card on an agent's Skills & Tools tab — a Member sees a note there instead of a picker. The Tools card beside it is open to project members, who choose which connected servers each agent may call.
Each card carries the skill's validation verdict, its scope, its category and its tags — everything the library is browsed by.
Unlike the governance areas, which are tenant-wide, this page is scoped to an organization. The library you are looking at is the library of the organization named in the header switcher, and adopting, authoring and pinning all happen inside it. Switch organizations in the header and the grid, the badge counts and the version banner all re-read for the new one.
That matters when you have more than one organization: the same platform skill can be adopted by several, and removing it from one leaves the others untouched.
Everything this organization may attach — the platform skills it has adopted plus the skills it wrote itself.
Discover
Platform skills this organization has not adopted yet. A skill leaves this tab the moment you adopt it.
Custom
Only the skills this organization authored.
Library holds both kinds, and the control on each card says which: a skill this organization wrote is Deleted, an adopted platform skill is Removed from org.
The badge on each tab counts the whole tab, not the filtered view, so the grid under a badge can legitimately show fewer cards than the number claims once you type in the search box or pick a category.
Search matches name, description and tags. The category chips — Documents, Engineering, Operations, Support, Data and Compliance — are the product's closed list; a skill always has exactly one.
The platform ships six skills into every tenant — five attributed to the RAI platform library, and one, the deliberately unsafe slack-integration, to a Community catalog. All six are scanned by Platform trust & safety, which is the attribution on the safety panel rather than on the card. They are read-only: you can open one and read it, but the name, the body, the category and the tags are all disabled, and there is no version to roll back.
A platform skill opens with View rather than Edit — every field is disabled and the safety rail shows the platform's own scan.
One catalog entry, slack-integration, is deliberately unsafe: its body fetches an external URL, the validator flags it, and adoption is refused. It is there to demonstrate that the safety gate works. Its Add to org button is disabled, and so is the button on any skill that has never been published.
The skill moves into Library, and the tab counts move with it.
Adoption publishes nothing and moves no agent. It widens what this organization may attach — you still have to pin the skill to an agent for anything to change.
To reverse it, use Remove from org on the card. That drops the skill from this organization's library and detaches it from every agent in this organization; the platform skill itself is untouched and other organizations keep it.
The editor is a two-state document: Structured shows the parsed fields and sections, Raw shows the SKILL.md file itself. Both edit the same content, and the safety rail on the right shows the server's verdict on whichever version is on screen.
The three levels are a progressive-disclosure model: the metadata is always in the agent's prompt, the sections are fetched only when the agent reaches for the skill.
Open the Custom tab and choose Create skill.
Fill in name and description under Level 1 · Metadata, or switch to Raw and write the file directly. The name must be lowercase letters, numbers and hyphens, at most 64 characters.
Write the body under Level 2. The description is what the agent reads to decide whether to reach for the skill, so write it as a trigger — "Use when…".
Pick a Category and add Tags in the sheet header. Tags are free text; press Enter or comma to commit one.
Choose Save skill. The server parses and scans the document as it stores it, and the rail updates to the stored verdict.
Optionally write a Change note, then choose Publish.
Validate safety runs the same scan without saving, so you can see what a change would do before committing it. The rail says "Unsaved preview — the stored verdict changes when you save" while you are looking at one.
A skill is a single SKILL.md. Bundled files are not stored or loaded, so links to a scripts/ directory are ordinary markdown text — write what the agent needs into the sections themselves.
Skills are instructions an agent follows, so a skill that reaches outside its own document can change behaviour after it was reviewed. That is the threat the scan is built around. Each check is a pass, a warning or a failure:
Check
Fails or warns when
Required name field
The frontmatter has no name. Fails.
Required description field
The frontmatter has no description. Fails.
Name format
The name is not lowercase letters, numbers and hyphens, is over 64 characters, or is a reserved word. Fails.
No XML tags in metadata
The name or description contains <…>. Fails.
Description includes when to use the skill
The description is under 20 characters or carries no trigger phrase. Warns.
No external network requests
The body contains a URL or a fetch-shaped pattern. Fails.
No dynamic code execution patterns
The body mentions eval, exec, a subprocess or a shell. Warns.
No data exfiltration indicators
The body carries encoding or exfiltration language. Fails.
Instructions body present
Every section is empty. Warns.
Those checks resolve to one of four statuses:
Validated & safe — every check passed. Only this status can be published.
Pending review — the three required checks passed, but something warned.
Safety flagged — a check failed. A flagged platform skill cannot be adopted.
Draft — never scanned. A scan never resolves to this, so it only ever means a skill nobody has validated yet.
There is no second copy of this scan in the browser. The verdict you see always came from the server, so what the editor shows and what the publish gate enforces cannot disagree.
Saving and publishing are different acts, and the difference is the whole versioning model.
Saving updates the draft. Publishing snapshots the saved draft as a numbered version — and moves nobody. An agent runs the version it was pinned to until someone deliberately moves it, so publishing a new version never changes what a configured agent does.
Every publish is listed with its author, its change note and the time — and every earlier version stays listed and resolvable.
Publish is offered only when the stored verdict is Validated & safeand there are no unsaved edits, because publishing snapshots the saved draft rather than what is on screen. The Unpublished changes badge in the header says when the draft has moved ahead of the published version.
Roll back on an older version re-publishes that version's content as a new version. Nothing is deleted or renumbered — an agent pinned to any earlier number must still be able to resolve it — and agents already pinned do not move. Your unpublished draft is left alone. Roll back is disabled while the editor holds unsaved edits, because a rollback reloads the editor from the server's copy of the draft.
Rolling back is not available on a platform skill: your organization owns the pins but not the skill.
When agents in this organization are pinned to something older than the published version, the Versions tab shows a banner naming the count and a Force update control. Confirming moves every one of those agents onto the published version from its next beat. Agents in other organizations are not affected.
Re-pinning an agent to a different version is what changes what it runs. A rollback does not: it moves the library's current version, while every agent stays on the version it was pinned to.
Skills are authored here and attached on the project Team pane — open an agent and use its Skills & Tools tab.
Each pin carries the version it was attached at. v2 and v1 here are two different snapshots of two different skills, not a sequence.
The picker offers only skills in this organization's library that have a published version — an unpublished skill cannot be attached. An agent may hold at most 50 pins.
When the library moves ahead of a pin, the row offers a control to move that one agent onto the published version; Force update in the Versions tab does the same thing for every agent at once.
Skills reach an agent's beats, not console or channel chat turns. The beat's prompt lists each pinned skill's name and description, and the agent calls an inline LoadSkill read to pull a body when it decides the skill applies — at most two bodies per beat by default, and loading one costs no action budget.
Delete sits in the editor header and on the card in the grid. Before you can confirm, the dialog reads how many agents in this organization are pinned to the skill and says so — that number is the whole question. The skill is then detached from every agent in this organization.
The version history is kept, so an agent that is still pinned goes on resolving the version it was pinned to. It cannot be attached again, though: the attach picker offers only skills that are not deleted, and there is no restore.
A platform skill has no Delete, only Remove from org.
The stored verdict is not Validated & safe, or the draft has unsaved edits. Save first, then read the safety rail.
Add to org is disabled
The skill is safety-flagged, or it has never been published.
The Structured tab is read-only on a skill you own
The frontmatter could not be parsed, and a banner says why. Editing it there would overwrite metadata the server read correctly — fix the file on the Raw tab.
A skill is missing from an agent's picker
It has no published version, or it is not in the active organization's library.
Saving an agent's skills fails, naming a skill
A pinned skill has left the library — deleted, or removed from this organization. Remove that row on the agent's Skills & Tools tab and save again.
The grid is empty after switching organizations
The library is per organization. A skill adopted by one organization is not adopted by another.
Connect MCP tool servers, review every tool a server offers before an agent can call it, and grant servers to the organizations that may use them
A tool is something an agent can call in another system — search a corpus, look up a ticket, post a message. Settings → Tools is where an administrator connects the servers that offer those tools and decides, one tool at a time, which of them an agent is allowed to call. Open it with the Settings control in the top navigation bar, then choose Tools under Capabilities.
Connecting and reviewing tool servers is reserved for Platform Admin. Granting a connected server to an agent is open to project members: administrators connect servers and decide which organizations may use them, and project members choose which of those each agent may call.
A new tenant has no tool servers. Nothing is connected until an administrator connects it.
Tool servers this tenant connects by URL and credential. Every tool one offers is held for review before an agent can bind it.
Builtin
Servers authored by the platform and connected by key. Their tools arrive already approved, because there is no third-party text for an administrator to read.
The tab is the filter the list route takes, so switching tabs is a fresh request rather than a client-side split.
This build ships no platform tools. The builtin mechanism is in place and the Builtin tab reads the catalog from the server, so the first platform server a later release adds appears there with no change here.
The Builtin tab says so outright. It states it only when a read actually landed — a failure reports itself rather than showing an empty catalog.
Header name (required), an optional prefix such as Bearer , and the Token.
OAuth client credentials
A token fetched with a client ID and secret.
Client ID (required), the Client secret, optional Scopes, and where the credentials are sent at the token endpoint.
One server, one credential, shared by everyone. Every agent, in every organization granted this server, calls it as this one connected account — there are no per-agent credentials. Granting a server to an agent is granting that agent the right to act as that account.
For OAuth, where the client ID and secret are sent is asked rather than negotiated. A server that accepts only the request body answers a correctly-formed Basic header with invalid_client — the same error it returns for a wrong secret — so no status code can tell the two apart. Set it to match what your server expects.
A credential is write-only: the stored value never comes back, and the form shows only whether one is set. Sending a new value rotates it, one field at a time.
A connected server's card is a summary of everything that decides whether its tools are reachable: its status, when it last synced, how many organizations hold it, and how it authenticates.
This is the property the whole feature is built around. A tool's title, description and schemas are text a third party wrote, and an agent follows them. So nothing a server offers is callable until an administrator has read it and accepted it under their own name.
Three tools discovered, none of them approvable yet — the page approval counts only rows whose text has been on screen.
A row joins the page approval only after its schemas have been opened. That is not a formality: the input schemas are not on the row, so a bulk approval that promoted them unread would put an administrator's name on text nobody saw. There is deliberately no control that marks rows read without showing them.
Opening one row's schemas admits that row and no other. Show what approving all N accepts opens the rest — a shortcut through the gate, never around it.
Open the server and go to its Tools tab.
Read each tool. Use Show the schemas on a row, or Show what approving all N accepts to open every held-back row at once.
Choose Approve N on this page.
Approval is per page of the listing, and the button's label carries the count — Approve 0 on this page and Approve 3 on this page are the same control. If tools on another page are still waiting, the tab says so.
Approving accepts a tool. It does not switch it on — those are two decisions.
Each row carries three things, and all three must line up before an agent can call the tool:
Control
Meaning
Approval
An administrator has read this version of the tool and accepted it.
Enable
This tool is offered to agents at all. Approving never switches a tool on.
Effect
Read only or Side effecting. A side-effecting tool changes something in the outside world, so a beat spends an action budget slot on it and an agent at manual autonomy may not call it at all.
A tool binds to an agent only when it is approved, enabled, and still offered by the server.
The effect is an administrator's decision — nothing is inferred from the tool's name. The default it starts from does come from the server, though: a tool declaring readOnlyHint arrives marked Read only, which costs no action budget and is exempt from the manual-approval gate. Check it rather than accept it, since the server is a third party. It is what the runtime reads when it decides whether a call costs an action and whether approval is required — see Policies.
Sync tools re-reads what the server offers. Anything that changed lands as pending, and the row is pulled back into review: the tool keeps running for agents at the text that was approved, while the new text waits for someone to read it.
A rewritten description is shown in plain sight, labelled as not yet accepted, and the approval gate is closed again.
The rewritten text is on the row rather than hidden behind the disclosure, because that is what an administrator has to read before deciding. Approving replaces the approved title and description with the pending ones; the disclosure holds the comparison, so you can see exactly what you are accepting and what you are discarding.
Until then, agents keep binding the approved snapshot. A description rewritten upstream does not reach an agent on its own.
Test connection runs the same handshake and writes nothing — use it to check a URL or a credential without touching the catalog.
Moving a connected server to a different URL deletes every tool it has offered and drops the server back to inactive and not synced, so each tool has to be discovered and approved again — including the decisions about what each one is allowed to do. The form asks you to confirm before it does that.
Switched on is the administrator's own decision about whether the server should run, separate from the status the last handshake reported. A server that is switched off binds to no agent, whatever organizations it is granted to.
A server can only be switched on once a sync has succeeded against it — until then it is offered to no agent, and the control says so rather than failing silently.
An MCP server is connected once for the tenant and then granted to the organizations that may use it. Agents in those organizations' projects can be given the server; an organization removed here loses it immediately.
The checklist is the complete set. Saving with nothing ticked revokes the server everywhere, and the confirmation says so.
The Agents tab answers the other half of that question — which agents currently hold a grant to this server, and therefore what a revoke or a delete would take away. It is a read, so it has a tab of its own rather than only appearing when you start to destroy something.
Open the agent on the project's Team pane and use its Skills & Tools tab. The picker offers the servers granted to that project's organization; an agent may hold up to 100.
An agent granted a whole server may call every approved, enabled tool on it — or, if you choose Only selected tools when granting the server on the agent's Skills & Tools tab, just the ones you name. Narrowing there is the least-privilege control: the agent is offered nothing else. Each tool reaches the model under a namespaced name — the server's slug, then __, then the tool's own name — so two servers offering a search tool never collide.
Delete is in the sheet header. Before you can confirm, the dialog reads how many agents hold the server and states the count.
Deleting removes the server, its stored credentials, every tool it has discovered, and every agent's grant to it — across the whole tenant, not only the organizations it was granted to. If a delete fails, running it again is safe and finishes what it started.
MCP Server (connected by URL) or Builtin (connected by key). Cannot be changed after connecting.
Name
Required. At most 120 characters.
Description
Optional. At most 500 characters.
URL
The MCP endpoint. Required for an MCP server, at most 2048 characters.
Authentication
No authentication, Header token, or OAuth client credentials.
Header name / prefix
Header token only. At most 128 and 64 characters.
Client ID / Scopes
OAuth only. At most 256 characters; up to 64 scopes.
Organizations
Up to 100 organizations may be granted one server.
Effect
Per tool: Read only or Side effecting.
Enable
Per tool. Off until you switch it on for an MCP server. Builtin servers are enabled and approved automatically on every sync — there are none shipped today, so nothing behaves that way yet.
Bundle guardrails with the ceilings an agent runs under — autonomy, actions per beat, tool calls per beat and approval requirements — and attach the result to an agent or a group
A policy is what an agent or a group is governed by: the guardrails it carries, and the ceilings it sets. Settings → Policies is where policies are written. Open it with the Settings control in the top navigation bar, then choose Policies under Governance in the Settings sidebar.
Policies, Guardrails and Egress Allowlists are one plane, reserved for Platform Admin. The same role is required to attach governance, even though attaching happens on the Team pane — without that rule, any member of the tenant could strip every control off an agent.
Each card summarises what the policy actually constrains, rather than leaving it to be inferred.
This is the single most important property of the model. A policy never grants anything. Every clause is an upper bound, and composing two policies takes the tighter of each:
Numeric ceilings take the minimum.
Autonomy can only move an agent down the list.
Approval requirements are unioned — if either policy requires approval, approval is required.
A host must be admitted by every egress allowlist in force.
Guardrails are added together.
Attaching a second policy can therefore only narrow what an agent may do, never widen it. That is what makes it safe to hand an agent a broad policy and a narrow one at the same time.
Any number of guardrails, up to 100. Every guardrail a policy carries is added to whatever else governs the subject.
Only Active guardrails take part. A draft can be listed in a policy and attached with it, and it checks nothing — the picker shows each guardrail's status badge so you can see that before you save.
At most one, or None. It names the hosts the agent's tools are allowed to reach. Because a host must be admitted by every allowlist in force, adding one to a second policy can only narrow the reach.
A Link domain guardrail has no hosts of its own and reads whatever allowlist is in force, so a policy that carries one must name an allowlist as well. Saving an Active policy that carries a Link domain guardrail and names none is refused — without an allowlist to compare against, that guardrail cannot be evaluated at all.
How much a beat may do on its own — Manual, Suggest or Full.
Actions per beat
How many actions one beat may take. 1 to 20.
Tool calls per beat
How many tool calls one beat may make. 1 to 20.
Require approval for
Read-only tools, Tools that change something, or both.
Leave a ceiling blank and this policy sets none there. Blank is not zero — zero is a value the server refuses, and it would read like the tightest possible setting rather than the refusal it is.
There is no separate approval control on an agent. An approval requirement is a policy clause, so it is something a policy brings rather than a fourth thing to attach.
A policy is Draft or Active. Only an Active policy is in force; a draft can be attached and listed and governs nothing. The page states the count above the list when any policy on it is still a draft.
Select New policy. The editor opens as a sheet on the right.
Give it a Name and a Description. Name it after the population it governs — "Customer-facing agents" — rather than after the controls inside it, which will change.
Choose the Guardrails it carries. The picker is searchable and shows each guardrail's kind and status.
Choose an Egress allowlist, or leave it on None.
Set the Ceilings you want to impose, and leave the rest blank.
Each ceiling is an upper bound; where two policies both set one, the tighter wins.
Writing a policy governs nothing on its own. Attach it to a subject, and which subject you choose decides which traffic it governs:
An agent — open the agent on the project's Team pane and use its Guardrails tab. This governs that agent's beats.
A group — attach it to a native group on the Users page. This governs the console and channel turns of the people in that group; a caller's groups are resolved on every turn and narrowed together into one effective set.
A subject may carry up to 25 policies, plus guardrails and an allowlist attached directly. The agent's Guardrails tab shows an In force panel that asks the server what the current selection actually composes to, and re-asks it on every change. That panel is the only place the narrowing is visible before a beat runs — including narrowing you did not intend.
Detaching governance is a widening, and nothing about an empty selection is invalid, so it validates clean. Attachment is gated on the governance permission for exactly that reason: without it, stripping every control off an agent would be an ordinary edit.
Every tenant is seeded with Baseline safety, a platform policy bundling the shipped deterministic controls: no credential leakage, masked contact details, blocked identifiers and denied words. It carries a Platform badge.
A platform policy is inspectable but not editable — write your own alongside it.
Platform policies are read-only: the server refuses an edit or a delete. Unlike a guardrail, a policy has no duplicate action, so the editor says plainly that it cannot be changed rather than offering a Save that would fail. Write your own alongside it — composing a second policy can only narrow what an agent may do, so adding one never weakens the baseline.
Seeding a tenant changes no traffic. A policy governs a turn only once something attaches it.
Delete is on the left of the editor footer. Before you can confirm, the dialog reads how many agents and groups attach the policy and states the count, because that number is the whole question — deleting a policy nothing uses is housekeeping, and deleting one that governs a live team is not. If that lookup fails, the dialog says so rather than showing a reassuring zero.
Deleting is permanent, and the policy stops governing everything it is attached to.
A policy with no guardrails and no ceiling is legal, and the list flags it: "This policy carries no guardrails and sets no ceiling — attaching it changes nothing." It is worth writing one deliberately as a placeholder, but it is more often a policy someone emptied without noticing.
Author the checks that inspect what reaches an agent, what it says, and what it sends to a tool — their kind, stage, action, and whether they are in force
A guardrail is one check: what it reads, what it does about a violation, and whether it is in force at all. Settings → Guardrails is where guardrails are defined. Open it with the Settings control in the top navigation bar, then choose Guardrails under Governance in the Settings sidebar.
Guardrails, Policies and Egress Allowlists are one plane, reserved for Platform Admin — a Member sees none of the three. Grant the role on the Access page.
Each card carries the guardrail's status, its kind, the stage it runs at, and what it does about a violation.
The kind decides how the check is performed, and which configuration fields the form offers you.
Kind
What it does
PII
Finds personal identifiers — email, phone, US Social Security number, payment card, IBAN.
Regex deny
Refuses anything matching your patterns.
Word deny
Refuses specific terms.
Secret scan
Finds API keys, tokens and private keys.
Link domain
Refuses links to hosts no egress allowlist in force admits.
LLM judge
Asks a model your prompt about the payload.
The five deterministic kinds cost no model call. LLM judge is the only kind that reaches a provider, which is why it is the only one that needs a model and a prompt.
What reaches the agent — the user's question, or another agent's message.
Output
What the agent is about to say or record.
Tool call
The arguments the agent is about to send to a tool.
Stage matters more than it looks. A guardrail named "mask contact details" that only ever reads the question fires on nothing and reports compliance — the shape this plane exists to remove. If the rule is about the answer, set the stage to Output.
Redact is offered only for the kinds that can return the spans to substitute — PII, Regex deny, Word deny and Secret scan. Link domain and LLM judge return a verdict, not spans, so the form hides Redact when one of those is selected, and steps a chosen Redact back to Block.
A guardrail is Draft or Active. Only an Active guardrail is evaluated: a draft can be authored, listed and attached to an agent while checking nothing. That is deliberate — it is how you stage a control before it governs anyone — but it also means a plane full of drafts reports coverage it does not have. The page states the count above the list when any guardrail on it is still a draft.
Select New guardrail. The editor opens as a sheet on the right.
Give it a Name and a Description. The name is how the guardrail is identified in the guardrail analytics and in this list, so name it after the rule rather than the mechanism.
Choose the Kind, then the Stage and the Action. Each control shows a one-line explanation of the current choice beneath it.
Fill in the configuration the kind needs — the form offers only the fields that kind actually reads.
Choosing PII replaces the configuration area with the entity checkboxes; choosing another kind replaces it again.
Leave Status on Active and select Create guardrail.
Switching kind mid-edit clears the fields the new kind does not read. The server refuses a field its kind does not use, so the form drops them rather than letting you submit a request that would be rejected for naming a control the form has stopped showing.
Entities to look for — any of Email address, Phone number, US Social Security number, Payment card, IBAN. An active PII guardrail needs at least one. Plus Replacement, when the action is Redact.
Regex deny
Patterns — Python regular expressions, at most 25, each at most 200 characters. Plus Replacement, when the action is Redact.
Word deny
Words — at most 500, each at most 100 characters. Match case exactly. Where a word may appear. Plus Replacement, when the action is Redact.
Secret scan
Replacement, when the action is Redact. Nothing else — the detectors are built in.
Link domain
None. It compares links against the egress allowlists in force on whatever it is attached to.
LLM judge
Judge model — one of the models your tenant has connected — and Prompt.
Where a word may appear has two settings, and neither is free:
Whole words only (the default) does not match inflections. A list containing refund does not catch refunds or refunding. Add the forms you mean.
Anywhere inside a word catches inflections, and also matches inside unrelated words — a list containing class then refuses an answer that mentions classical or classify. Profanity lists are where this bites hardest, because so many short offensive words are substrings of ordinary ones.
Which error is cheaper depends on your own vocabulary.
Patterns are Python regular expressions and are validated as you add them. A pattern that repeats a group without a bound — the shape that can stall a turn on a crafted input — is refused at the write boundary, so (?:all |any |your )* will not save.
A Link domain guardrail carries no hosts of its own. Attach it to a subject that also carries an egress allowlist. With no allowlist in force it cannot be evaluated at all, and it stops the turn under its own name rather than passing quietly.
Every card has a flask icon, and the editor has a Test button. Both open a drawer that runs a sample payload through that one guardrail exactly as a live turn would. The definition travels by value, so you can test a draft you have not saved yet.
The drawer reports the verdict, why it fired, and what the agent would actually see.
The result has three parts:
The verdict — Allowed or Blocked, the action taken, and how many spans were redacted.
Why — every span the detector matched, and every near miss: a candidate that had the right shape and failed the check behind it, such as a card-shaped number that fails its checksum. This is the only place that answers "I pasted something that looks like a card number and it says Allowed".
What the agent would see — the payload after redaction, the note that nothing changed, or the statement that the turn is refused.
Nothing in the test drawer is stored or audited. The excerpts are sliced out of the sample you typed, and they locate exactly the content a Redact guardrail exists to keep out of the audit trail.
If the guardrail cannot be evaluated at all, the drawer says Could not be evaluated rather than reporting a pass. An unevaluable control is not a clean payload, and a live turn stops there too.
Every tenant is seeded with a catalog of platform guardrails, marked with a Platform badge. They are read-only here: the server refuses an edit or a delete, so the editor shows the fields for inspection and offers no Save.
A platform guardrail is inspectable but not editable — Duplicate & edit is how you change one.
To change a platform guardrail, select Duplicate & edit. The server clones it as an editable tenant copy, and the editor stays open on the copy. The copy is created as a Draft, so review it and set it Active to put it in force.
Seeding a tenant changes no traffic on its own. A platform guardrail governs a turn only once something attaches it — directly, or through a policy.
The list shows ten guardrails per page. The search box searches the whole tenant on the server, not just the page you are looking at, so a guardrail on page three is reachable by name. Use the pagination control beneath the list to move between pages.
Select any card to open it. Change what you need and select Save changes; the editor warns you before discarding unsaved edits.
Delete is on the left of the editor footer and asks for confirmation. Deleting is permanent, and the confirmation states the consequence plainly: the guardrail stops governing every agent and group it is attached to.
The editor checks a definition before the round trip and names the reason, rather than surfacing an error you have to re-read the form to interpret. Most of these are also refused by the server; the judge-model rule is the editor's own.
Refusal
Why
A non-judge guardrail with a prompt
Only LLM judge reads a prompt. Leave it empty, or change the kind.
Redact on Link domain or LLM judge
Those kinds return a verdict, not the spans to replace.
An active LLM judge with no prompt
The prompt is the whole of what the model is asked.
An active LLM judge with no Judge model
Choose one. The server would accept the row and fall back to your tenant's guardrail routing stage, but the editor asks you to be explicit. Connect a provider first on Model Providers if the list is empty.
An active PII guardrail with no entity
There is nothing for it to look for.
An active Regex deny or Word deny with an empty list
There is nothing for it to match.
A blank entry in a pattern or word list
A blank entry matches everything.
An incomplete definition cannot be tested whatever its status: the Test button checks the definition as though it were Active, because a test of a control that could not run answers nothing. A draft may still be saved incomplete — that is what a draft is for.
A guardrail written before this plane existed carries none of these fields, so it keeps the original behaviour: an LLM judge running at the Input stage that Blocks, and is Active. Those rows appear in this list alongside the rest and can be opened and given a kind, a stage and an action like any other — with one extra step, because an active judge carries no Judge model either: choose one before Save changes will enable.
Write down the hosts an agent's tools may be dialled at, check a host against the list before saving, and attach the result to an agent or a policy
An egress allowlist is the set of hosts an agent's granted tools are allowed to reach. Settings → Egress Allowlists is where allowlists are written; attaching one to an agent or a policy is what puts it in force. Open it with the Settings control in the top navigation bar, then choose Egress Allowlists under Governance.
Egress Allowlists, Policies and Guardrails are one plane, reserved for Platform Admin. The same role is required to attach an allowlist, even though attaching happens on the Team pane.
A new tenant has none. The platform ships no allowlist, so every list on this page is one somebody in your tenant wrote.
This is the property everything else follows from. An allowlist cannot grant an agent reach it would not otherwise have — every outbound request already passes AskRAI's own network protections, and the allowlist is applied after them. What an allowlist does is take the "any public host" those protections leave and cut it down to the hosts you wrote down.
Because of that, composing is a conjunction: a host must be admitted by every allowlist in force. Attaching a second one can only narrow the reach, never widen it — which is what makes it safe to give an agent a broad allowlist and a narrow one at the same time.
An agent with no allowlist in force is not blocked. It may reach any public host AskRAI's own network protections permit.
A host is a hostname and nothing else. The form refuses an entry the server would refuse, so what you can type is what will be stored:
Entry
Accepted
api.example.com
Yes — an exact host.
*.example.com
Yes — admits api.example.com and files.example.com, but notexample.com itself.
https://api.example.com
No. Enter the host only — no scheme.
api.example.com:8443
No. A host carries no port.
api.example.com/v1
No. A host carries no path.
*
No. A bare * admits everything, which is the absence of an allowlist.
api.*.com
No. A wildcard is only allowed as a leading *..
A wildcard's dot is part of the suffix on purpose: *.acme.com matches api.acme.com and does not match evilacme.com, so a neighbouring registration cannot slip in. A list holds at most 100 hosts, and each is at most 253 characters.
The Check hosts against this list box takes one or more hosts, separated by spaces or commas, and asks the server which of them the current list would refuse. It reads the hosts as they are typed in the editor, so you can test a list you have not saved yet.
A clean answer reads "Every host you listed is admitted." Anything else is named: "Refused: pastebin.com".
An allowlist is Draft or Active, and only an Active one is in force. A draft constrains nothing — the same position as an agent with no allowlist at all.
An Active allowlist must have at least one host. An empty one would admit nothing and refuse every outbound tool call, so the server refuses to store that combination and Create allowlist stays disabled until you add a host or move the list back to Draft.
Each card shows up to six hosts inline; a longer list collapses the remainder into a +N.
An allowlist governs nothing until something attaches it. There are two ways, and they compose:
An agent — open the agent on the project's Team pane and use its Guardrails tab. The Egress allowlist card holds one allowlist, or None.
A policy — a policy carries at most one allowlist, and attaching that policy to an agent or a group brings the allowlist with it. This is the only way a group gets one: a group has no egress allowlist of its own.
The In force panel asks the server what the current selection actually composes to, and re-asks on every change.
When an agent tries to call a granted tool on a server whose host no allowlist in force admits, the call is not made. The agent is told "The egress allowlist in force does not admit that server's host, so the call was not made. Do not retry it — say what you needed from it, or take a step that reaches somewhere you are allowed." The message names neither the host nor the URL, because the path of a tool call routinely carries arguments the model wrote. The refusal is recorded as an audit event, so a beat that lost a tool call this way is visible afterwards rather than only in the transcript.
The gate is asked before anything is spent: a refused call costs no action slot and no tool-call budget.
An allowlist constrains the tool server's own URL and nothing else on the outbound path. It does not reach the OAuth authorization or token endpoints a server hands back on a 401, whatever that server dials downstream of your call, or your model providers' endpoints — those are covered by AskRAI's own network protections alone.
A Link domainguardrail carries no hosts of its own: it compares links in content against whatever allowlist is in force. With none, it cannot be evaluated, and it fails closed — stopping every turn under its own name.
Two guards cover the common ways in, but neither is complete — check the In force panel after any change:
An Active policy that carries a Link domain guardrail and names no allowlist is refused when you save it. A policy naming an allowlist that is a draft, or that has no hosts, is not refused, and neither is in force at runtime.
Deleting an allowlist, moving it to Draft, or emptying its hosts is refused when doing so would leave an agent or a group holding a Link domain guardrail directly with nothing to compare against. The message names those subjects rather than counting them.
That second guard does not look through policies. It reads only the guardrails attached directly to an agent or group, so an allowlist reachable only through a policy's Link domain guardrail can be deleted without warning — and every turn that guardrail governs then stops, because a Link domain check with no allowlist cannot be evaluated and fails closed. Groups are the exposed case: a group can only receive an allowlist through a policy. Before deleting an allowlist, check which policies name it.
Open an allowlist by clicking its card. Editing hosts on a list already in force takes effect on the next beat — there is nothing to redeploy, and the change is in force within five minutes at the outside.
Delete is on the left of the sheet footer. Before you can confirm, the dialog reads how many agents and policies name the allowlist and states the count; if that lookup fails it says so rather than showing a reassuring zero. Deleting detaches the allowlist from every policy and agent naming it, which widens what those agents can reach, and cannot be undone.
Deleting an allowlist is a widening, so it is not refused merely for being in use — otherwise you could not remove a list you no longer trust without hunting down every reference first. The one case it is refused is the Link domain dependency above, where removing it would stop an agent entirely.
An allowlist the platform ships would be read-only — the sheet says so and offers no Save. No platform allowlist ships today, so every row on this page is one your tenant can edit.
The name is empty, nothing has changed yet, or the status is Active with no hosts.
A tool call is refused and the host looks right
*.example.com does not admit example.com itself. Add the bare host as a second entry.
A tool call is refused and no allowlist names that host
A host must be admitted by every allowlist in force — the agent's own and every one its policies carry. Read the In force panel on the agent's Guardrails tab.
Deleting or deactivating an allowlist is refused
An agent or group would be left holding a Link domain guardrail directly with no allowlist. The message names them; detach that guardrail or give them another active allowlist first.
Every turn suddenly stops on a Link domain guardrail
An allowlist that guardrail reached through a policy was deleted or drafted — the refusal above does not see policies. Re-point the policy at an active allowlist with hosts.
An agent still reaches a host after you removed it
Only Active allowlists are in force. Check that the list you edited is not a draft, and that no second allowlist is attached higher up.
Saving a policy is refused, mentioning url_domain
The policy is Active and carries a Link domain guardrail with no allowlist named. Add one to the policy.
Task-ordered routes through the documentation — from connecting your first model to running a team of agents in production
Every procedure in this documentation lives on the page for the screen it belongs to. This page puts those procedures in the order you are likely to need them, so you can work through a task without knowing which screen owns it.
Route that model to each pipeline stage — summarization, query refinement, guardrail judging and confidence scoring can each use a different model. Nothing takes effect until you publish.
AskRAI is a Responsible AI solution that helps staff and citizens get the information they need quickly and accurately — without stretching budgets or adding complexity. It combines retrieval-augmented generation (RAG) with curated knowledge bases, configurable guardrails, and built-in governance controls.
What can AskRAI do?
AskRAI organizes what your assistant does into the RIESE model — five pillars:
Resolve — Directly answer the user's question with a definitive answer from the knowledge base
Inform — Provide the facts or context a user needs to make a decision
Engage — Hold a multi-turn conversation to clarify needs and guide the user through a process
Support — Give ongoing, step-by-step help with complex workflows that span multiple messages
Escalate — Hand off to a human by opening a support ticket when confidence is too low to answer
AskRAI is built for organizations that need responsible, auditable AI — including municipalities, education and school districts, healthcare and social services, state agencies, public utilities, and financial services.
AskRAI answers from pre-processed, curated data rather than from the model's own training data. Admins ingest and curate that data from FAQs, troubleshooting guides, policy documents, and legacy help desk tickets. Grounding every response in approved sources is the main defence against an invented answer, and every answer is recorded with the question that produced it and the checks that ran.
What is Active AI Guardrail (AAIG)?
AAIG is AskRAI's guardrail technology. A guardrail is configured per tenant and reads one of three payloads: the user's question, the generated answer, or the arguments an agent is about to send to a tool. When it fires it can block the turn, warn and leave a record, or redact what it found and continue. See Guardrails.
Which platforms does AskRAI integrate with?
People reach AskRAI through Microsoft Teams — today that is the only human channel that delivers traffic. For machines, AskRAI exposes a governed public API, an MCP server for AI agents, and a CLI, each authenticated with a credential you issue from Programmable Access.
The channel lists you meet elsewhere in the console — in role mapping rules, conversation filters and the Sandbox — carry more values than that, including Web Chat and Mobile App. They are the vocabulary the platform records and filters on; an embeddable web chat widget is planned, not shipped.
AskRAI gives you configurable safety and compliance controls, an always-on audit trail, and transparent logic. Rules about tone, fairness or bias are yours to write as LLM-judge guardrails; the platform ships no bias detector of its own. Every interaction is recorded in a complete, tenant-scoped audit trail, so every response is accountable and traceable — auditing is always on. Guardrail enforcement, by contrast, is something you configure rather than a default: a guardrail screens a user's questions only once it is assigned to a group that user belongs to, so guardrails apply per group instead of automatically to everyone. See Guardrails.
Is tenant data isolated?
Yes. Configuration, knowledge bases, guardrails, users and caches are all scoped to one tenant and never shared. The isolation is enforced as a tenant_id filter on every query and every cache key rather than by separate databases — all tenants share one collection and one vector index, and that filter is what separates them. Data leakage between tenants is treated as a security vulnerability.